
The Pin Game is Strong with This One
Are you trying to make some money with your laser but don’t have a lot of time to make products? I am going to show you how I made 25 products that will easily sell for a $200 profit, or more! We’re on a time budget, so let’s get that laser fired on!
✨ Supplies for Projects
⇢ Acrylic & Wood : Craft Closet (Diode Laser Compatible)
⇢ Wide Masking Tape
⇢ Black Spray Paint
⇢ 3M Double Sided Sticky Tape
⇢ Gorilla Duct Tape
⇢ Sharpie Oil Paint Pens
⇢ Aleene’s Jewelry & Metal Glue
✨ Downloads for Projects
⇢ Star Wars Grogu Charm
➕ Subscribe to my YouTube Channel HERE
Step 1 – Pastel Laser Engraved Grogu Charm
The first thing you need to do is download this star wars file because it has this little Grogu charm.

Then we bring that into our editing program, take out the hole and size it up to about 2”. Any cute design will work for this. I lay them out all snuggy, I think 8 of these will do nicely.
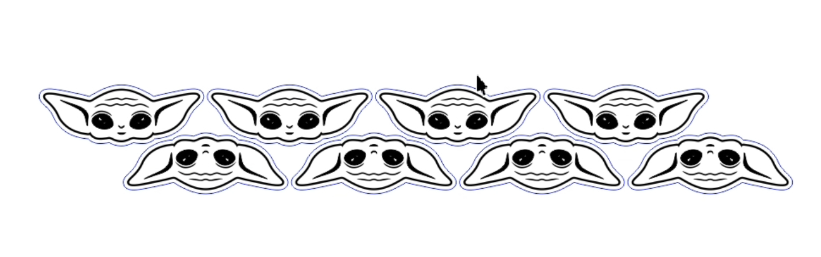
Now, I need to engrave and cut them out. I start the stopwatch and we’re off! I am using a fun pastel green color, I’ll have links to my favorite materials in the description. Be sure to leave the masking on for these.

The final time is about 12 minutes exactly. All of our lasers will have different times. Luckily for this part of the product making, you can be doing other projects to maximize your time.

Step 2 – Cut Out the Next Space Themed Design
Now let’s cut out another product before we head onto the next step. I’ll be using wood for this. It doesn’t have to be solid wood, just some sort of wood that you can engrave and paint. Before I engrave and cut them, I just need to put on some masking tape. This extra wide masking tape is super convenient for this.

I start up that stopwatch again, and in about 15 minutes, you can see we’ve got some cool planet shapes.

Step 3 – Spray Paint Engravings of Both Designs
I very simply just spray paint in the engravings with black spray paint. This one has a matte finish, but any nice black spray paint will do. While I was out here, I saw a huge spider that I looked up and it was a camel spider and debated coming back out to get everything, but luckily they needed some dry time so we can start laser-ing the next products!

Step 4 – Laser Cut Last Design 👑
This next one is super fun and will add a bit of royalty to our product line so far. We’ll need to start with this 16th” thin black acrylic. To make the assembly process easier, I’m going to put on some 3m double sided sticky tape from this roll I have and then we just cut out these crown shapes right through it.

That was pretty fast! There’s no engraving for these products, just cutting. For the top layer, I am going to cut out 4 of these heart crowns in mirrored pink. Once those are done, I use some masking tape to lift everything out because I want to keep the little hearts inside the crown. Then I just do the same thing but with a mirrored gold color.

Step 5 – Assembling and Painting the Products
Since I am not emotionally ready to go back outside yet, let’s assemble these crowns. Since the sticker backing is on there, it literally is as easy as peeling that off and putting on the mirrored acrylic.

The reason I did 4 of each color is so I can alternate a pink crown with a gold heart and a gold crown with a pink heart to make 8 total crowns.
After I armed myself with heavy books and covered my body in foil, I was able to get everything back from outside. Barely. These Grogu charms are pretty much done! Using some gorilla duct tape, I peel off all the masking layers. The spray paint makes quick work of coloring in those engravings!

We are getting really close to the end! Have you figured out what the final products will be yet? Now, let’s give those planets some color. Using my favorite sharpie oil paint pens, I get to coloring. I just randomly alternate colors and there are 9 more super bright products!

Step 6 – Completing the Mystery Product
Now to finish them up! If you guessed these were going to be pins – you are correct! They could absolutely be magnets, also! For me, I am simply going to glue on one of these pins to the back of each of these. I find they sell super duper well, and are SO cheap to make!

I just had to touch up some of the paint, and now we can figure out our final time.
Well, it looks like I’m at about 54 minutes, but let’s round that up a bit to take in consideration getting the files loaded, battling a scary spider, spray painting, ect.

I am confident that you could make this many pins or magnets in an hour. I plan on selling these around $8-10 a piece which puts me around that $200 profit area.

The only thing left to do is package these up, like on these cards, or display on a cork board covered in a piece of felt!

If you utilize some of the techniques you learned today, I just know your customers will be impressed! If you want to master more ways to make money with your laser check out this post next!
🆓 FREE Download for Honeycomb Bed Pins

Leave a comment