
Get Weird with Your Laser Materials 😋
If I am going to teach you anything, I want it to be this – get weird. Otherwise, think outside of the box! You got a laser to make things. Maybe you didn’t even know what yet, and maybe you still don’t. If you want to stand out as an artist, this is for you.
✨ Supplies for Projects
⇢ Wood
⇢ 3M Sticker Paper
⇢ Aleene’s Jewelry & Metal Glue
⇢ Craft Magnets
⇢ Rub N Buff
⇢ Sharpie Paint Pens
✨ File Downloads for this Project
⇢ NES Controller Altered
⇢ Cute Ghost Earring Download
Watch the entire in-depth tutorial in the video below and get inspired!
➕ Subscribe to my YouTube Channel HERE
I had a wisdom tooth taken out a few days ago, so I have been in an exceptionally silly headspace. I tried to laser some things that didn’t work out so well, but I had a lot of winners, too! And it all started with an avocado.

Can You Laser Cut an Avocado Peel?
First, you need to explode your avocado into pieces. I dried a quarter piece of the peel in a big book so it would be as flat as I could make it. It is pretty brittle, so I decided to laser out pieces that are meant to be glued onto a sturdier object.

I am going to laser out a classic Nintendo Entertainment System Controller from this nice solid Walnut wood. This will be a free design for my paid patrons! This engraves and cuts nicely, but as you can see, there are no buttons. That’s where the avocado peel comes in!

I was going in blind for the cut settings. It is pretty solid and thin, so I went pretty fast on the speed and low on the power. I probably could have gone a bit higher power, but I was able to pop all these little buttons out. Now it’s time to assemble!
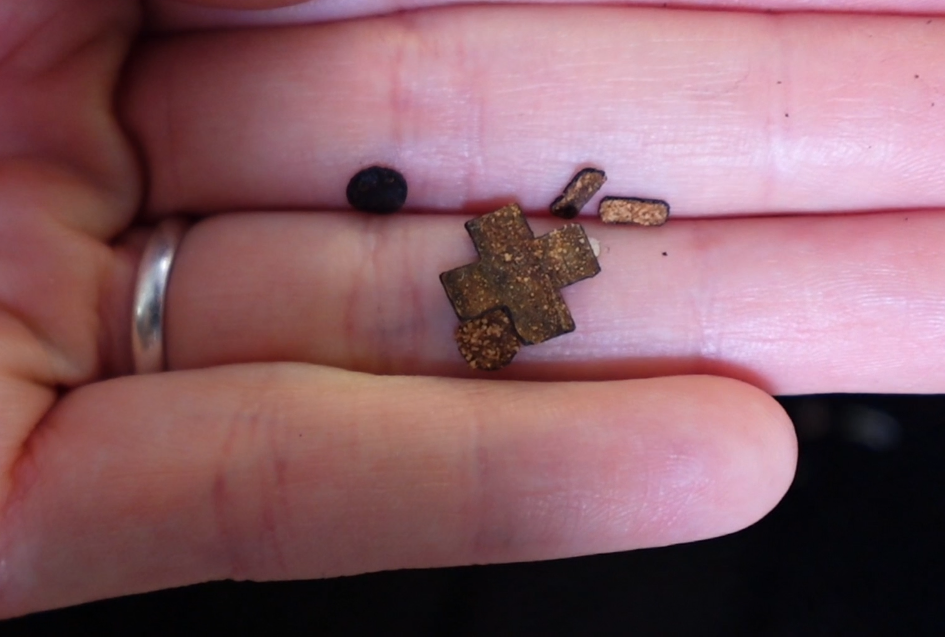
Trying not to lose all those little bits, I give the controller a bit of a sanding. With some gel type super glue, I used tweezers to help me get all the buttons on there.

It didn’t take long to dry. The avocado peel is a bit porous. Once I decided this should be a magnet, I just glued those on and it is all done! Can you imagine a customer finding out this was made with an avocado! That is going to be a fun conversation!

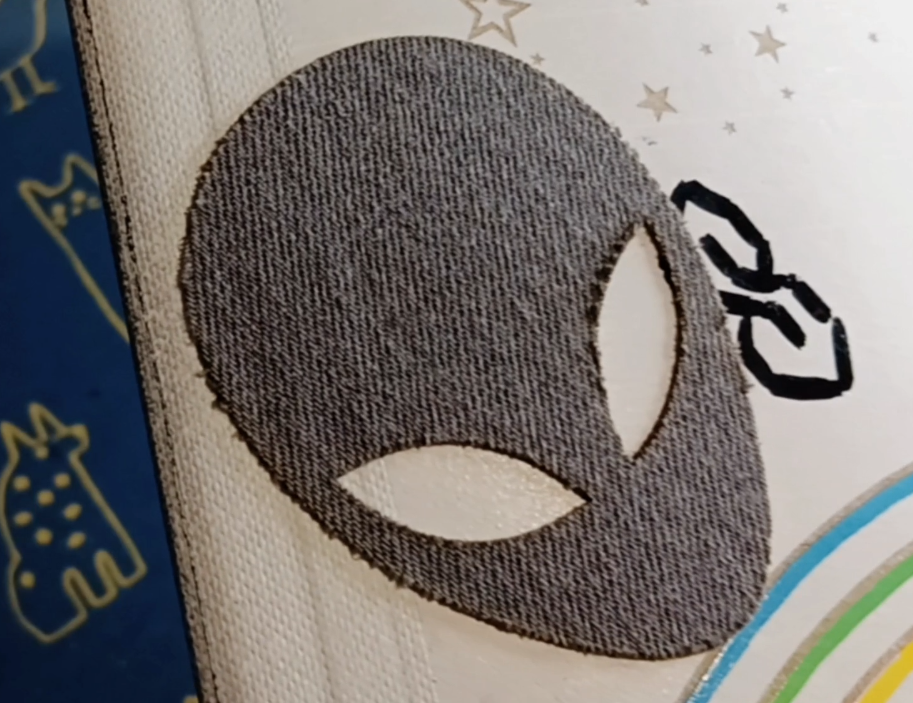
Can You Laser Cut Jeans?
My son seems to keep growing out of his jeans, so I have an abundance of them. I cut off just a little bit from these gray ones. I will be able to make a lot out of these jeans. They are 98% cotton and 2% Elastane, whatever that is, and will cut through just fine.
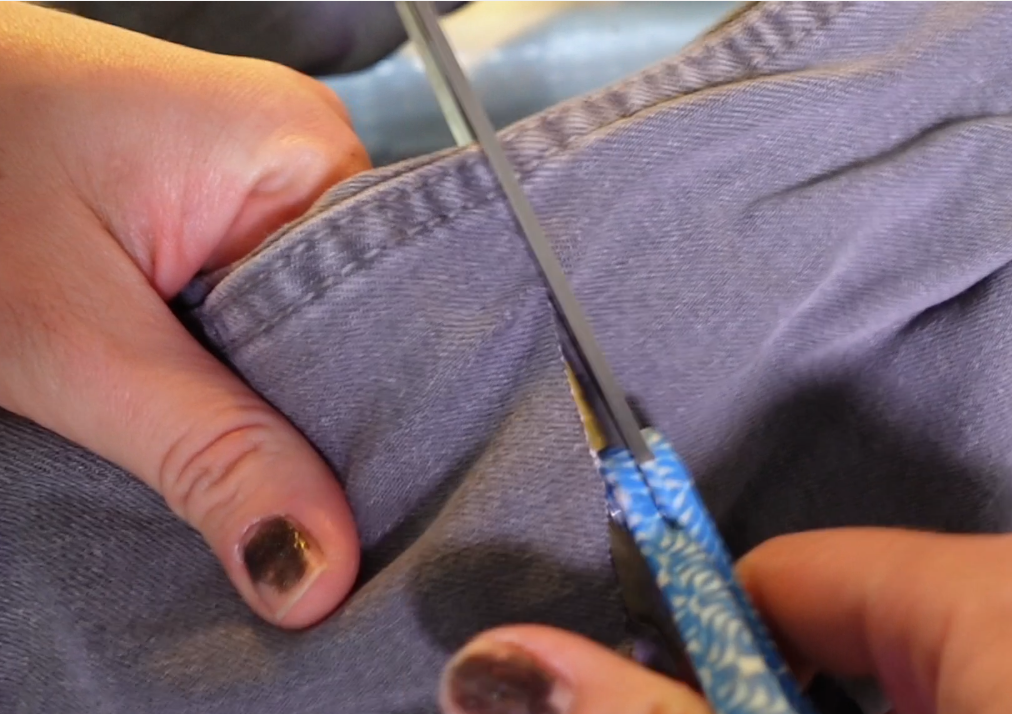
I want to make this into a sticker, so I use our hand 3M double sided sticker paper. This will also keep it from fraying too much. On the front side, I put on a layer of regular masking tape.

I am going to laser this with the sticker side up, but it should work out either way. The masking tape keeps it from getting scorch marks from the laser.
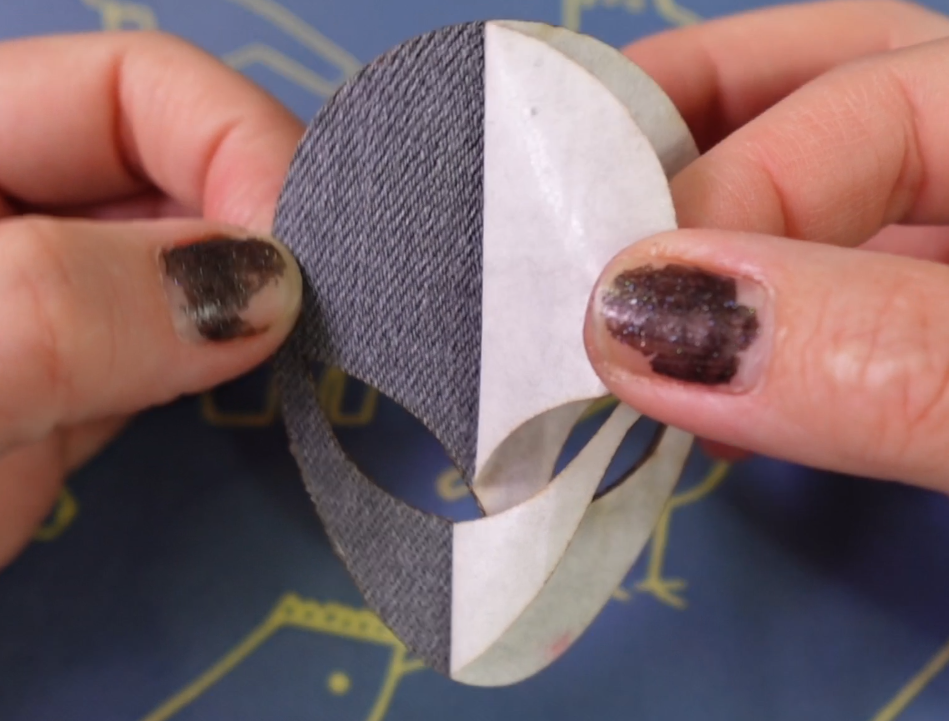
Isn’t this a fun sticker! If you wanted to make patches, just iron on the applique paper and do the same thing! I’ll be making a deep dive into lasering jeans soon!
Think Outside and Inside the… Jar?
Now, I know what you’re thinking, a glass jar is not outside of the box. But I have a story that might change your mind.
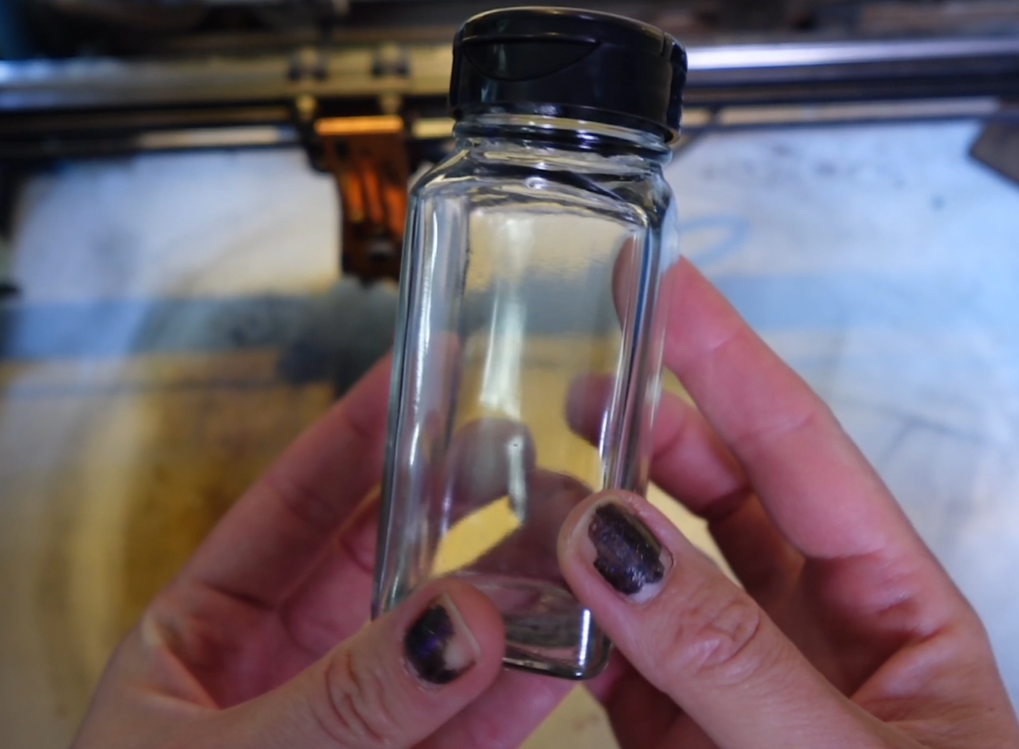
First, I am going to engrave a design on here. I don’t have a rotary, so this square spice jar will work nicely. I put on a bit of masking tape on and engrave it. If you have a diode laser you will need to put on special laser marking paper for glass. This will keep the engraving nice and uniform.
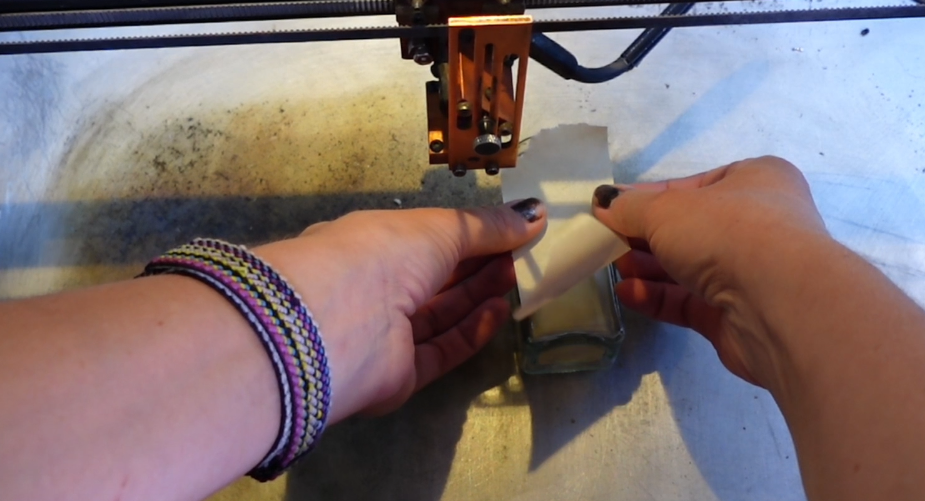
The bounding box accidentally started to do a cut line, so there is a partial cut line on this side.
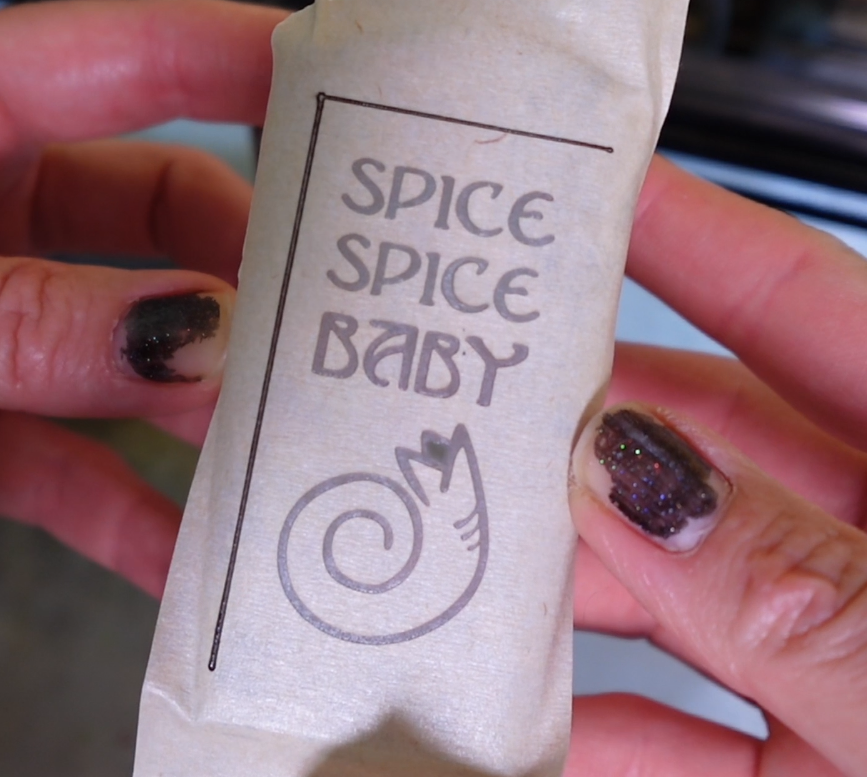
I wanted to try again on the other side, so I engraved it and did a low level cut line to outline everything, on purpose this time.
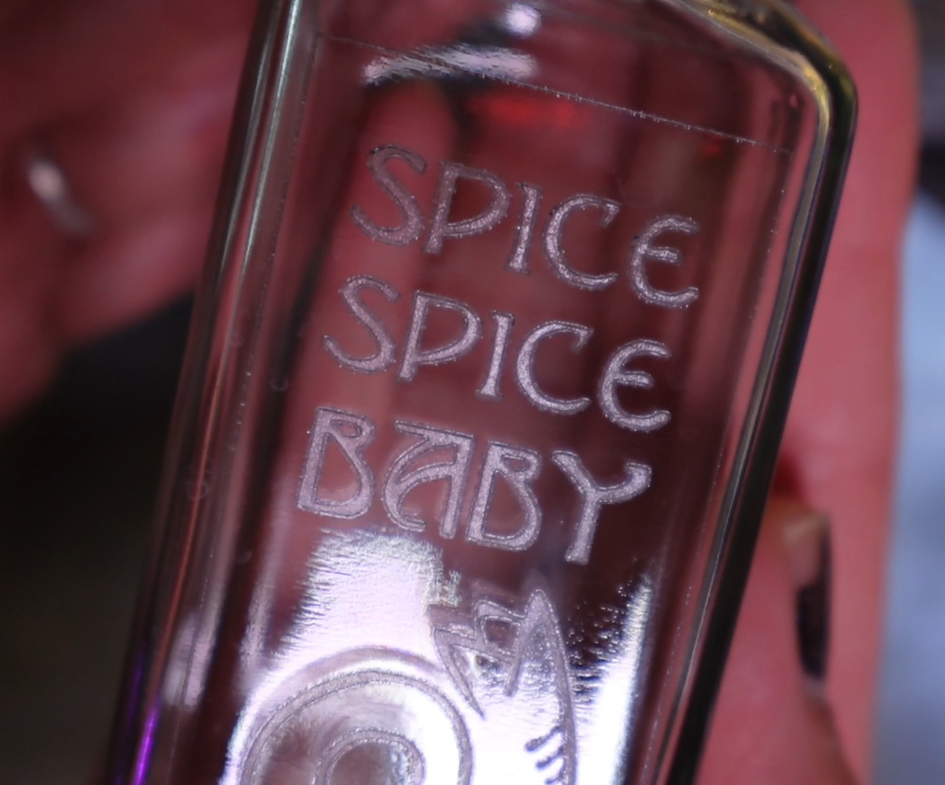
Now let me tell you that story! Years ago, I very seriously started to look into how I could make a granola company. I was into granola a lot. It was a bit more involved than I was willing to go into then, but if I were to start it now, I would make my granola and sell it in laser engraved jars. Think how well that would do at a craft fair. Not only are they getting a yummy treat, but a reusable jar or cup with a cute pattern on there, or a recipe, or local art, or even my own art! It would bring the profits up and the product would really stand out.
Apart from thinking how you can incorporate your laser into lifting up another type of product, if you want to make these engravings stand out, I really recommend Rub N Buff. That stuff is awesome.

I did one side in a gold rub and buff and the other in a silver color. Both turned out great and really sticks to the engravings!

Recycle What You Can with Your Laser
I’ve touched on this subject before, but recycling is a great use for a laser!

In this case, I am making little ghost earrings from a Starbucks lid.

This design is from a recent laser download file I made for Halloween. I also made a little backing card from the cup itself!

I know these might not last very long as earrings, but perhaps instead, I could make little product tags with them! The point is, there is a bunch of trash going to waste in the world, so I might as well try to give it a second chance!
Can You Laser Engrave Beans?
Yep, that is a little tiny black bean in my hand.

Using a bit of masking tape folded over itself, I can keep the beans in place in my laser.
I’m sure you think I have completely lost it. Perhaps I have. Don’t you remember those mall kiosks where you could get a grain of rice with your name on it? Well, this isn’t that, but it could be!

I engrave 5 beans with the work MAGIC on it. You can make the engraving stand out more with a Sharpie Paint Pen. Some Rub N Buff would probably work, also.
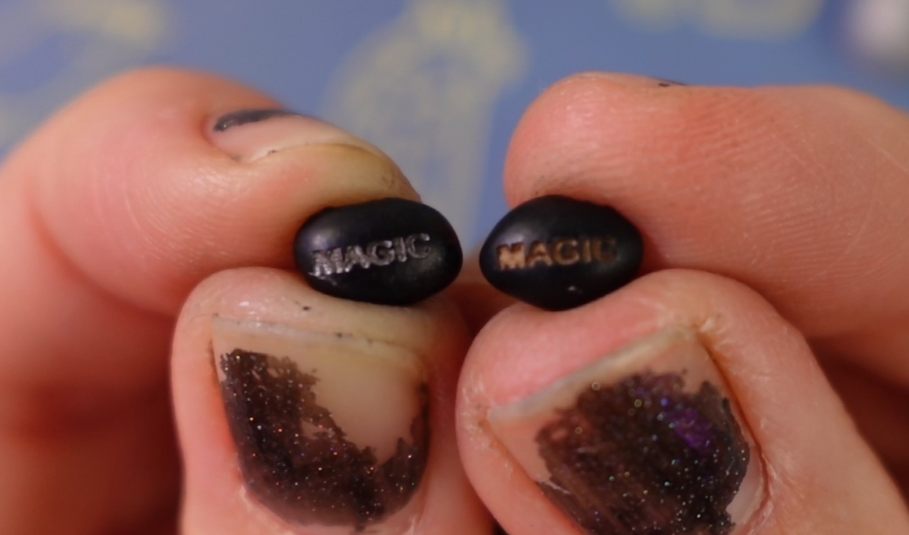
These could make fun gifts if you engraved a name, or date, or special location on there. Beans the limit!
I just scooped them up into a tiny jar and they are done! If you are thinking what I am thinking, then yes. I am going to try to trade these in for a cow.

Conclusion:
There is a whole world of things you can create with your laser that you can find right in your home!
🆓 FREE Download for Honeycomb Bed Pins

Leave a comment