
A Fun Laser Craft to Share with Kids! 💞
✨ Supplies for Projects
⇢ Acrylic or Wood
⇢ Stickers (Bought or Handmade)
⇢ UV Resin
⇢ UV Curing Light Box
⇢ Jewelry Findings
This is the easiest way to make full color Laser Cut Jewelry Charms!

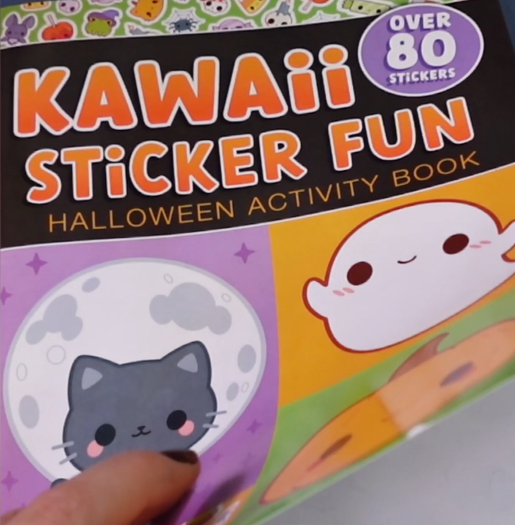
Step 1 – Obtain Stickers
First, get yourself a sticker book from the Dollar Tree! If you have your own sticker craft paper, making our own illustrated stickers is super fun and unique!
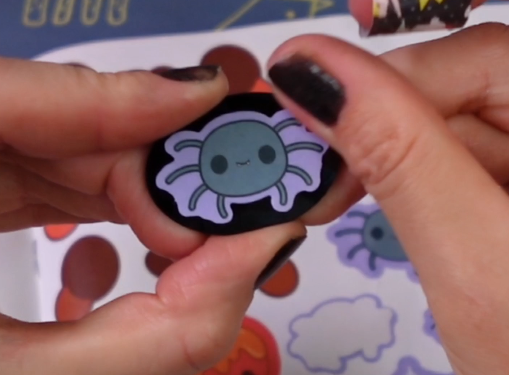
Step 2 – Laser Cut Pendant Shapes
Next, laser cut a bunch of regular shapes out of acrylic or wood that will fit the stickers you would like to turn into pendants. They can be fun colors, or even clear!

I just took a general measurement of the shape of the sticker and made a basic shape about the same size as the sticker.
Once you have the shapes laser cut out, simply put the stickers on!
Step 3 – UV Resin
After you put the stickers on the pendants, the magic really happens! UV Resin is going to seal these up and make them last forever.
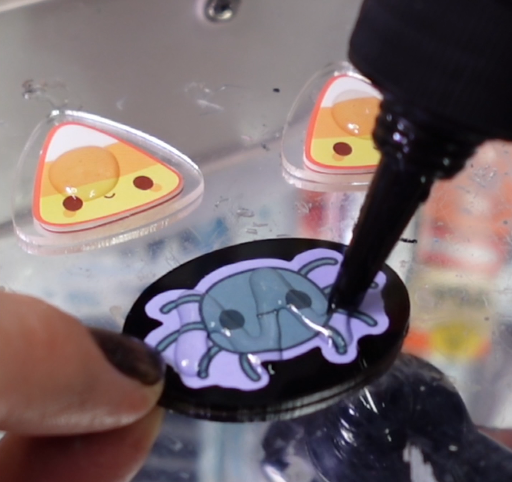
*Note – If you use traditional 2 part resin with a long cure time, it could soak into your stickers and make the colors uneven. UV Resin cures so fast, it never has a chance to “soak” in.
Once they are cured in your UV Curing Light Box or under your UV flashlight, they are ready for your crafts!
I made jewelry with mine!

Watch the super quick tutorial in the video below!
➕ Subscribe to my YouTube Channel HERE
🆓 FREE Download for Honeycomb Bed Pins

Leave a comment