
Spooky on a Budget! 👻
Halloween is a fun holiday to utilize our lasers for decorations, gifts, tricks and treats! The best place to get some creative spooky juices flowing is the Dollar Tree! Follow along with me and perhaps I will scare some ideas into you for this Halloween!
✨ Dollar Store Supplies
⇢ Large Star Cutout Sign Blank
⇢ “Scary” Cloth
⇢ Metal Table Sign
⇢ Sticker Book
⇢ Anything that Inspires You!
✨ Extra Materials Needed
⇢ MDF
⇢ Spray Paints
⇢ Elmer’s Glue All
⇢ Masking Tape
⇢ UV Resin
⇢ UV Resin Curing Lamp
⇢ UV Resin Dye
✨ File Downloads for these Projects
Project 1 – Extra Large Door Hanging
For this project I found a large board in the wooden craft section. It is a super thin MDF with a wood veneer on it, that’s too big to fit in my laser! Which means I can use it as a base to make a nice big sign.

I am using some 1/8th inch MDF to cut out a Trick or Treat design.

The next step is to paint everything. For the Dollar Tree sign blank, I am going to get extra spooky and paint it 3 colors. I start with white then cover it with a “spooky cloth” which you can also find at the Dollar Tree to give it a web like texture.

Next up is purple spray paint and then I cover it up again and paint it with black spray paint.

For the MDF cut outs, I am painting them black, yellow and purple. For the lighter colors, I suggest hitting it with a primer specific paint first or sealing it up in one of the ways I mention in my How to Perfectly Paint MDF tutorial.

Once everything is dry, I figure out where I want everything to be and I simply glue it together! I am using Elmer’s Glue All, which is a super strength glue similar to wood glue, which would also work.
I would not be able to make a sign this big with my laser alone, and with all the pieces together, I think it turned out super spooky! I do hope some children choose ‘trick’ because I’ve been filling buckets with spiders and I don’t want them to go to waste.

Project 2 – Sticker “Treats”
Next, let’s make some “treats” with stickers! If you have ever wanted a way to add full color images to your projects, stickers are what you need!
I measure some stickers I like and laser cut out some acrylic pendants in roughly the same shape.
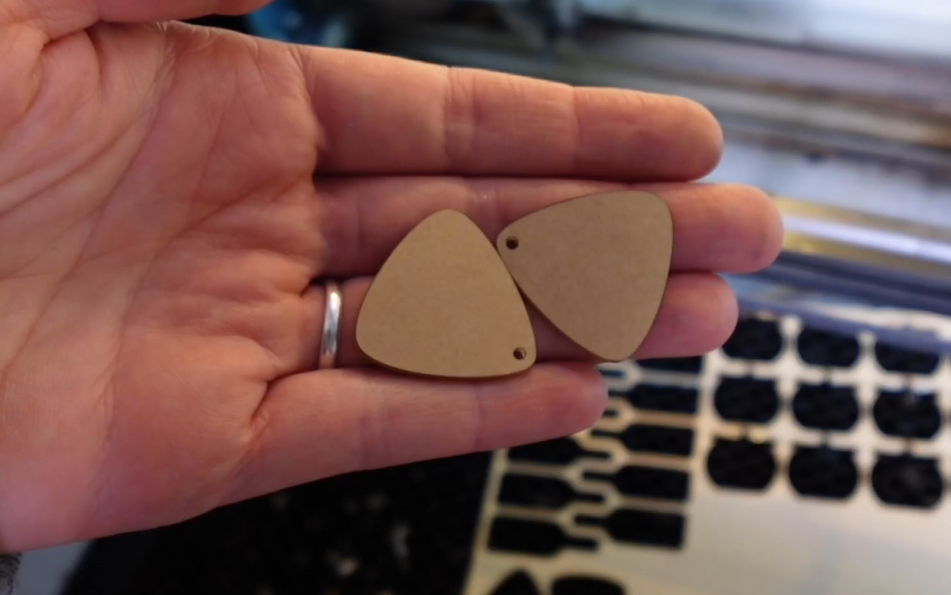
Next, all you have to do is put the stickers on your shapes! You can get creative with the colors you use. I tried to match up the spider and skull cutouts, the candy corn is clear and has a sticker on both sides!
The next step is where we turn these from just a sticker, to a long lasting pendant! Resin is the magical goo you need!

Since these are paper stickers, I highly suggest a UV Resin because you can cure it faster than regular time curing resin because that could soak into the paper and ruin the color of your piece.
I put a little glitter in the resin of the skull pendant to give it some razz ma tazz!

The resin cures quickly and makes these little pendants super professional looking and they truly will last a while. Since the candy corns are double sided, I cover the backside with more resin – Tada! These are ready to be turned into little treats to give to the kids who are allergic to everything.

I am making a pin, necklace and earrings. You might not want to give anything sharp out to the neighborhood kids, but they do make good treats to share.
Project 3 – Live, Laugh, Lobotomy Table Sign
Next up I saw this “Live a Better Day” sign and personally I have never been a fan of that positivity message trend, so let’s warp it Halloween style.
After I separated the sign from the base, I put a coat of primer over the metal part. Once it was dry, I masked everything off and it’s ready for the laser!

I made a “Live, Laugh, Lobotomy” engraving and it wasn’t until it was done that I noticed “lobotomy” was spelled wrong. But that’s ok because when you mess something up, you learn from it or you figure out a way to cover it up.

Before we do that, I spray paint the engraving in with some black spray paint. Now to get creative!
So, we’ll need some more of that tasty UV Resin! I am going to mix a little bit of resin dye in it to make look like some blood, why not! Spirit of the holiday!
Using a brush, I just glop on the resin and let it drip down.

Once the fake blood is right where you want it, hit it with those UV rays to keep it in place. I put some drops on the base and glue it together again!
What a cute sign to put next to your operating table! This project was a great life lesson – if you have a typo, just cover it up with some fake blood!

Project 4 – Put a Web on It
I found this lazy susan, and despite it being so lazy, it inspired me! This was also made primarily of mdf with a wood veneer on top, which makes it perfect to engrave!
The design on the top was a bit raised, so I sanded that off to get it ready for a few coats of black paint.

I made a web design, which will also be in the file download I mentioned earlier. In addition to the engraving, I also went around it with a vector etch, which is just a low level cut line. It made the edges super crisp!

Sometimes projects don’t need to be complicated! This would make a perfect addition to a Halloween feast table or to display a spooky little town!

Bonus Crafts:
If you ever see glass like this, you can give it an antique mercury glass look with rub n buff! You just literally rub it on and buff it off! Now the texture of the glass really lights up!

I also got a few little cauldrons to put glow stick bracelets in. You can line your porch or hang them all over the house.

The dollar tree is a pretty great place to find cheap materials and supplies! If you would like some more inspiration on the cheap, check out this post next!
➕ Subscribe to my YouTube Channel HERE

Leave a comment