
Plus 10 FREE Designs to Try This Out On! ✔
10 Free Downloads Await! Sign up for Creative Fabrica’s All Access Free Trial and enjoy 10 free downloads to kickstart your creative projects.
✨ Supplies for Project
⇢ Wood Veneer
✨ File Download
⇢ Salem Witch Halloween Design Bundle
There are more images out there than laser cut files, so here is the one trick you need to know to turn any image into something you can laser cut around!
I got This Design for FREE!!
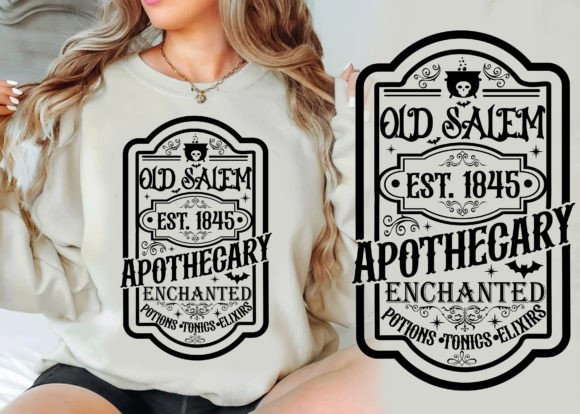
I turned this T-Shirt Design into a Laser Cut file! Here’s how I made this so you can too!
Step 1 – Download File Bundle
Go to Creative Fabrica and start a Trial (or Subscription) so you can download This Design for FREE!
Pick the design from the bundle that you like and import it into your program of choice. I am using CorelDraw. Don’t worry if you don’t have it! I’ll go over the process for Inkscape as well.

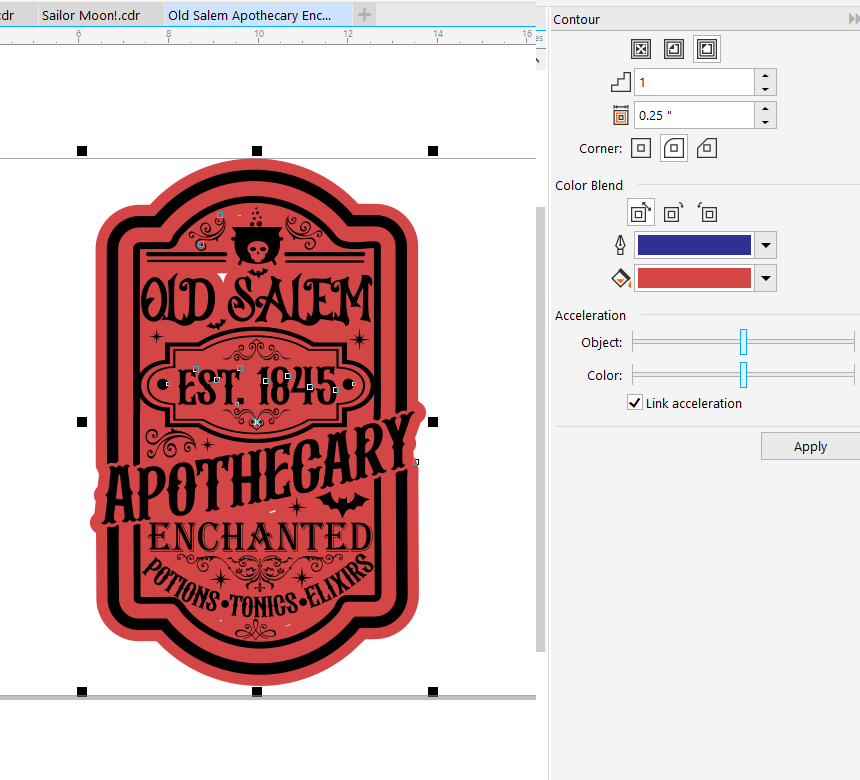
Step 2.1 – Contouring an Image in CorelDraw
To make a cut line around the image, we need to simply make a contour line around the image.
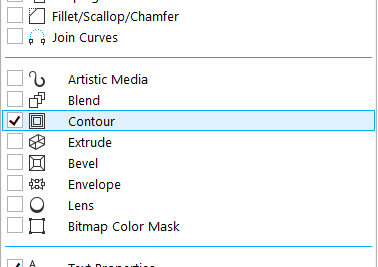
For Coreldraw, you can find the contour tool in your left side bar. Click the + button and locate it on the menu.
Select the image, which must be completely Grouped (CNTL + G), and play around with the contour until it is to your liking.
Once done, right click on the contour line and “break contour group apart”.
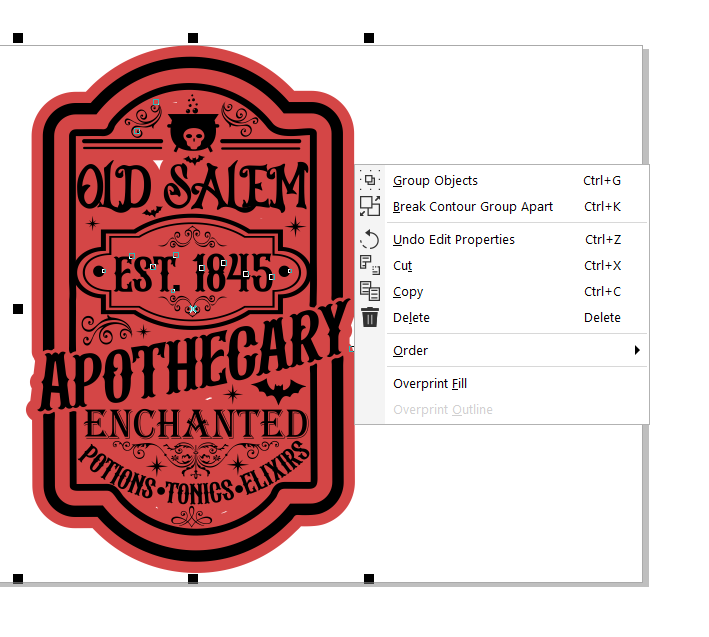
Clear out any fill color and make the outline the width and color that pertains to your laser program. Resize for your project parameters. Now it is ready to Laser Engrave and Cut!

Step 2.2 – Contouring an Image in Inkscape
Open the image of your choice into a new workspace. It should be grouped together already. If not, select all the elements and go up to Object -> Group, or select all elements and press CNTL + G.

Then make a duplicate of the design and set one off to the side. Ungroup one of the images, you may need to do the ungroup function a few times and clear out all the inner design elements. Group together all the leftover parts and proceed to the next step.

To do a contour, either select Path -> Path Effects. A new window will pop up on the left bar. Press the + to bring up a menu and select Offset.

Play around with the settings. I like to use the rounded join to make the edges smoother, but it depends on your design.

Go up to Path -> Stoke to Path. Clear out the black fill and outline with your cut parameters. Go back up to Path -> Union.

Next, go back up to Path-> Break Apart and delete the inner outline.
Now you just need to center the engrave image and make the outline the width and color that pertains to your laser program. Resize for your project parameters. Now it is ready to Laser Engrave and Cut!

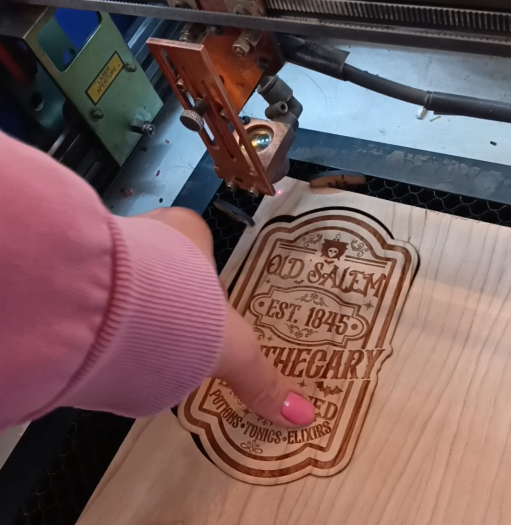
Step 3 – Laser Engrave & Cut
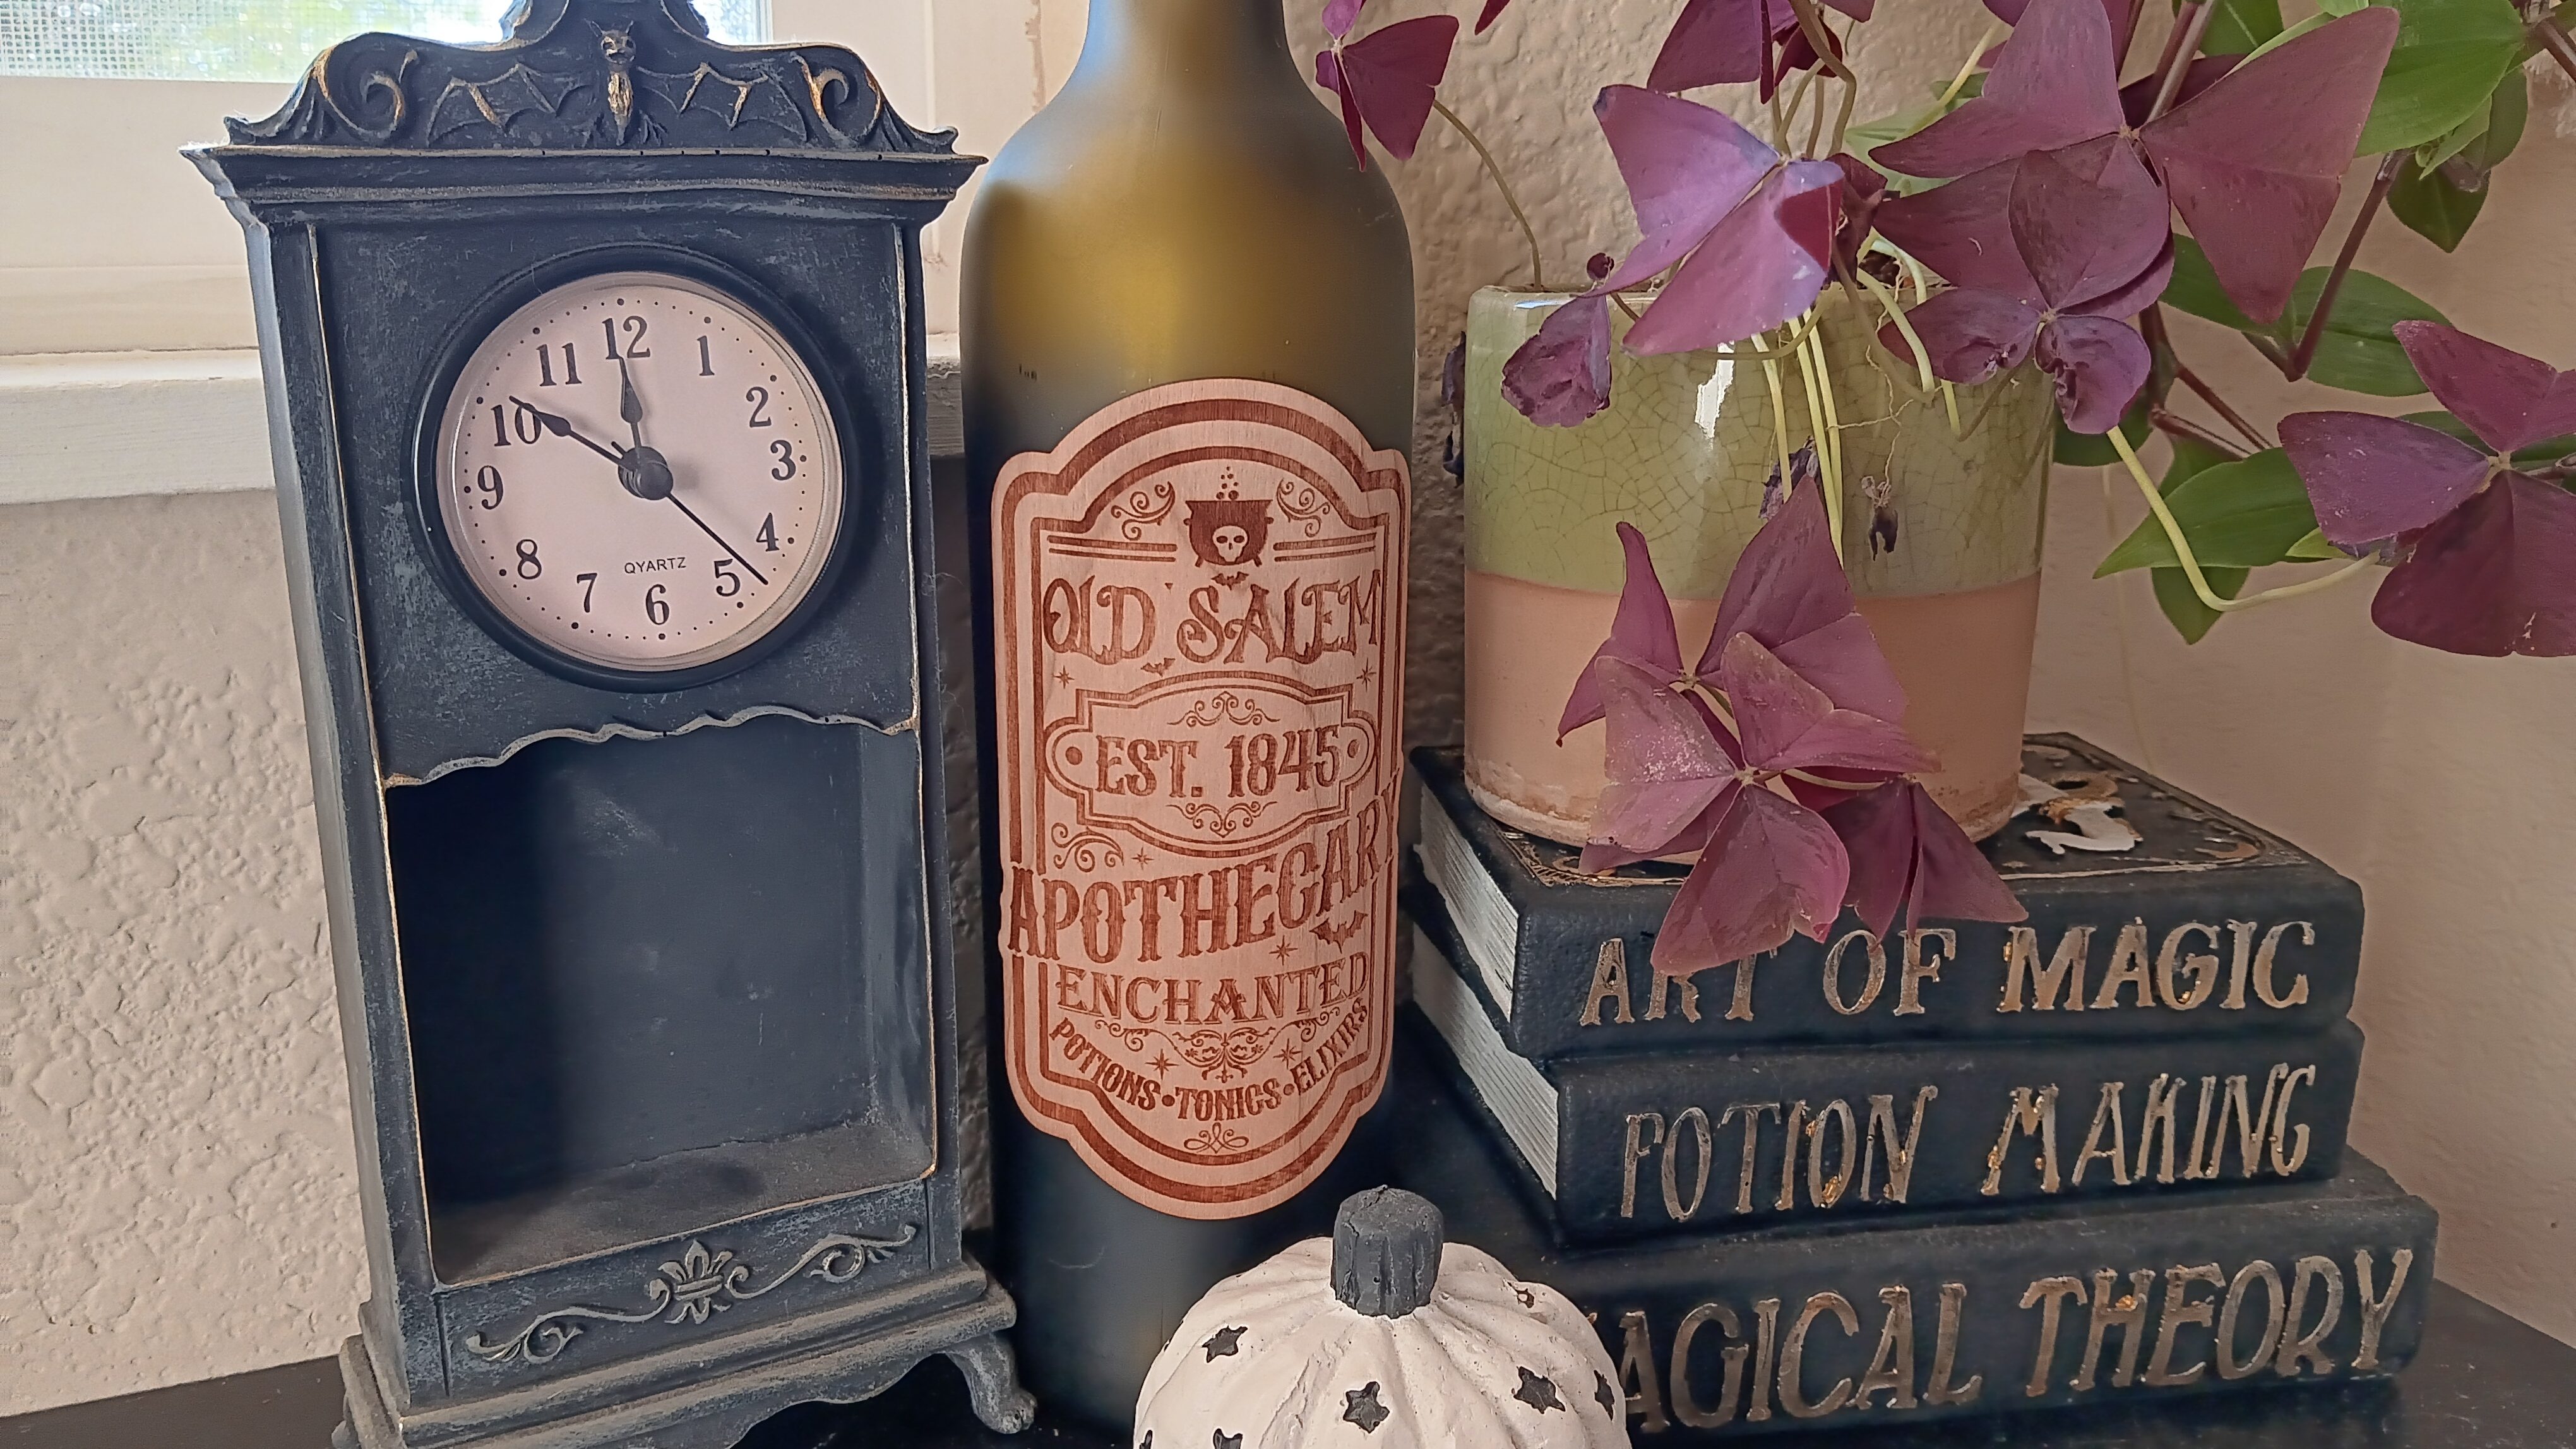
I am using sticker backed wood veneer to engrave this spooky design on!
I stuck this on the side of an old wine bottle and it is ready to decorate!

Sign up for Creative Fabrica’s All Access Free Trial and enjoy 10 free downloads to kickstart your creative projects. Plus they’re having a Subscription Sale, so check it out and Happy Haloweeeeeeen! 🦇
Watch the super quick tutorial in the video below!
➕ Subscribe to my YouTube Channel HERE

Leave a comment