
Stand Out from Other Laser Crafters! 🌟
10 Free Downloads Await! Sign up for Creative Fabrica’s All Access Free Trial and enjoy 10 free downloads to kickstart your creative projects.
✨ File Download
⇢ May Coffee Kick In Before Reality SVG Free Download
✨ Supplies for Project
⇢ 1/8th Inch MDF
➕ Subscribe to my YouTube Channel HERE
Have you ever found a flat svg image you like, but don’t know how to turn it into a laser design file?

We are going to go over just how easy that is using the free program – Inkscape.
To find loads of free files, I like to head over to Creative Fabrica.

They have millions of svgs and fonts that I use with my projects. Under their free tab, I click the free svgs and go pick out an image I want to turn into a multi-layered sign! This coffee one is perfect!

Step 1 : Open the File in Inkscape
You are going to be amazed at how fast you can do this. Open up the file in Inkscape, and let’s get started!
I like to make a copy (CTRL C + CTRL V) and set that off to the side so we know where we started and we can pull over any bits if needed.

Step 2 : Aligning the Words
Next, we are going to want to ungroup the letters and shapes. To do this select everything and go up to Object and down to Ungroup. You may need to do that a few times to get everything separated.

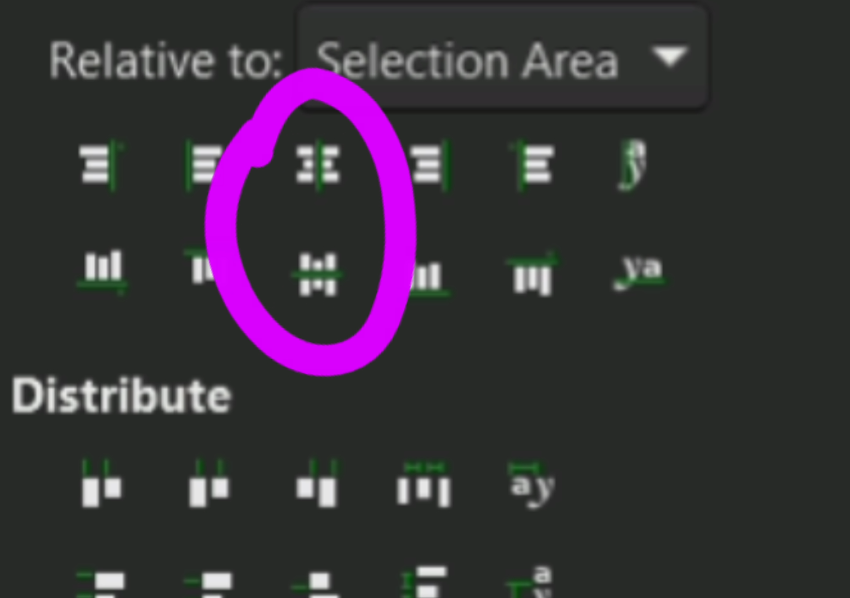
The words were still grouped which is great because I want the words to line up. So, I select each of the things I want to align and use this align button.

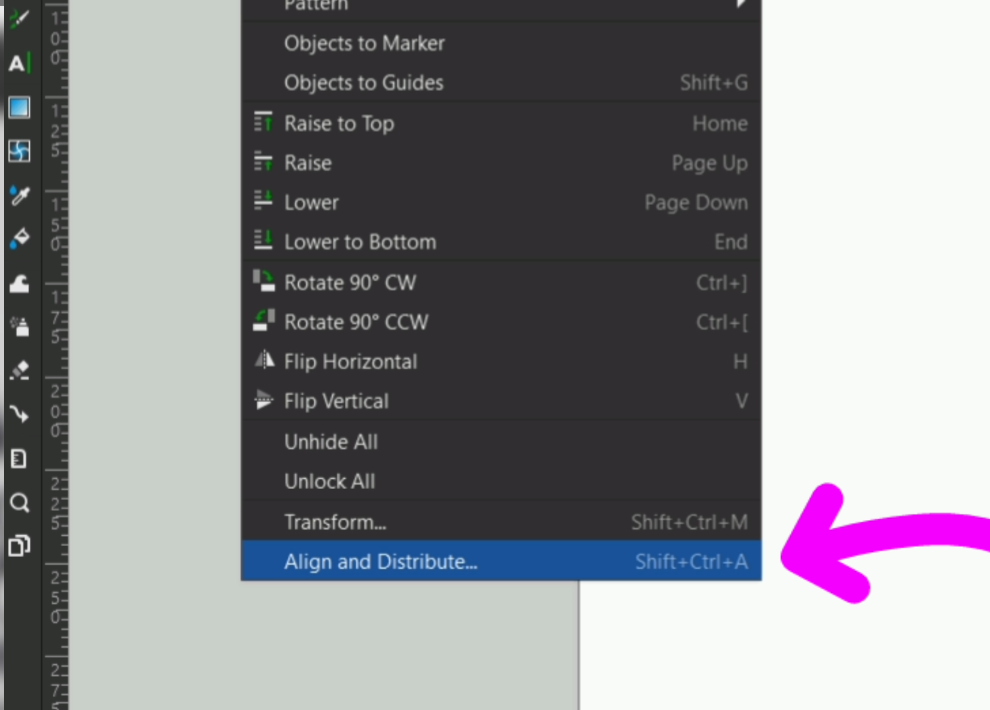
If your sidebar doesn’t already have the align tools up, go up to Object and down to the Align and Distribute and that will pull up.
Step 3 : Create the Main Sign
Now let’s make the shape of the sign. I simply use the rectangle tool to outline the words. To alter the corners of the rectangle, there are 2 squares and 1 circle in the corners. Take the circle corner and adjust it to your liking.

I want the letters in the center of this rectangle, so I group all of them together with CTRL + G. Then I can select the group and the rectangle and use these 2 align buttons.
Next up, I make another rectangle and circle shape. With a bit more aligning and adjusting things, I am ready to fuse all these shapes together. To do that, select the shapes, go up to Path and down to Union.

How I envision this sign is that the lettering, ribbon and coffee cup will be the 2nd layer. The coffee steam and the “KICK IN” words will be engraved on the main back piece of the sign. So, I need to alter this coffee cup to not have a little steamy wisp.

Step 4 : Altering Vector Shapes
To do that I make sure everything is ungrouped and double click the cup to bring up the vector points. I select the steam dots and delete them.

To make this line flat again, I select the 2 points and click the little line in the top bar. That will flatten it out.

To replace the steam wisp that I want engraved, I copy and paste over one of the others.

Step 5 : Lettering Outlines
Once it is cut out, to make sure I line up all the letters, I want to make vector engrave lines. Essentially, while this is getting lasered out, these will be cut lines that I set to a very low power setting, so it doesn’t cut completely through. To do that, I select everything I want for the cut line then hold SHIFT and select a color.

To wipe out the black fill, hold CTRL and select the white square with the X in it.

Now we have the main back piece of our sign. Use the Fill and Stroke function, you can find that in the Object dropdown, to make sure your lines are what they need to be to be read by your laser.

Step 6 : 2nd Layer Pieces
Next, we need to make the 2nd layer objects. The easiest way to do that is to select the coffee cup, words and ribbon and make a copy with CTRL C and CTRL V. I deleted anything I don’t need.

Then, I position everything nice and snuggled together so I don’t waste any material. Once that is looking good, I make sure everything is the right color, the right dimension, and everything is suited for my laser machine.

Step 7 : Time to Laser Cut!
I am using 1/8th inch MDF Board. It cuts out really nice!

To help me keep all my letters together, I use a bit of masking tape.

After I stain the MDF pieces and let them dry, I simply glue everything together.

The vector engraved letter lines help me get all the lettering in the perfect place. I put a sawtooth hanger on the back and it is ready to decorate my space!
Being able to turn free SVG images into a Layered Laser Design is a skill that will set you apart from other laser makers!
I have an affiliate link for Creative Fabrica, if you find that is a subscription you can use. I do suggest you at least check out their totally free downloads, because there are some hidden gems in there!

Check out my other laser tips and Inkscape tutorials!
Sign up for Creative Fabrica’s All Access Free Trial and enjoy 10 free downloads to kickstart your creative projects. Plus they’re having a Subscription Sale, so check it out and Happy Crafting!

Leave a comment