

Easily Personalize Laser Engraved Gifts! 🎁
10 Free Downloads Await! Sign up for Creative Fabrica’s All Access Free Trial and enjoy 10 free downloads to kickstart your creative projects.
✨ Supplies for Project
⇢ Acrylic or Wood
If you have a full color picture that you want to turn into a laser engraved object using free-ware like Inkscape, this tutorial is for you! Find an image you want to engrave and follow along with these steps!
➕ Subscribe to my YouTube Channel HERE
NOTE* There are so many types of lasers out there, all with their own laser machine software. This means you may have more steps to follow after you prepare your image, or you might be able to skips some steps. Plus, I only go over a few ways to prepare your pictures! There are way more methods than the ones I am covering here.
Why the Trace Bitmap Inkscape function doesn’t work for color pictures
We’ve used the Trace Bitmap function before when we wanted to trace Patrick Star in another post, but you will find that won’t work for your color pictures. Even if you made the picture black and white first, this Trace Bitmap will fail you.

It only picks up the darkest colors, and tends to blob it all together, despite toggling around. There is one way I have found that could be a great fit for your picture and that is –
Method 1 – Point Engraving Filter in Inkscape
The main goal while making a picture ready for your laser, is to morph the picture from color into black and white. Any grays, or gradient, will need to be achieved with dots or shapes that are close or far apart.
The first way to turn our picture into a whole bunch of black shapes is with Inkscapes built in filter called Point Engraving.
While you have the picture selected, got up to Filters -> Image Paint and Draw -> Point Engraving. It will pull up a floating box.
Click the Fill Color tab above and make sure the color is pure white. Then, in the Point Color tab, make sure it is pure black. Back on the main tab, click the Live Preview box so you can see your picture as you edit it.
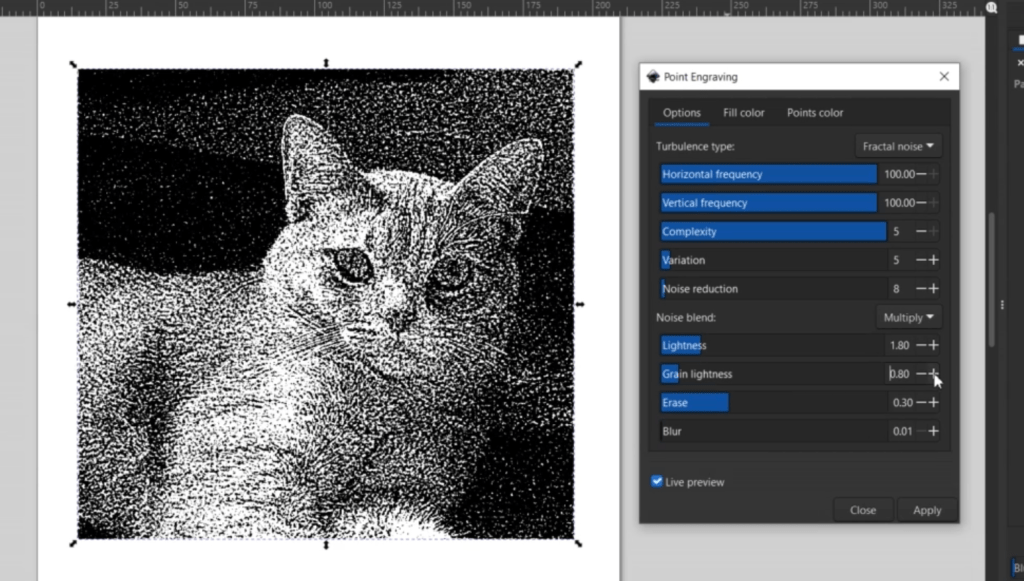
Now we can start fiddling around. Each picture will have completely different requirements. If your picture still has gray colors, make sure the Blur toggle is all the way down to .01.
Once you get it to how you like it, click apply and close the box.
Now you can export the image as a bitmap, jpeg or even an svg, depending on your laser software requirements.

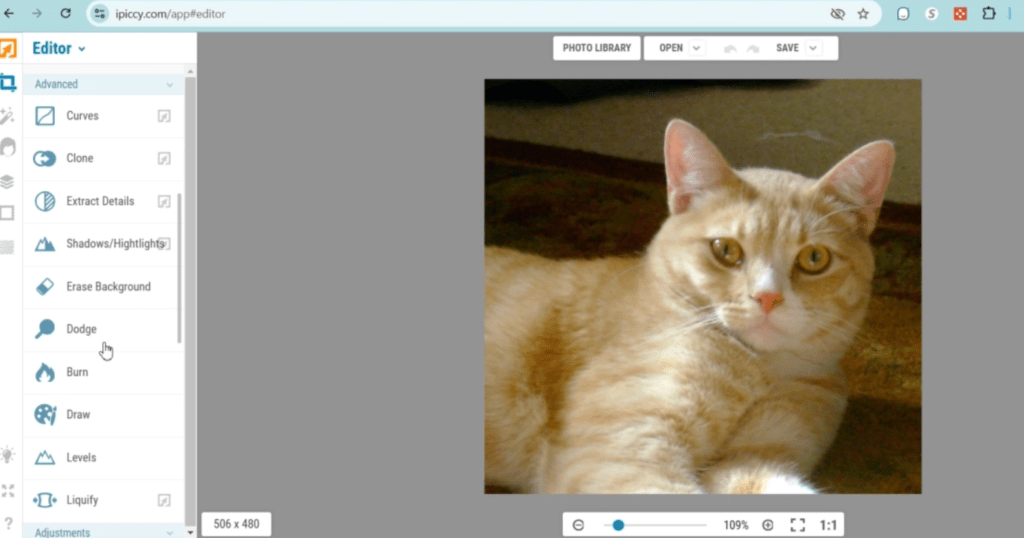
Method 2 – Preparing your Picture with Free iPiccy.com Photo Editing
Another way you can fine tune your picture into pure black and white is with a free online editing program called iPiccy.com. The best part about this site, is it is super easy to navigate and you don’t need to make an account or pay to download your edited pictures.
Go to iPiccy.com and click Edit a Photo. Import your picture and let’s start editing!
First, we need to make the picture Black and White. All the functions are on the left hand side. I adjusted the contrast a bit to start accentuating the black color. Once it is looking good, hit apply and scroll up a little and find Equalize. This will have gray tones, but don’t worry about that yet. This will evenly distribute your grays. I toggled the fade up a bit to heighten the black objects.
Next, hit apply and go one down to Local Contrast. Now we are really going to start separating the gray color. I go all the way up on the strength toggle. Getting closer!
Hit apply and go one more down to Light & Contrast. Again, I go all the way up on the contrast toggle. The light toggle will depend on your picture.

Finally, this is where we get rid of any remaining gray color. Hit apply and move one more down to Adjust Threshold. Balance the white and black threshold to find the perfect look. Make sure there are no grays in your image!
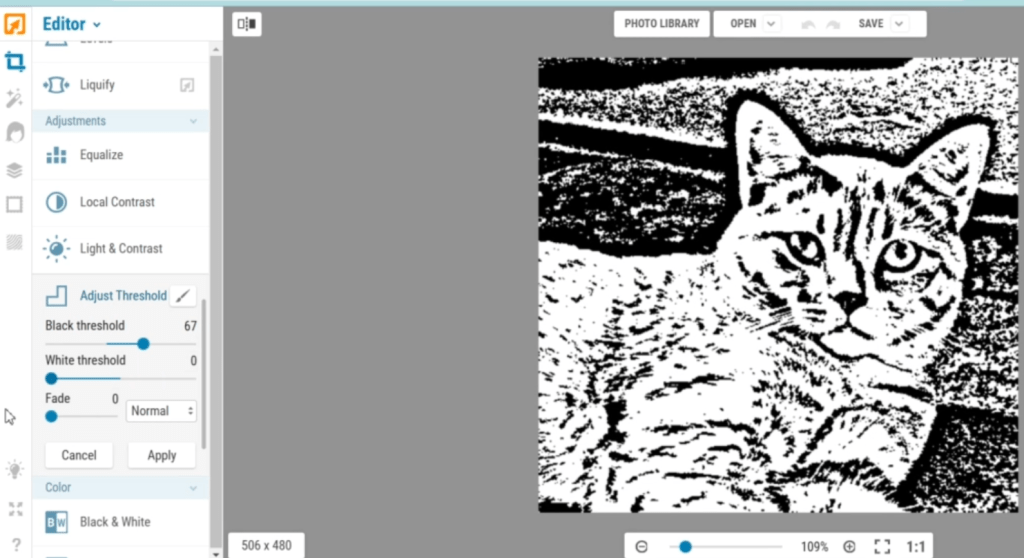
If you need to adjust, go back a few steps and keep fiddling. Now, I just download and we are ready to roll!
Also, now that it is such a great black and white picture, I can even import this into Inkscape and use the Trace Bitmap function with success! You might want to outline the black shapes for your laser program, and Inkscape can do that now.
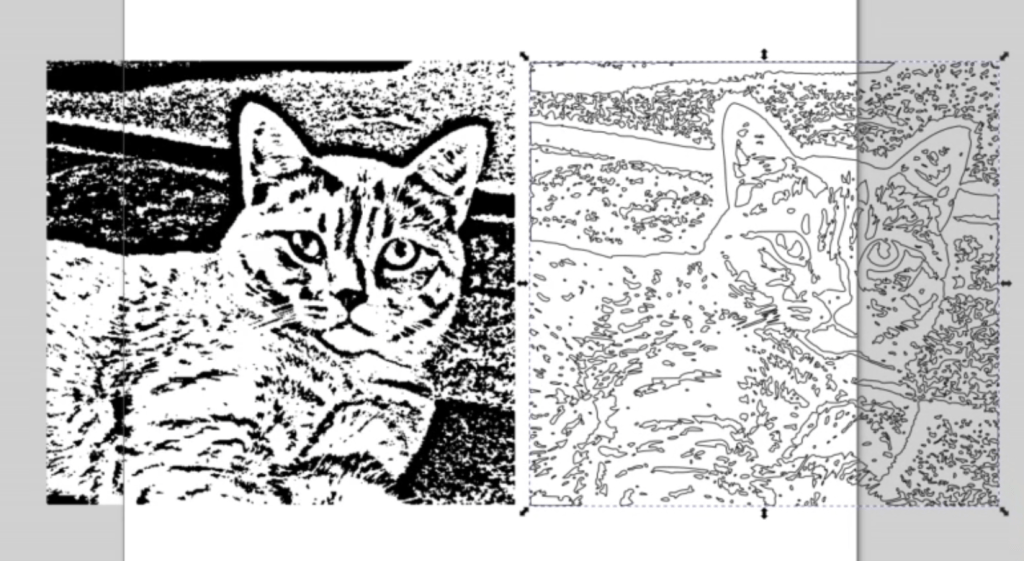
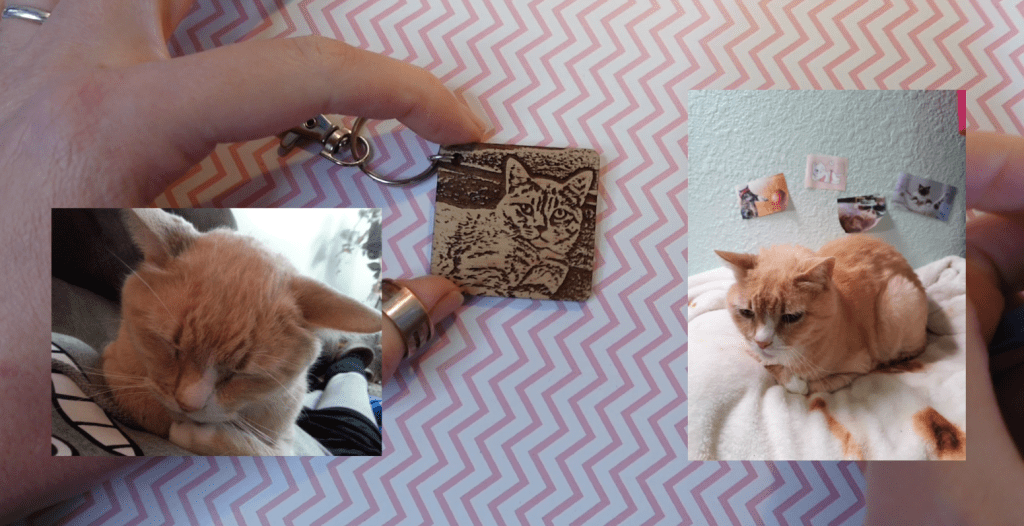
The Final Result
Now, we just need to see how it looks! The picture I used for these examples is of my old boy Syrus. He crossed the rainbow bridge a few years ago, so I love to memorialize him when I can. Hopefully, he can look down and not be too disappointed in my projects. He was a bit of a grumpy gus.
If you want to learn even more Inkscape skills, check this out! Happy Crafting!
Sign up for Creative Fabrica’s All Access Free Trial and enjoy 10 free downloads to kickstart your creative projects. Plus they’re having a Subscription Sale, so check it out and Happy Crafting!

Leave a comment