
Pro Level Crafts with Basic Inkscape Skills
10 Free Downloads Await! Sign up for Creative Fabrica’s All Access Free Trial and enjoy 10 free downloads to kickstart your creative projects.
✨ Supplies for Project
⇢ Inscape
⇢ Acrylic or Wood
⇢ MDF Core Bamboo
⇢ Novus Number 2 Plastic Polish
⇢ Gorilla Duct Tape
⇢ Sharpie Oil Paint Pens
✨ Download of Projects in this Tutorial (But try to make your own 1st 😉)
Whether you are just starting out, or want to enhance your Inkscape skills, this tutorial is for you! Everyone needs to know how to make these laser cut crafts with Inkscape!
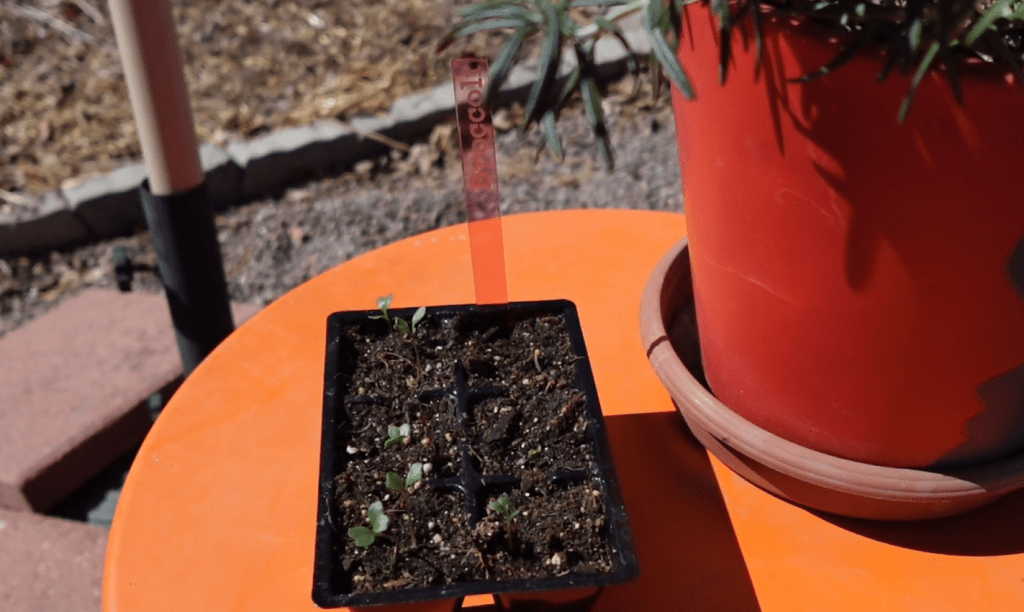
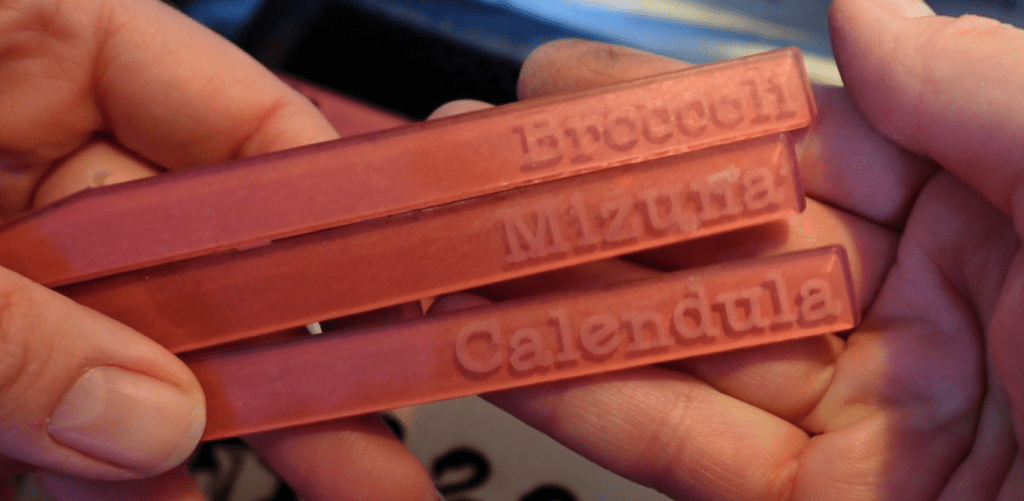
Project 1 – Plant Label Stakes
Spring is in the air, so let’s make some plant stakes! Boring? Maybe. But, do these make a great gift? Absolutely.
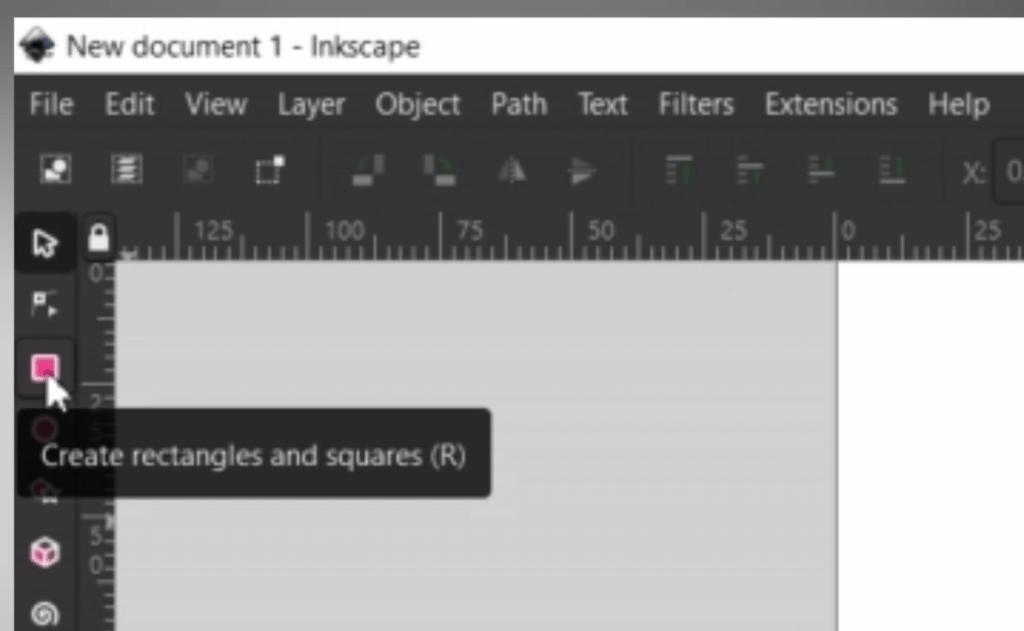
First thing we are going to do is select the top-most square icon in the vertical bar on the left. If you hover over it, it will say “Create Rectangles and Squares.”
Now drag a long rectangle shape. No need to be specific, that comes up next.
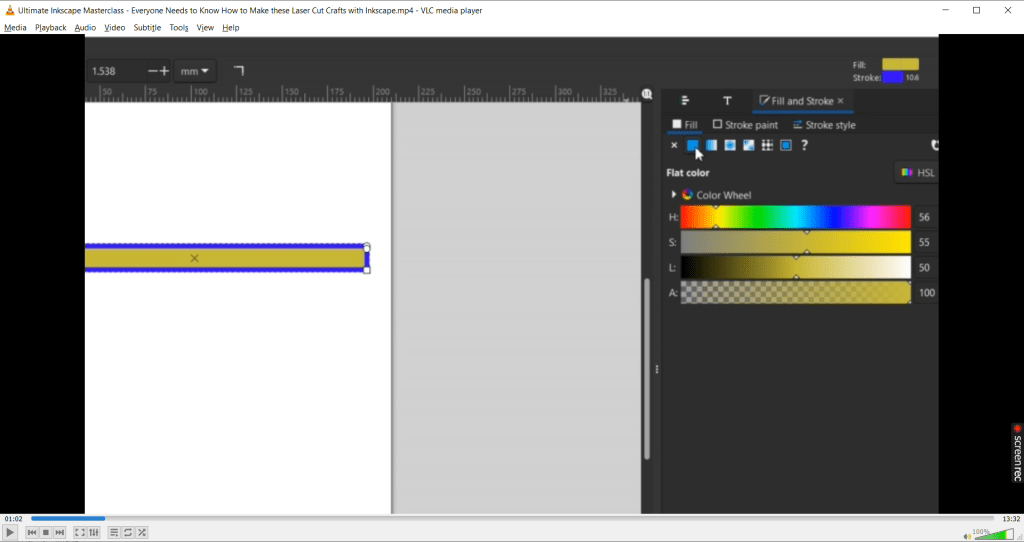
If your shape is weird colors like mine, which was set to the last settings I had, you can change the colors and line thickness by going up to Object and down to Fill and Stroke. A popup will come up on the right hand side with a few tabs and toggles.
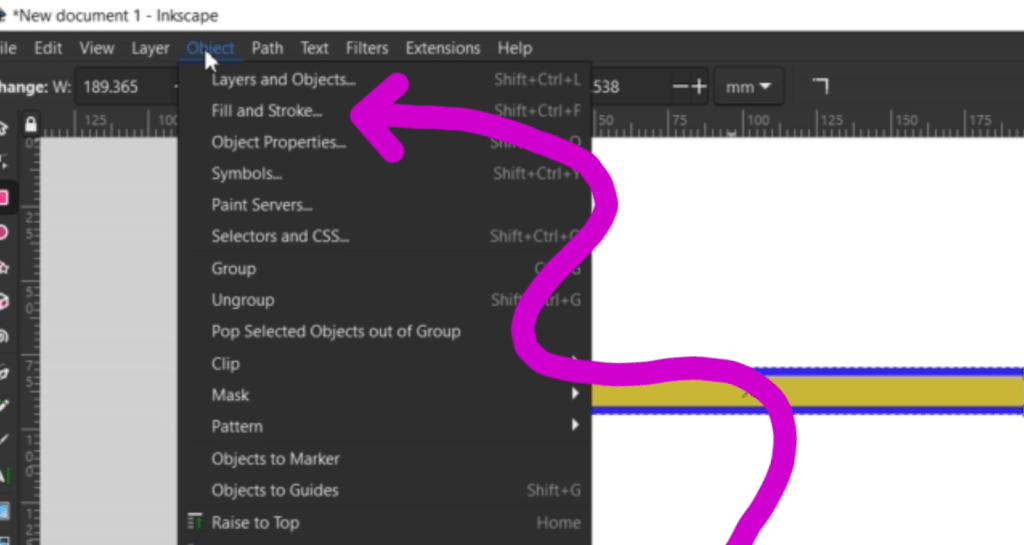
You can then select a fill color under the Fill tab. The Stroke tab is where you can change the color of the outline and the Stroke Style tab is where you can alter the line width.
Once that is settled to your liking, select your rectangle and find the measurement boxes above with the W and H. In-between there is a lock icon and we want that in the unlocked position. 🔓 The type of measurement can be selected in this dropdown menu, I’m going with inches.
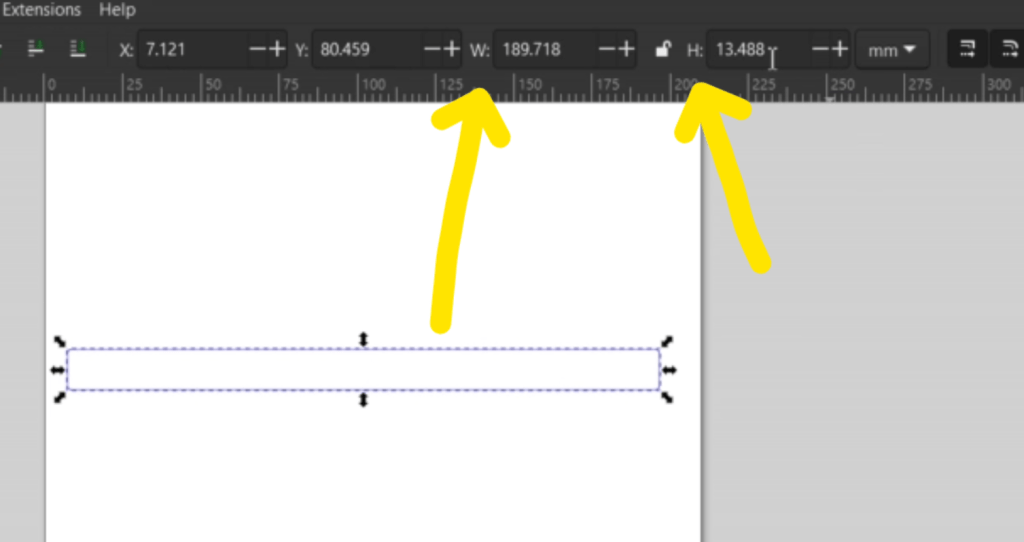
We can now put in the specific measurements we want our plant labels. I want mine at 6 inches wide and one half inches tall.
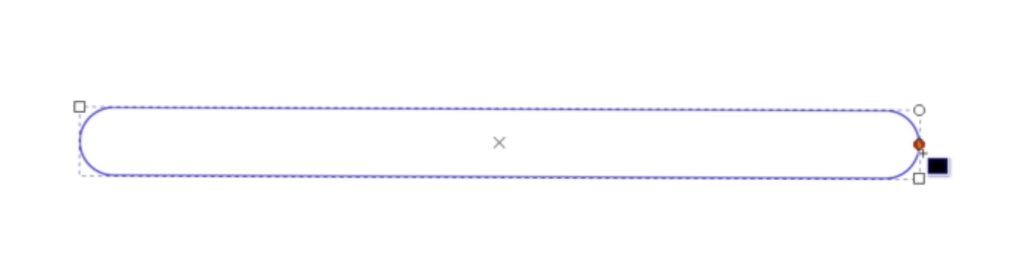
I also want the corners slightly rounded. This is easy. Just double click your rectangle. You should see a square in the corners along with a circle in a corner. Hold the circle and drag it up and down to round the corners.
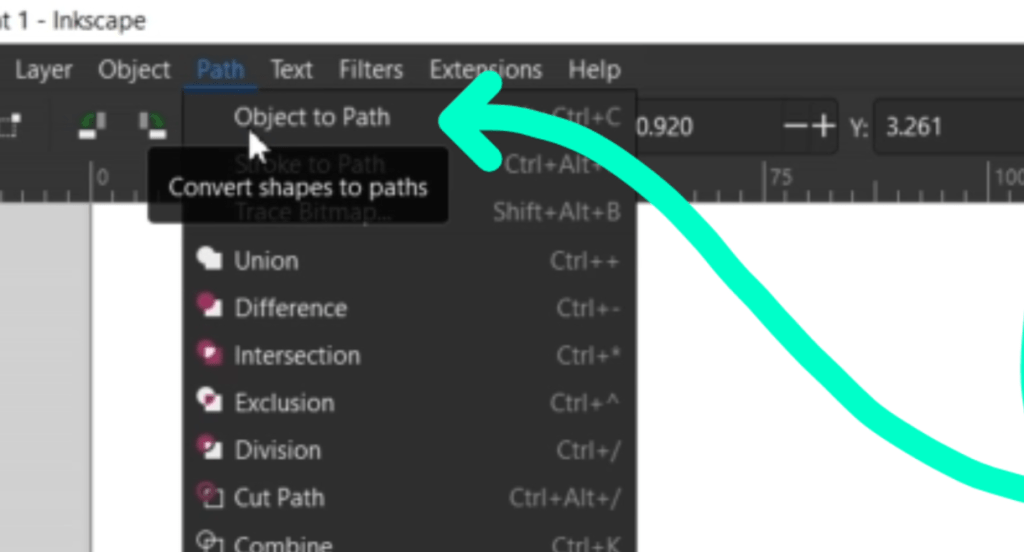
Next, we want the stake part of the plant stake to be pokey, so you can stab these into the soil by your plants.
To do this we just select the rectangle and go up to Path and down to Object to Path. This will turn this into an object we can manipulate.
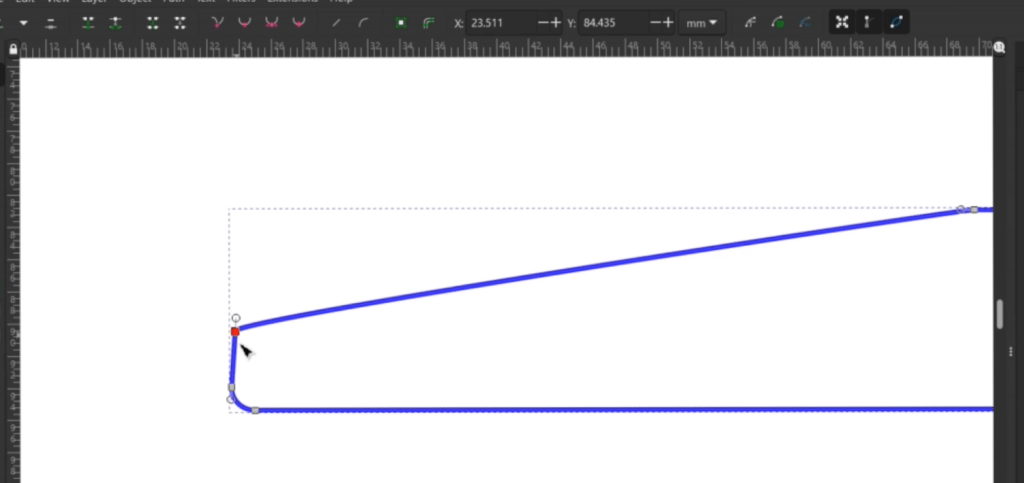
Double click on the rectangle and there will now be circles on the line in the rounded corners.
I’m just going to drag one of these circles over to make the start of my pokey part and lower another dot. If you need to add dots, simply double click on the line to put one there. To delete, select the dot and hit the delete key.
Now these are looking like plant stakes, so we just need to label them!
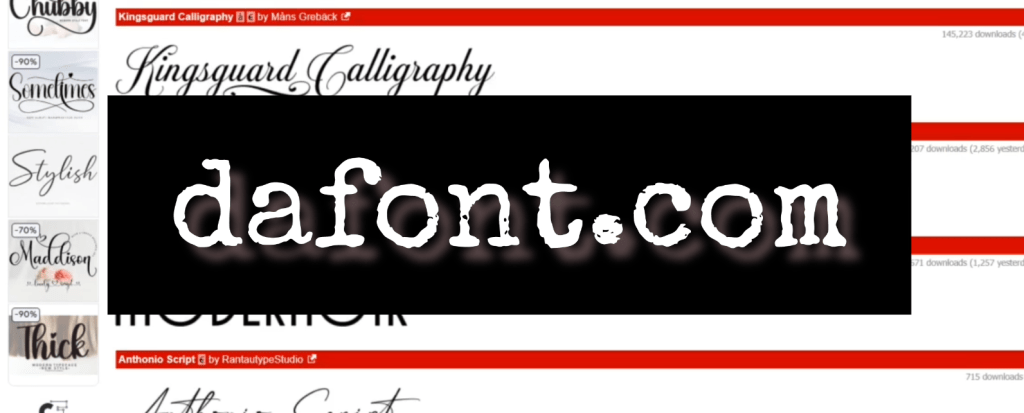
I wanted a fun font and my go to place for absolutely no strings attached fonts is dafont.com. I looked for a typewriter style font, and downloaded it into my font file.
Using the font button on the vertical left-hand bar (it looks like a capital A) the mouse turns into the A and you can click anywhere to start typing.
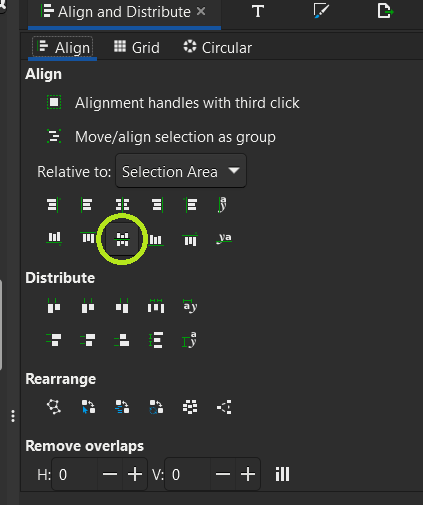
After I typed in broccoli I selected it and dragged a corner down to shrink it a bit. To get it centered on the plant stake, I select both the plant stake and the word, went up to Object and then down to Align and Distribute at the very bottom.
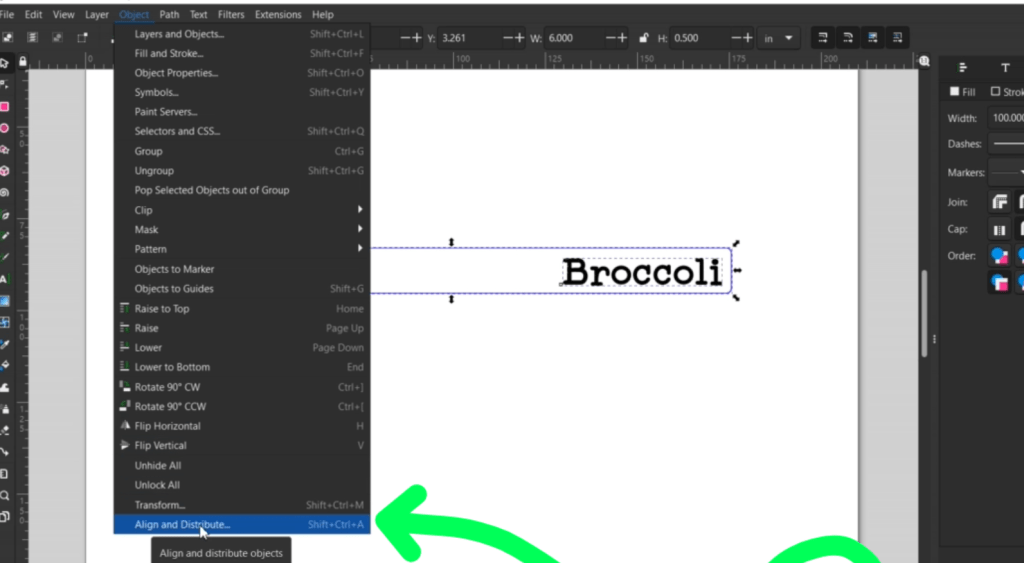
This pops up on the right and then we can select this icon to align the objects in the middle.
I’m going to make a few more by copy and pasting them down and changing out the word.
They engrave and cut super fast! I like to use a clear color to engrave upon. I chose pink to contrast the plants a little bit.
To clean up the engraving area, I used a little bit of Novus #2 Plastic Polish. If you do anything with acrylics, you need this stuff on hand!
These make great gifts for plant people!
If you thought that was easy, check out this next one!
Project 2 – Flower Earring Pendants
Being able to make little pendants is crucial. Not only can you fit these in around other laser cut projects, but they pack a profit!

To make some Flower Charms for Earrings, we need to draw a circle. The circle button is right under the rectangle one we are familiar with now.
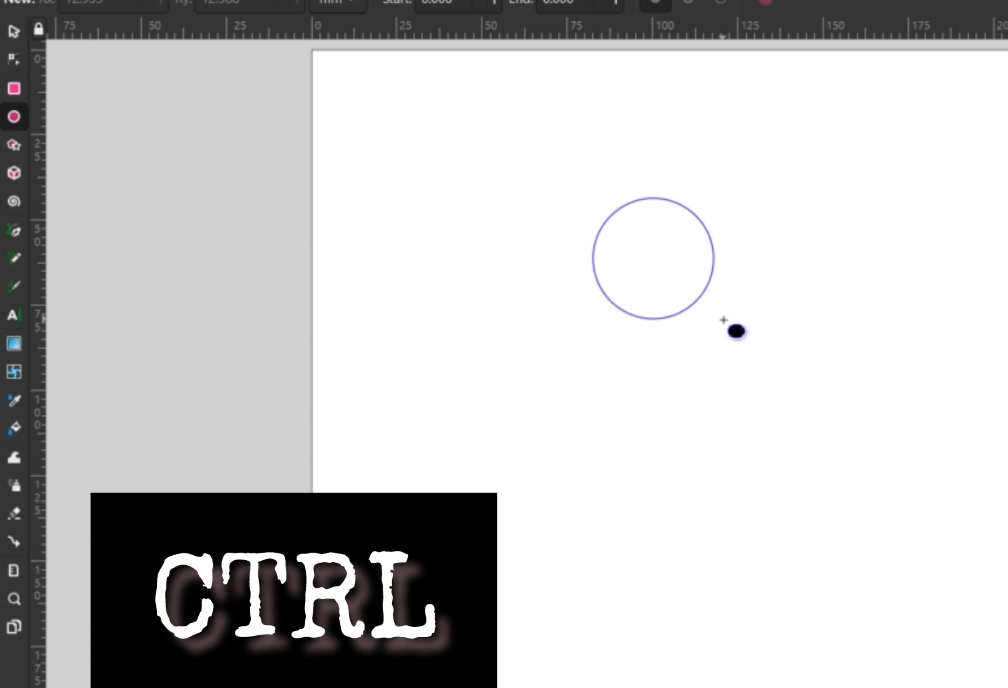
To make a perfect circle, hold down the CTRL key when you drag out a circle. The size doesn’t matter yet, we can alter that later.
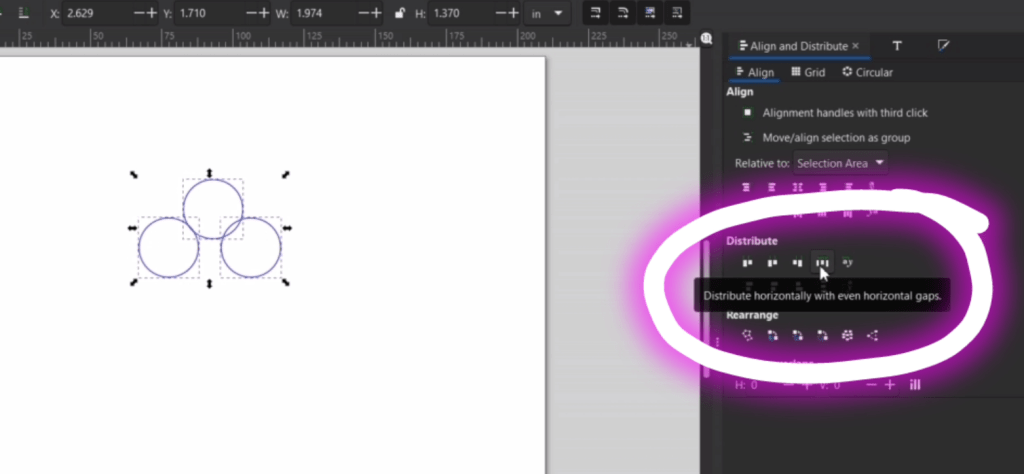
Not I am going to make a few copies of this circle. The 2 middle flower petals I would like to be aligned, so we can use the align bar on the right leftover from opening it in the last project.
You can align these from the bottom, or the middle since they are the same size, then I select all the petals and distribute them evenly with the distribute horizontally button.
For the bottom petals we copy and paste two more and go through similar steps with aligning. I kept nudging everything, aligning and distributing until it was even.
It’s great practice to learn about all these buttons and what they do!
Now I want the bottom 2 petals to be perfectly aligned to the top petal. To do this, I select the 2 bottom petals and go up to Path and down to Union.
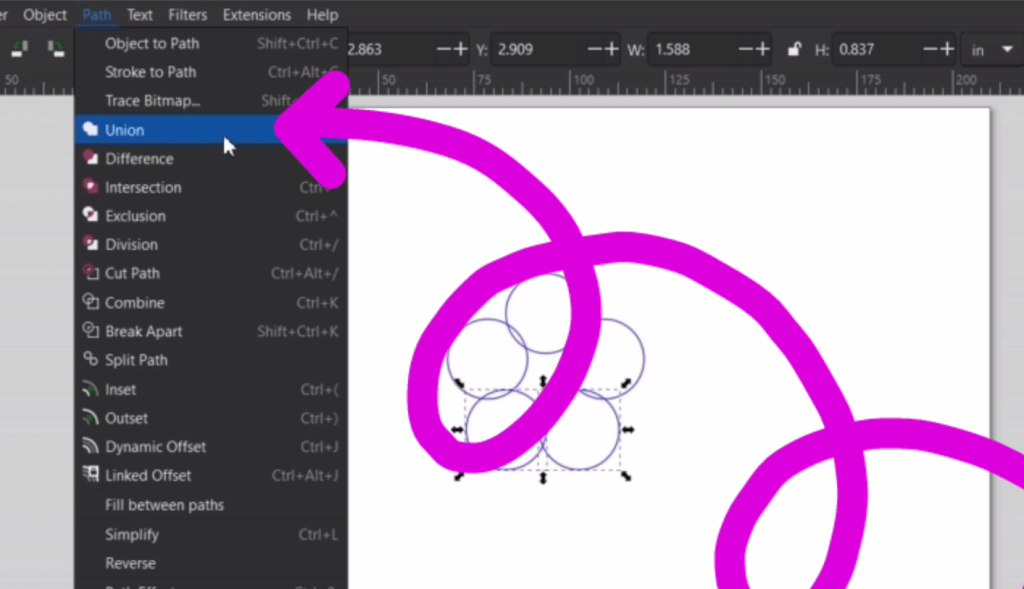
You can use the Union function again with the middle 2 petals, even though they aren’t overlapped. Now I can select everything and align them down the middle.
Once everything is selected, go up to Union again and now they are all one shape!
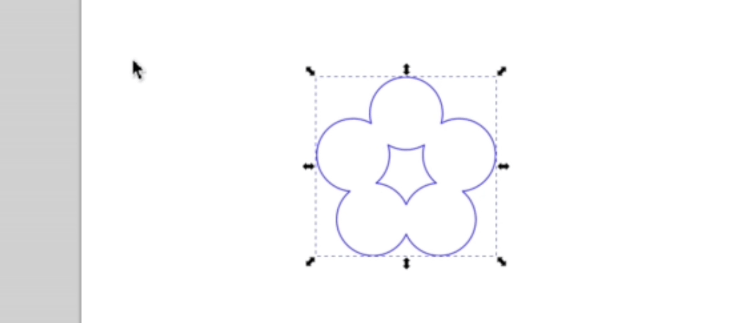
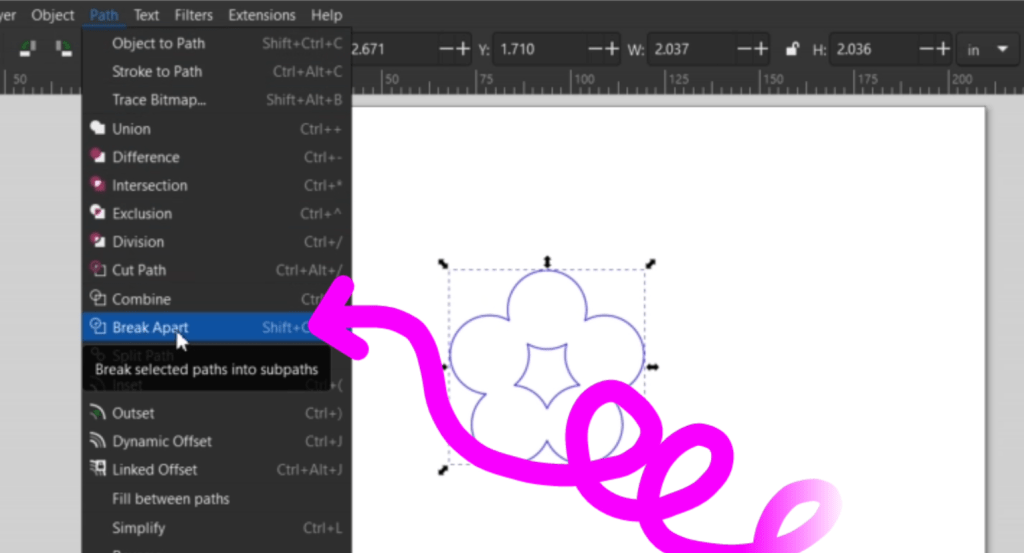
We want the middle shape gone, so while the flower is selected, go back up to Path then down to Break Apart. You can now select the middle shape and delete it.
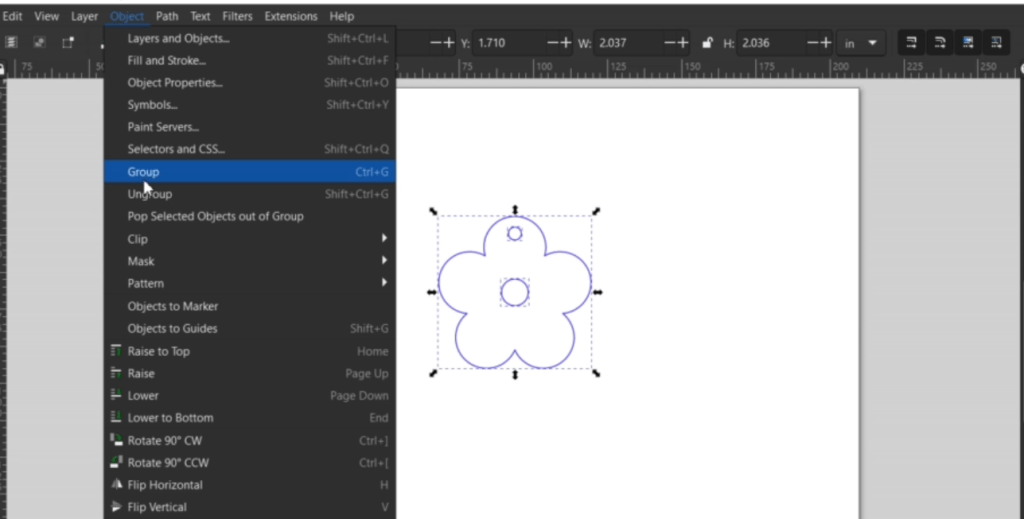
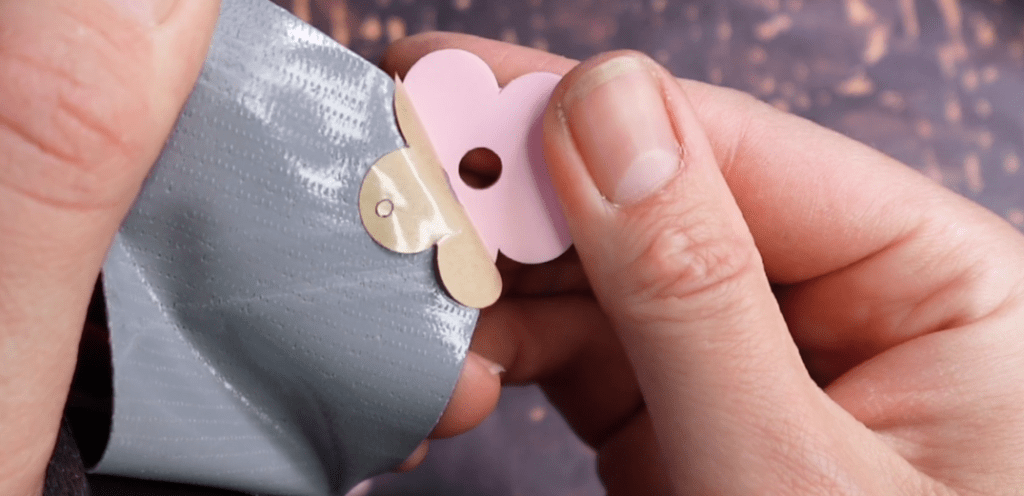
We just need a little hole in the middle and a hang hole now! You get the concept of aligning things now, so once everything is aligned vertically, select it and group it together by selecting Group under the Objects tab, right clicking and selecting Group or pressing the CTRL and G key at the same time.
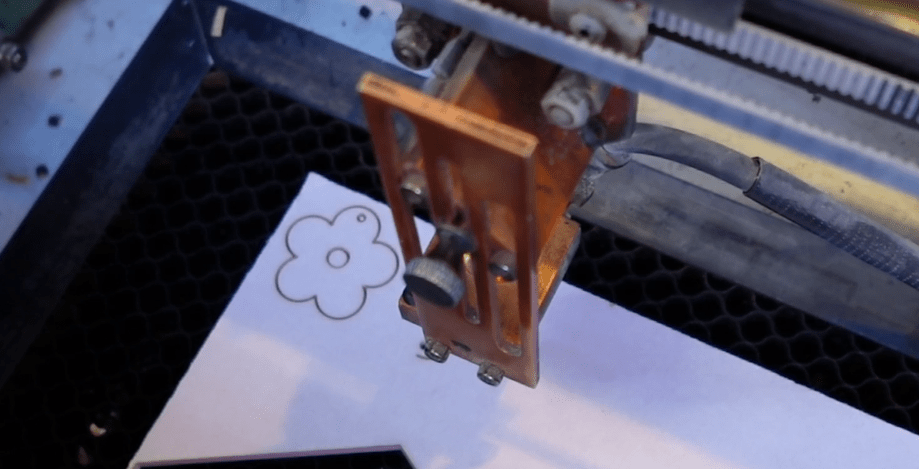
Now I just need to adjust the size and laser it out!
If you use acrylic, one way to get the masking paper off easier is with a bit of strong duct tape, like this Gorilla Tape.
Like I said before, it’s great to add little things, such as jewelry, to your crafting list. It helps to use up extra little bits of acrylic and wood, so there is no waste!

Plus, they are so cute!
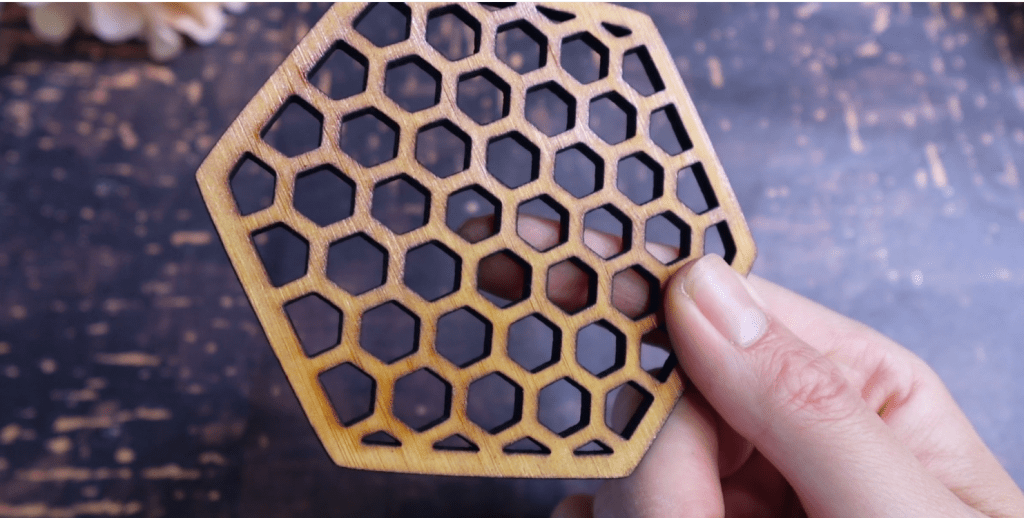
Project 3 – Beehive Coaster
Did you know if you own a laser you are legally obligated to make coasters at least once? This beehive coaster looks hard to design, but it’s not and I can prove it.
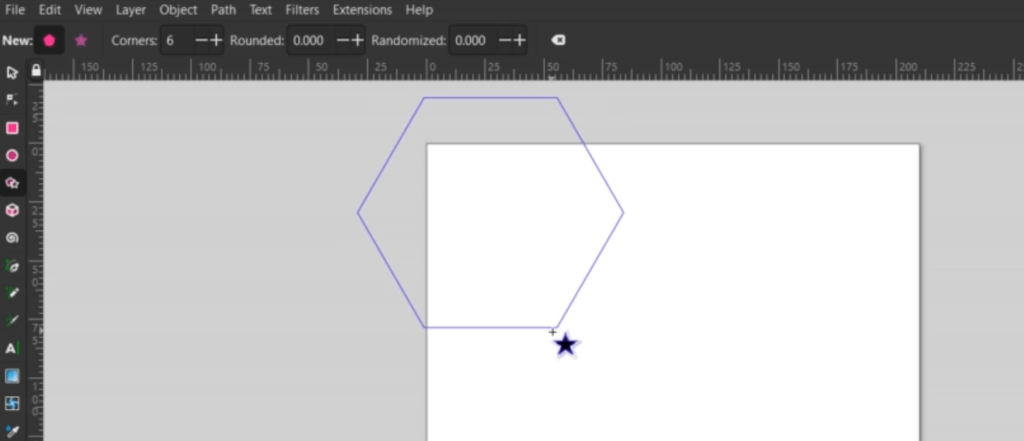
We’ve done a rectangle, we’ve done a circle, now let’s whip out some hexagons!
Select the polygon shape button underneath the circle button on the left.
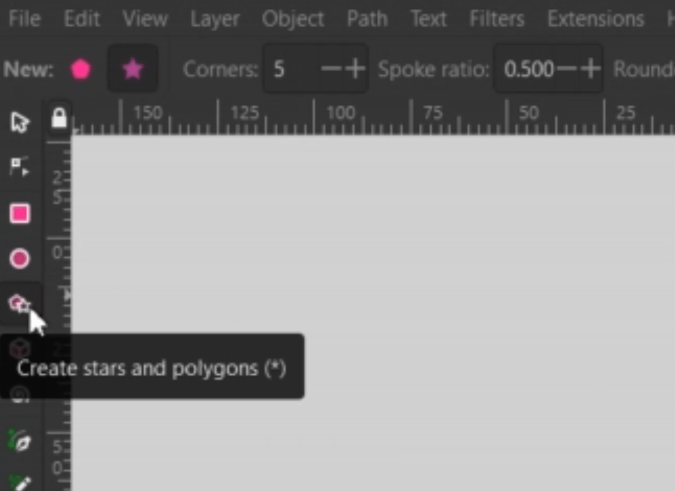
Before we draw out a shape, make sure the Polygon shape is selected on the top bar along with 6 corners.
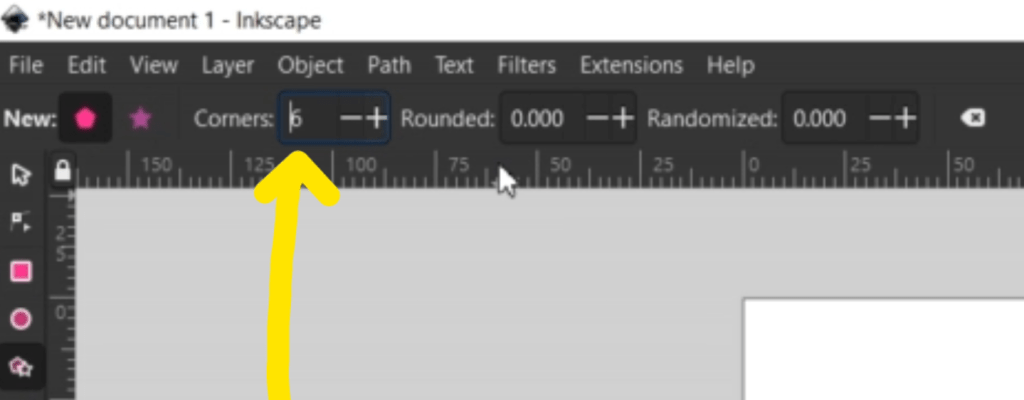
Hold down the CTRL key while you drag out our hexagon to make the sides parallel.
If you’d like to get a little roundy with this, you can do that up at the top bar, too. I went with .05 on the Rounded scale.
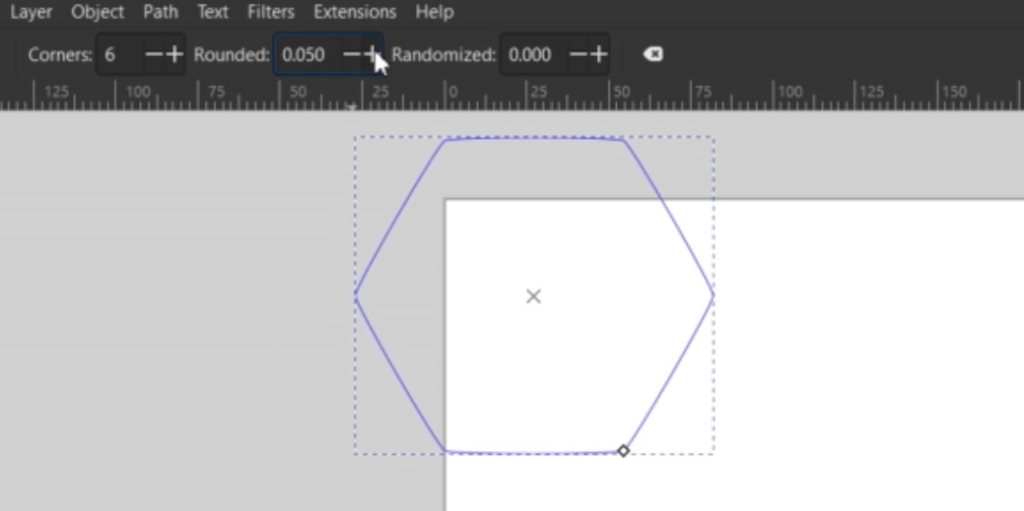
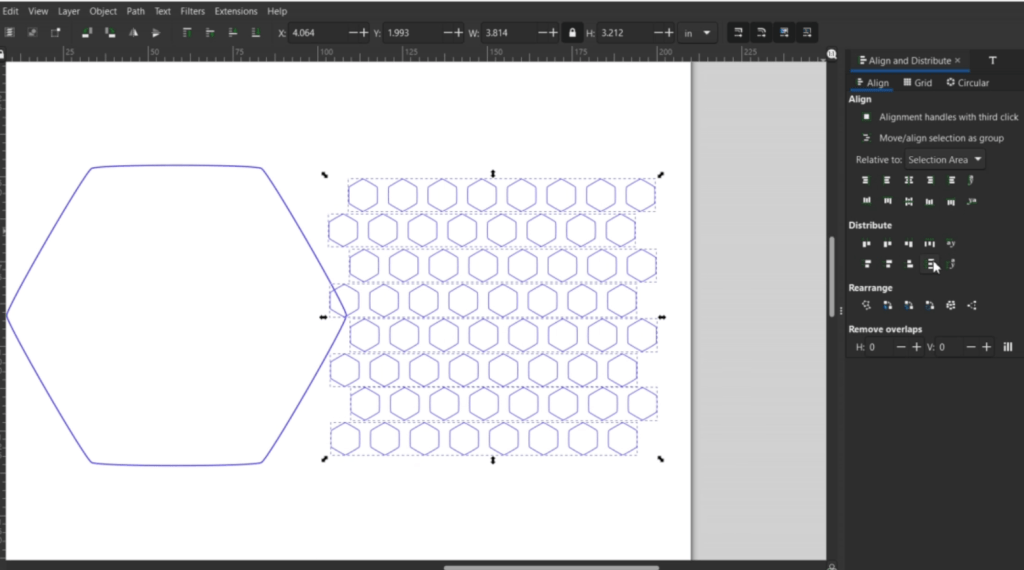
This is going to be our main big outline shape. Now we need to make a bunch of little hexagons for the middle.

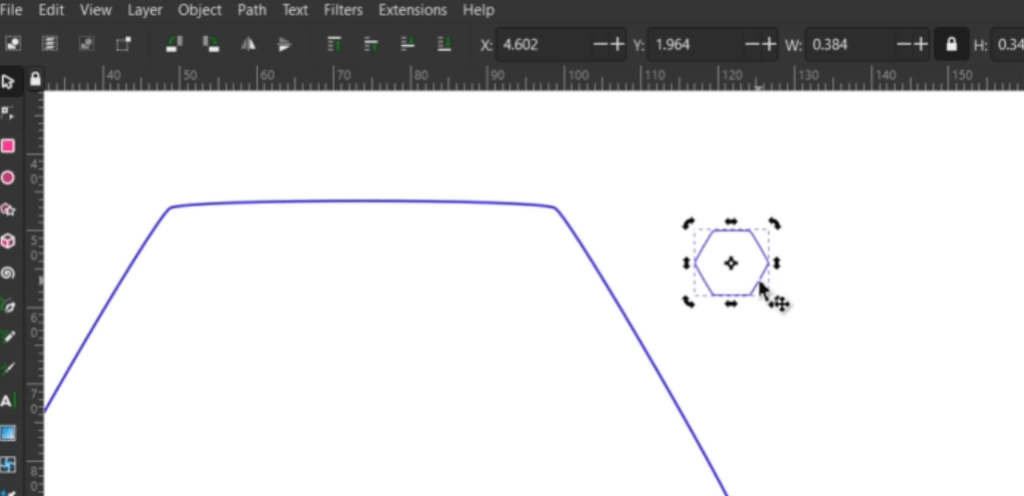
I just draw another hexagon holding down that CTRL key. The round scale will transfer over to the new shape so everything is similar. Make sure you select the mouse icon in the left bar and double click it. The pointing arrow in the corner will turn into rounded arrows and allow you to rotate it. If you hold the CTRL key while you rotate it, you can make sure it clicks into place.
Now I just copy and paste a whole bunch of these fellas. Using what we know about aligning and distributing, I get these in order. I select all of them and make a copy of the line. I tried to put them underneath the first row as good as I can and then distributed the two rows.
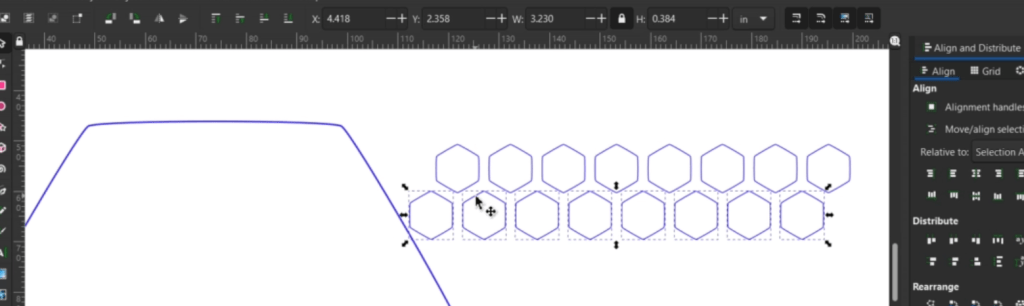
I copy and pasted more and then went and grouped each row so I could distribute them vertically.
Next up is where the magic happens.
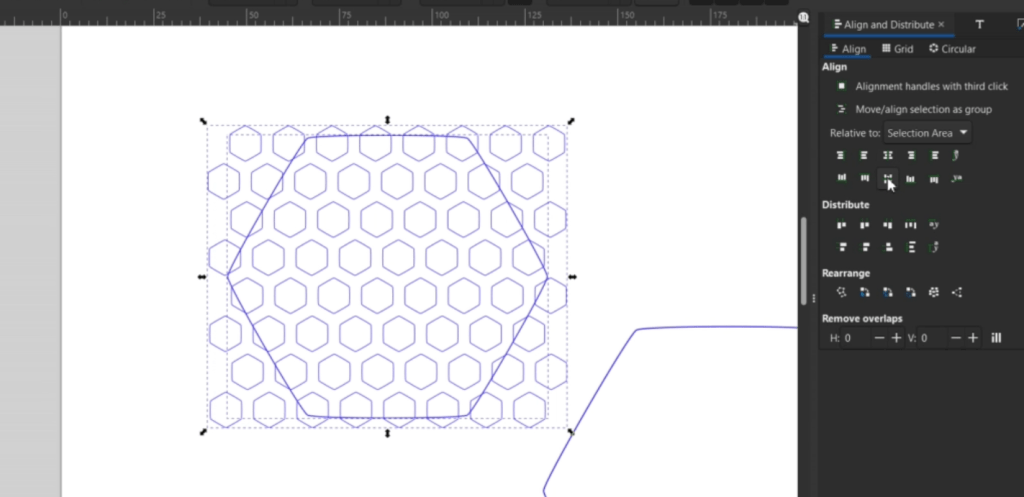
Make a copy on top of the big hexagon by pressing CTRL + D and take a corner to scale it a bit down by selecting it and dragging a corner in. Set it aside.

Ungroup all the tiny hexagons. While they are still selected, go up to Path and down to Union.
Now center the grouped little hexagons with the shrunk down bigger hexagon with the align tools.
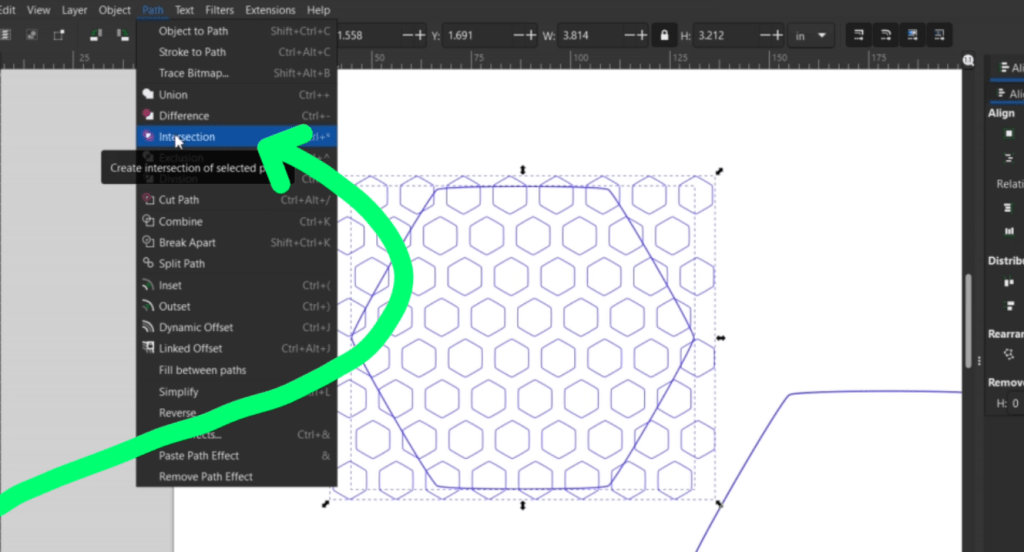
While they are both selected go up to Path and down to Intersection.
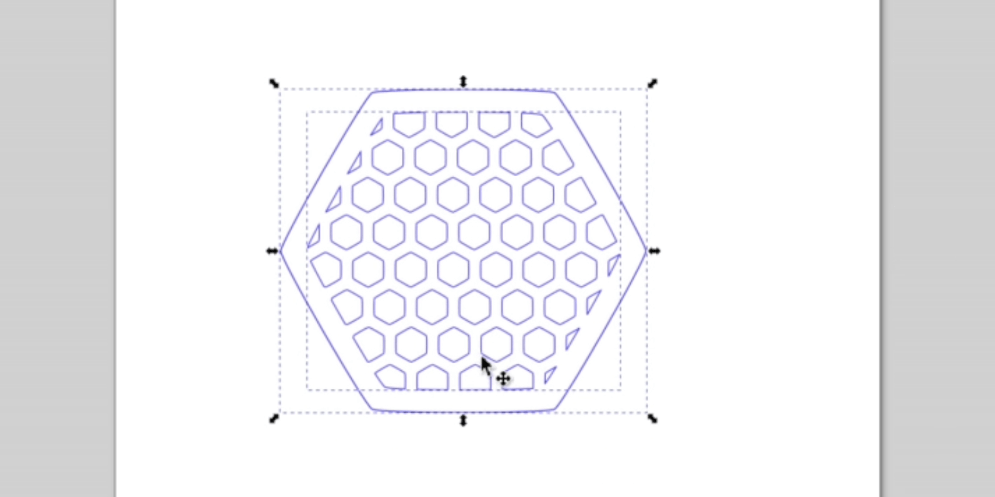
Tada! Now you just need to center this into the original big hexagon! Just adjust the size to a coaster size, or maybe a little bigger for a plant pot, or decorative bowl, honey pot, you name it!
I laser cut mine out of this MDF Core Real Bamboo Wood from Craft Closet. I just sanded the scorch marks off and it’s all done!
We just need to learn a few more tricks with the next project for the grand finale!
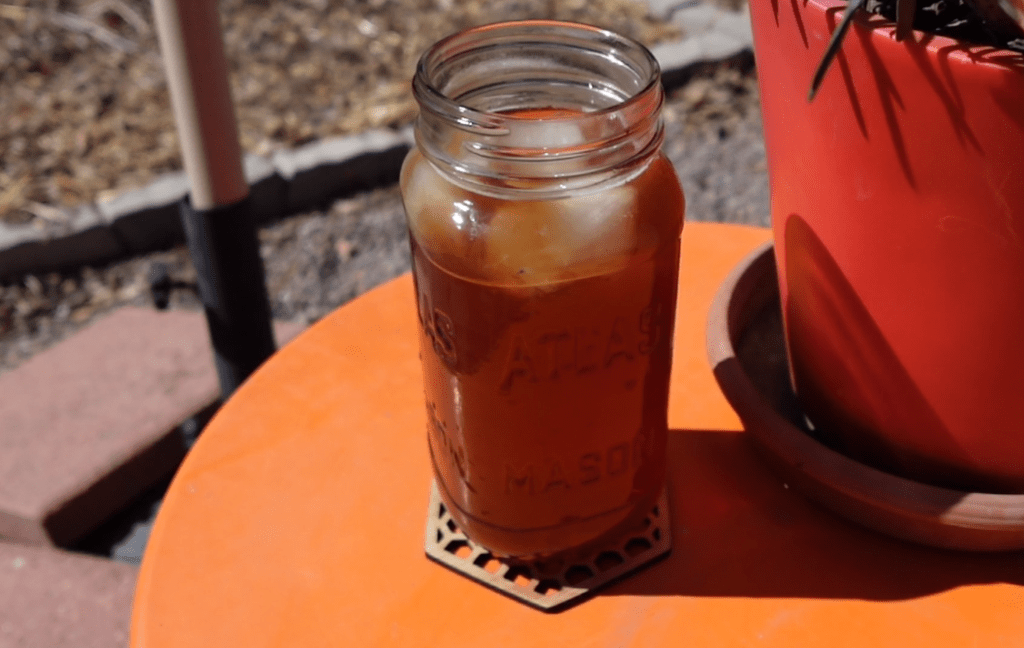
Project 4 – Personalized Drink Stir Stick
Did you know if you own a laser you are legally obligated to make a drink stir stick at least once!
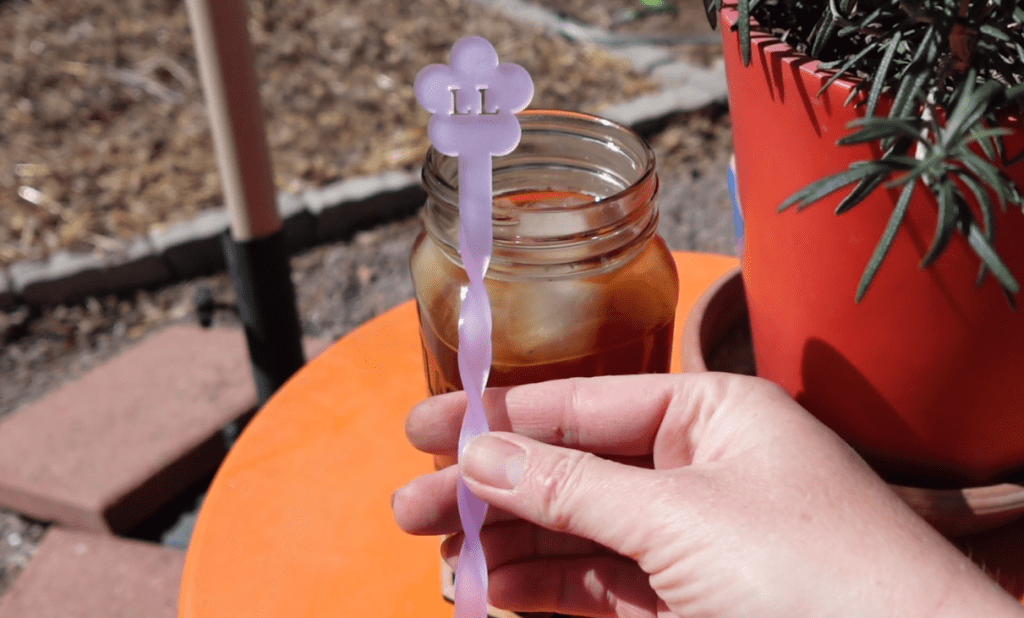
Jokes aside, this project highlights how to alter text to be cut lines, so let’s get to it!
Believe it or not, you are already capable of making this stir stick shape with the lessons we’ve learned!
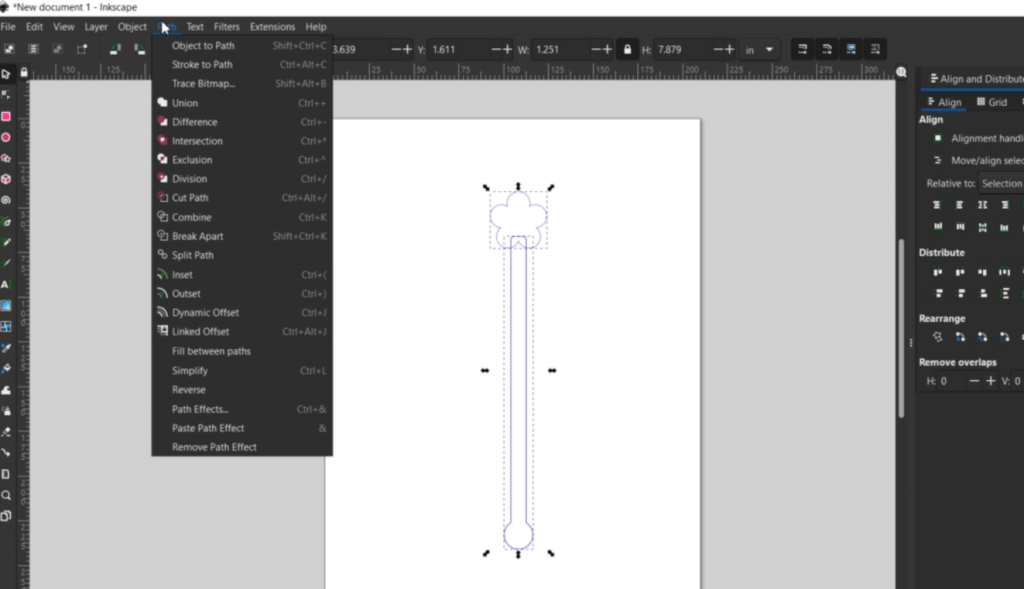
Just make a rectangle, make it the size you want, I went with 6.5″ tall and .35″ wide. Draw out a little circle for the bottom. Align it.
Copy one of those flower earring shapes. Ungroup the main flower shape from the holes and align that, too!
Now, select everything and combine it with the Union function!
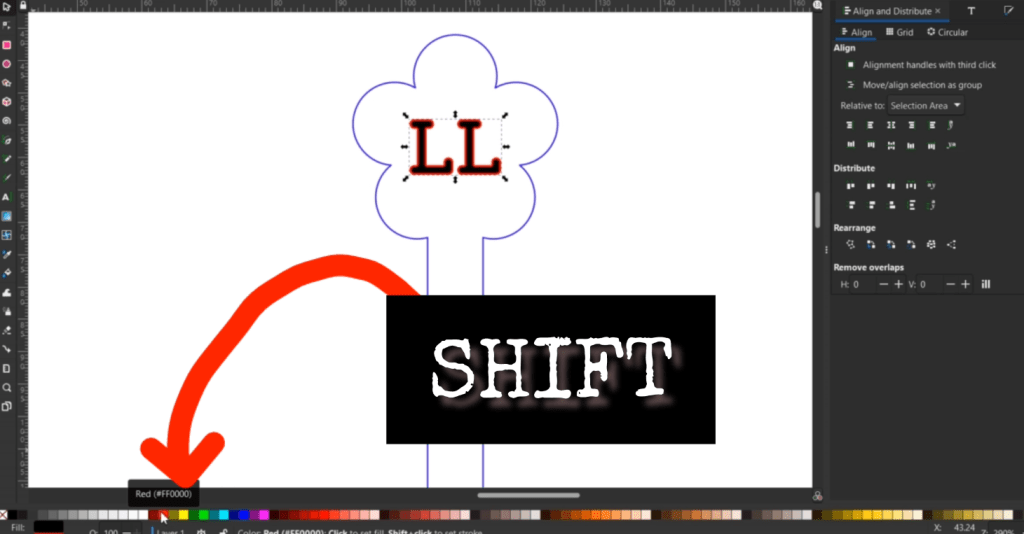
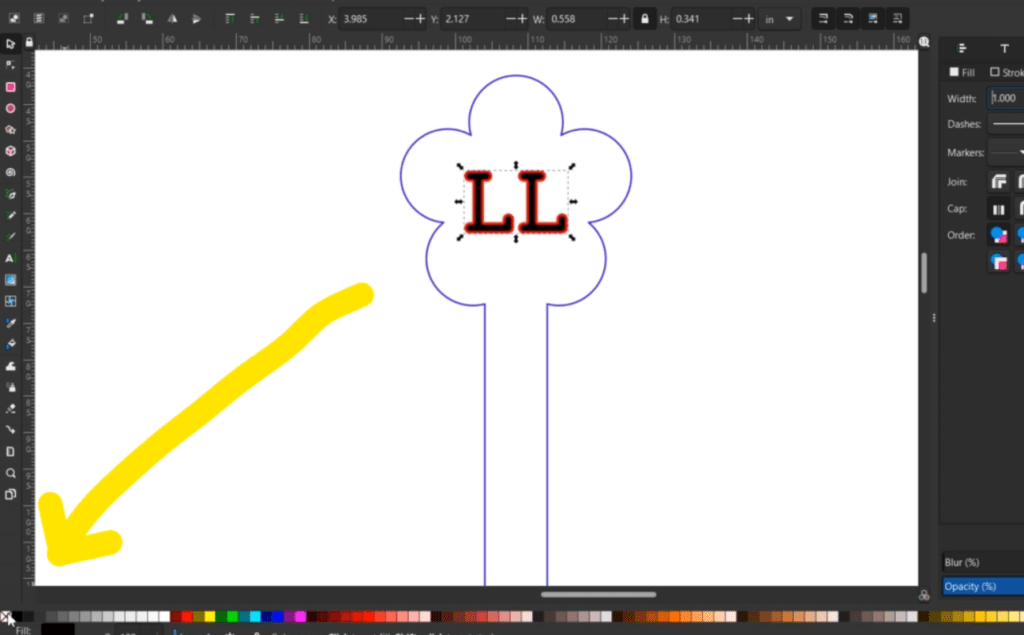
Here’s the new things to know. Type out your word or initials. When we are cutting out letters, pay mind to the font so you don’t lose chunks of your text. Luckily LL for Laser Lady works here.
I am going to adjust the letter spacing a little bit here first. Select the letters and go Path down to Object to Path. You can now Ungroup them and nudge them around a bit.
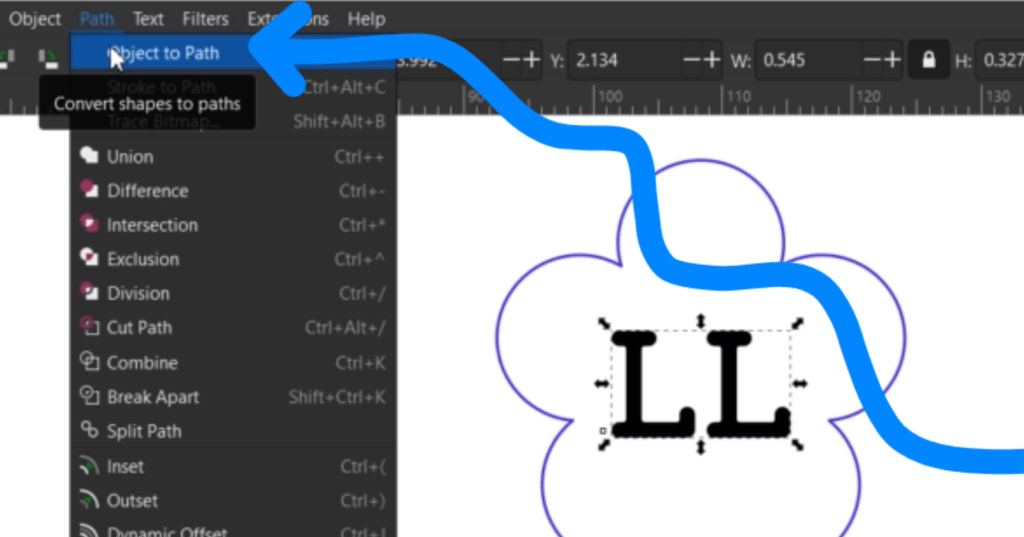
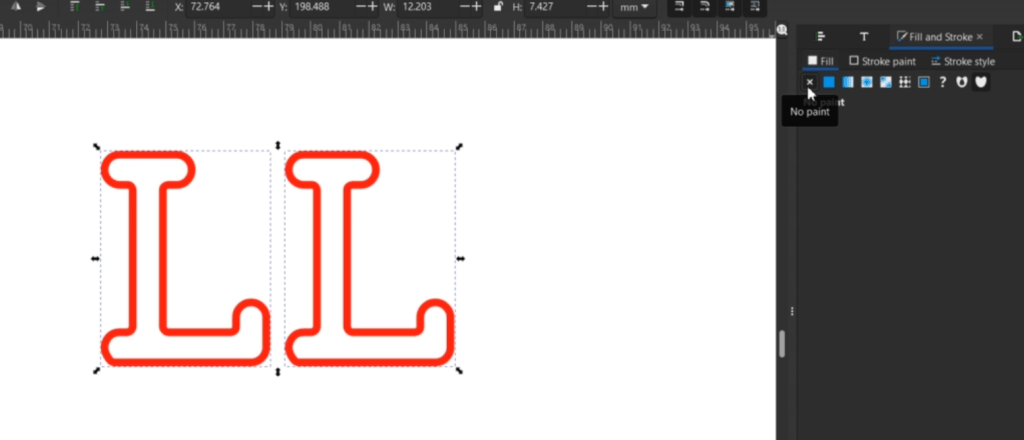
To make the text a cut line all we need to do is select the letters. Hold the SHIFT key and select a color along the bottom color bar or select a color under the Stroke Paint tab in the Fill and Stroke tab in the right side control panel.
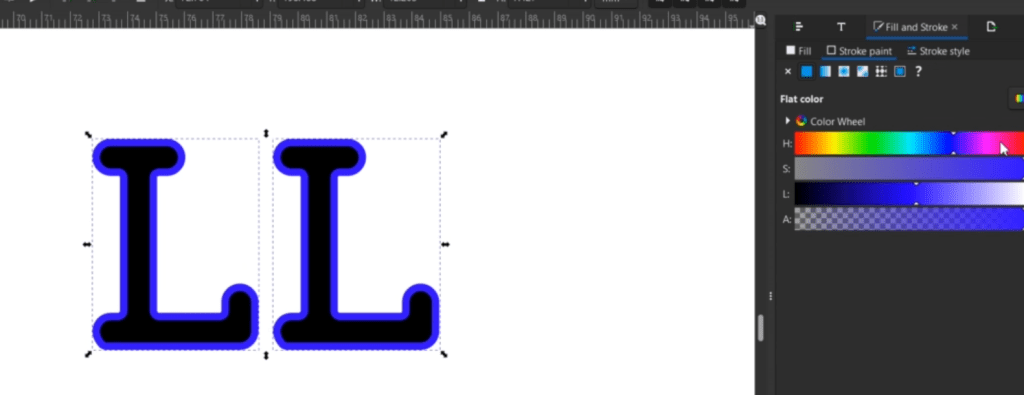
Now you can clear out the color in the same fashion. Using the left-most white box with the red x in it along the bottom color bar or under the Fill tab.
You can adjust the width of the line, along with everything else in the Stroke Style tab and there you have it!
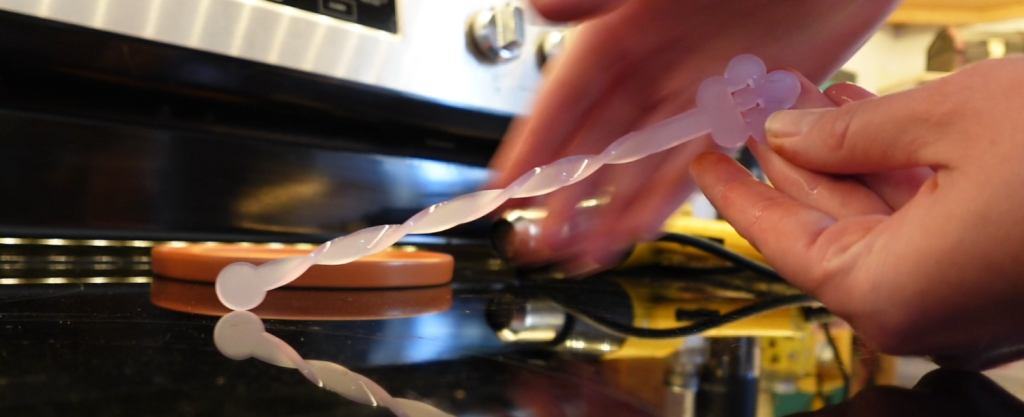
This cuts out quickly and in typical Laser Lady fashion, I need to make it extra with a little bit of heat shaping.
Now we know everything we need for the final project, and one of the most popular things to do with your laser!
Project 5 – Make a Custom Layered Sign
Being able to make your own layered laser cut sign is a huge step but now we know everything we need to master it!

To save us all some time, let’s just glide right over the process.
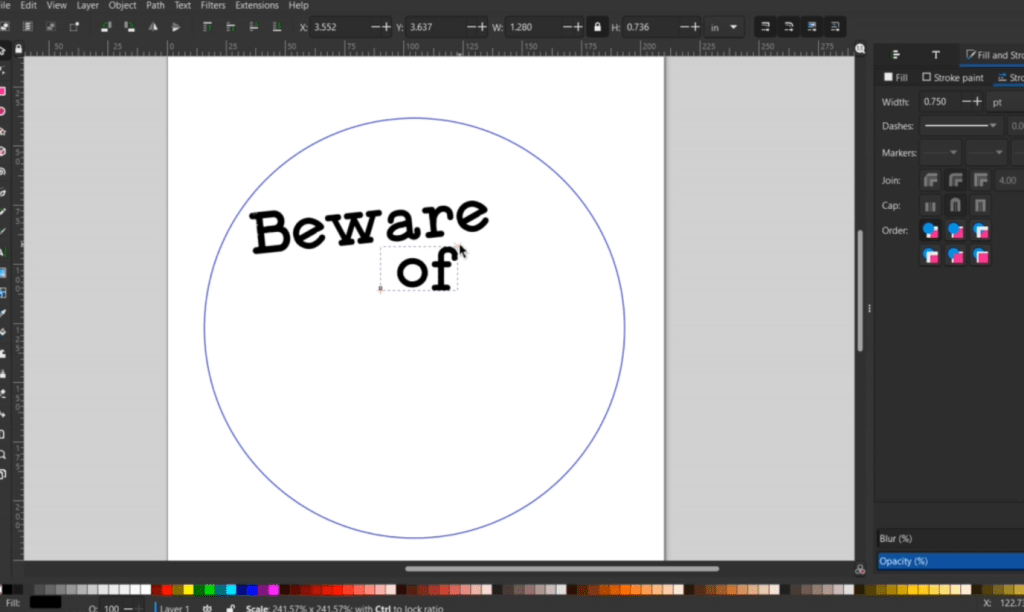
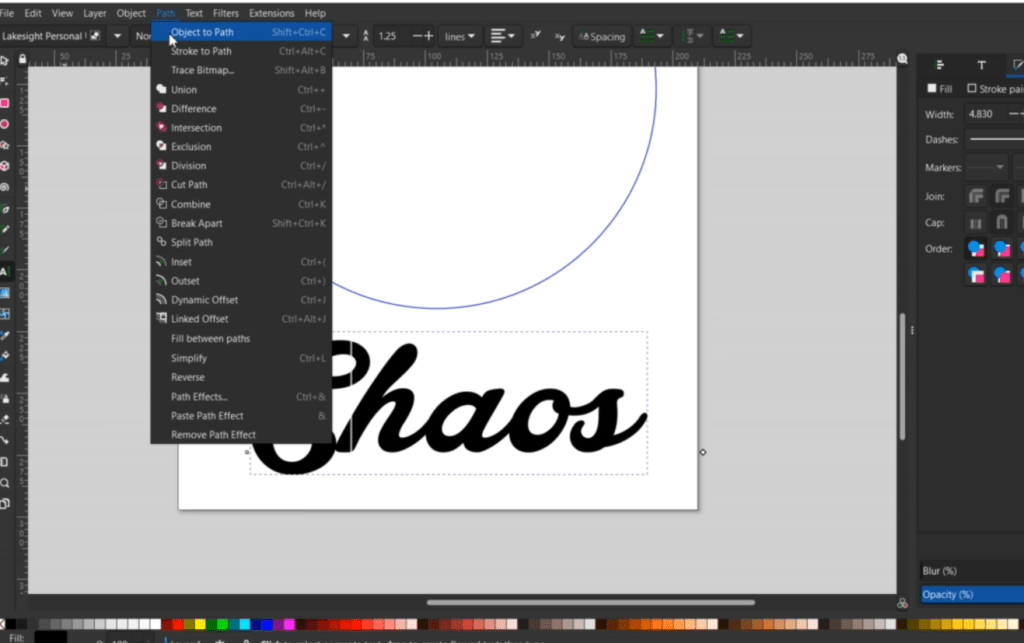
First, we are going to make a nice big circle and start fiddling with some text. I know I want it to say “Beware of Chaos Gardening”. I want all the letters expect for the word “Chaos” to be engraved on the main circle. “Chaos” will be cut out and layered on top.
To keep all the letters together, I am going to choose a cursive style font. I want to nudge these together a little bit, so I select the word, and go up to Path and down to Object to Path.
After I Ungroup it, I can move the individual letters around.
Now, I select the whole word and go up to Path and down to Union like we did with the stir stick! Outline it with a cut line and let’s keep on designing!

Using the flower shape from the earrings, I get rid of the hang hole and make a few copies and place them around the sign. These will be cut out separate, as well.

I put in a hang hole and then there’s a bit more fiddling with placement and I decide I want some lines engraved in the middle.
I make some thin rectangles then align and distribute them. I Union them together and make a duplicate of the large circle with CTRL + D.
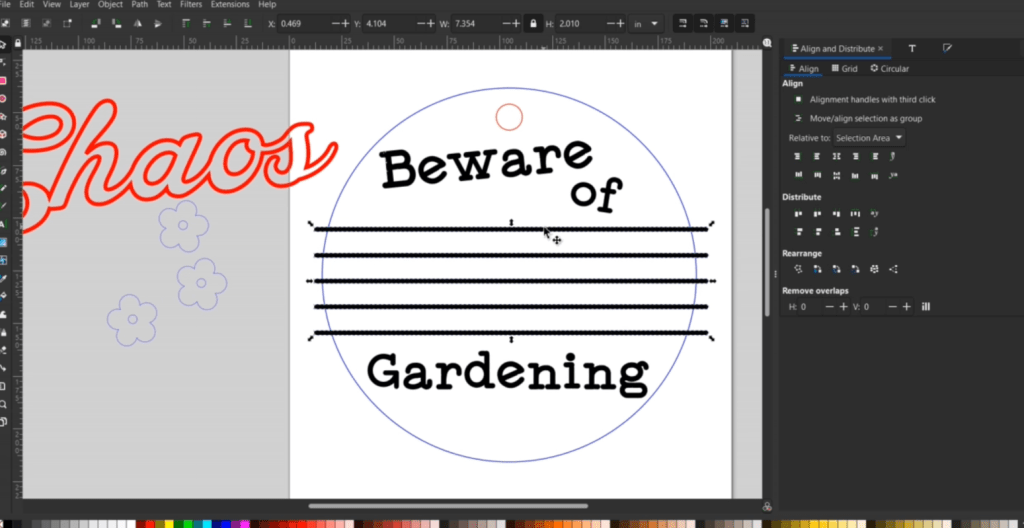
Having the extra circle selected along with the rectangles, go up to Path and down to Intersection.

Select the outlined rectangles that now fit inside the circle and clear out the outline and fill with black so it is engraved, or however your laser likes things so it engraves it. They all have their own little personalities, don’t they?
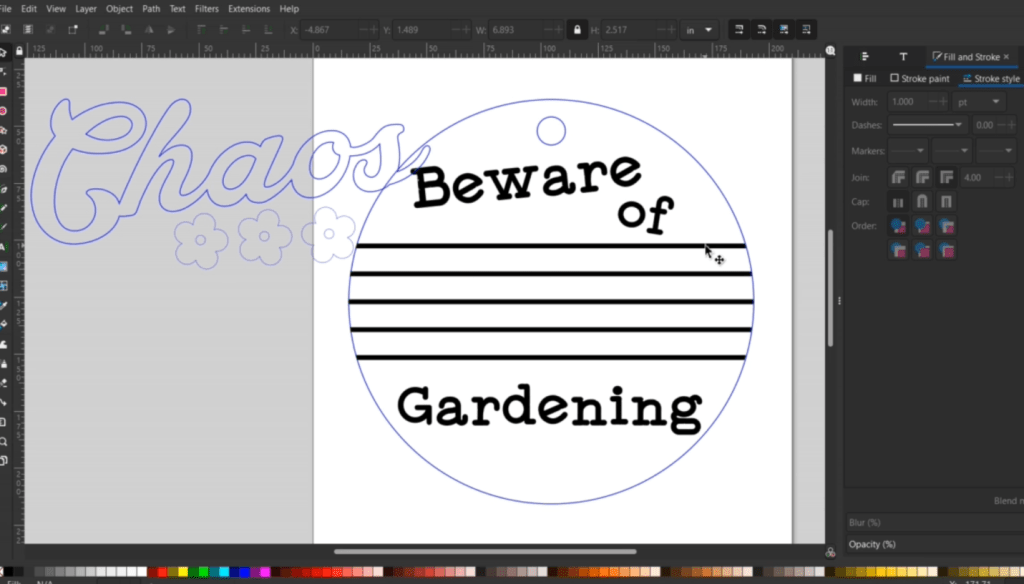
Now I can go in and make all the cut line colors match along with the width of the lines and we are ready to cut it out!
I am using regular wood for this, cuts like butter.
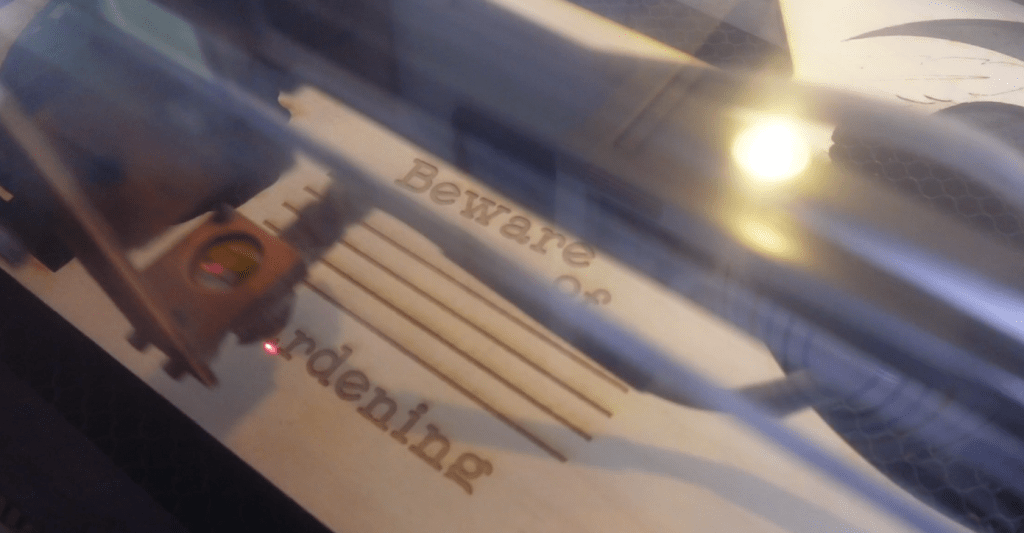
This wood takes on paint and stain really well. I just need to sand down a few bits. To paint the lines, chaos word and flowers, I use my handy Sharpie Oil Paint pens. Any type of paint or paint pens are great for this.
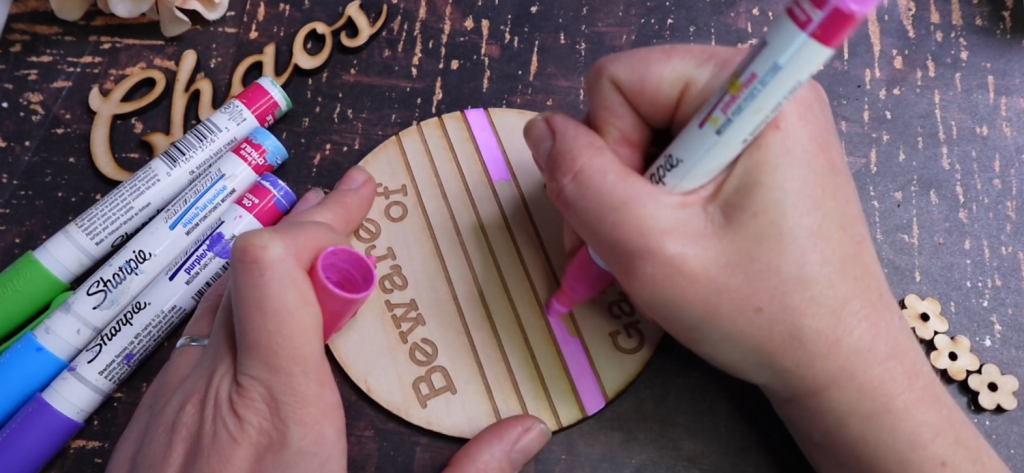
I glue the bits in place and once it is dry I go over it with a bit of stain and finish it up with some clear spray varnish.
I like a rustic look, but obviously your signs will reflect your unique art style!

Knowing these basic functions in Inkscape will allow you to make your own laser cut files! There are always more than one way to come up with the same result, and in time, you will find even faster ways to do all of this!
Thanks for making it this far in and Happy Crafting!
➕ Subscribe to my YouTube Channel HERE

Leave a comment