

Increase Your Wow-Factor for Only $1.25
10 Free Downloads Await! Sign up for Creative Fabrica’s All Access Free Trial and enjoy 10 free downloads to kickstart your creative projects.
✨ Dollar Store Supplies
⇢ Paper Gift Bags
⇢ Shot Glasses
⇢ Bamboo Cutting Board
⇢ Galvanized Mason Jar Stand
✨ Extra Materials Needed
⇢ Gorilla Glue Contact Adhesive
⇢ Wood Stain
⇢ Sawtooth Picture Hanger Hooks
⇢ Acrylic – 💚 Save 10% with code: LASERLADY
✨ File Downloads for these Projects
⇢ Cow Meat SVG (Creative Fabrica)
The best place to get some creative juices flowing is at the Dollar Tree! Looking around the place, I was inspired to try out a bunch of ideas! Success was maybe only at 85%, but my potential profits will the MASSIVE! Go grab a couple bucks and let’s get inspired on a budget!
➕ Subscribe to my YouTube Channel HERE
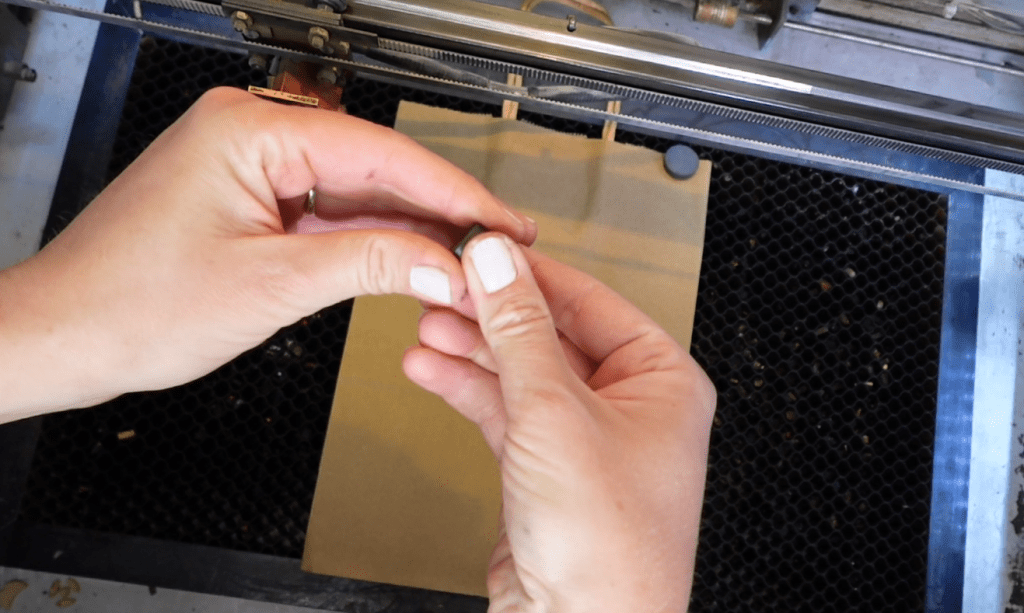
Project 1 – Engraved Gift Bags
One of the first things I found for my laser were these gift bags. I ca easily make some customized bags for the sales I will hopefully make this weekend!

Since it is just paper, I used some magnets to keep it flat and in place while it engraves.
There is one trick to engraving paper and is usually my number one asked question – what settings do you use? My 40w CO2 laser came with it’s own laser program, and there are so many programs out there, so yours might have different numbers, settings, bells and whistles.
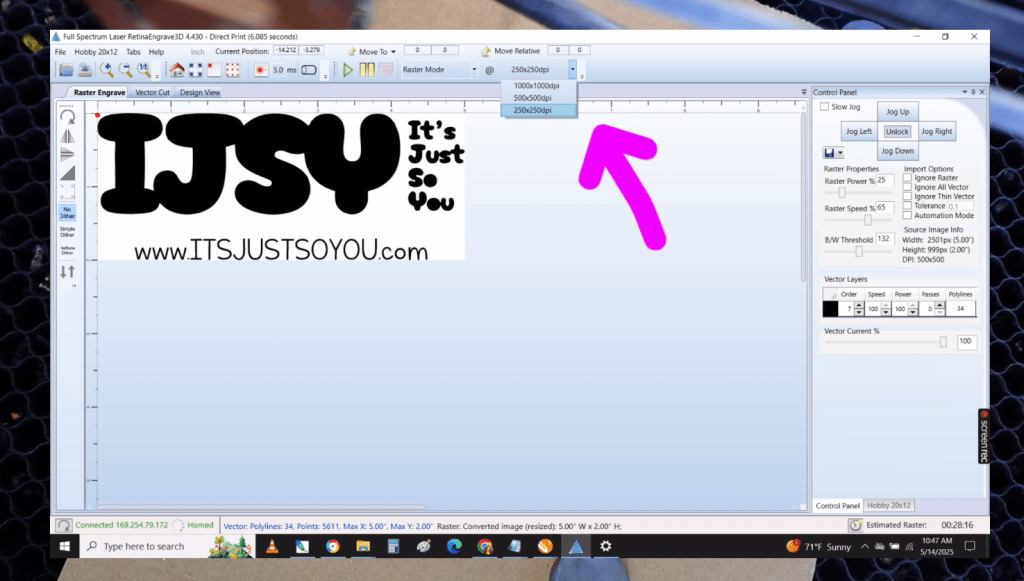
For my laser I can set the “dpi”, which affects the y axis width, to very low, the power very low and the speed pretty high. Mine goes off percentages, while yours might be a mm per second sort of a thing.
Nail down your settings with an old card or mail laying around.
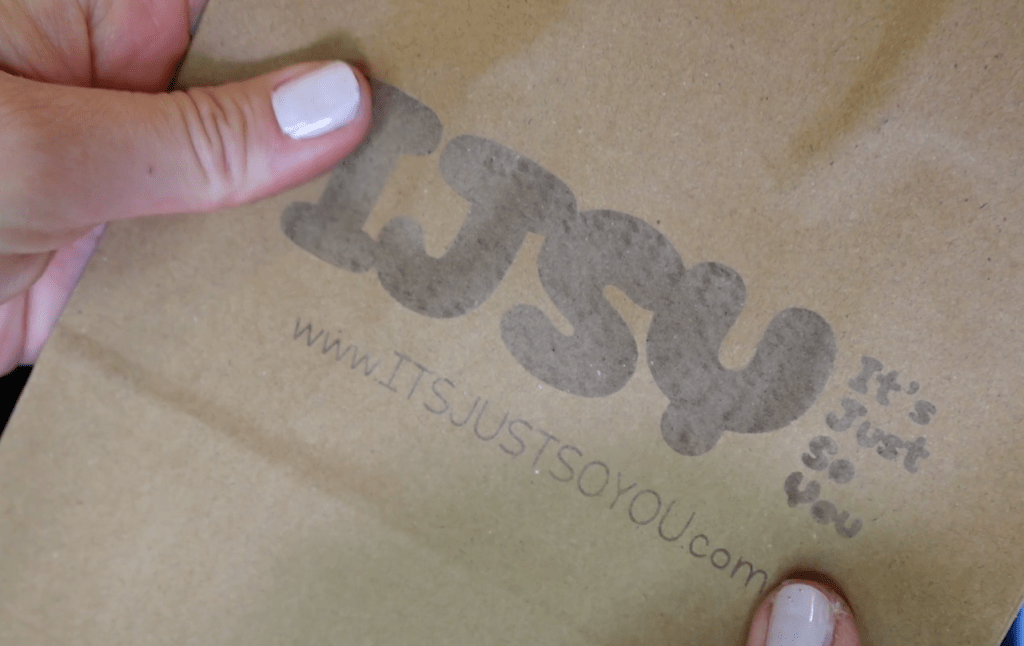
Now I can give these out to customers! Very impressive and pretty quick!
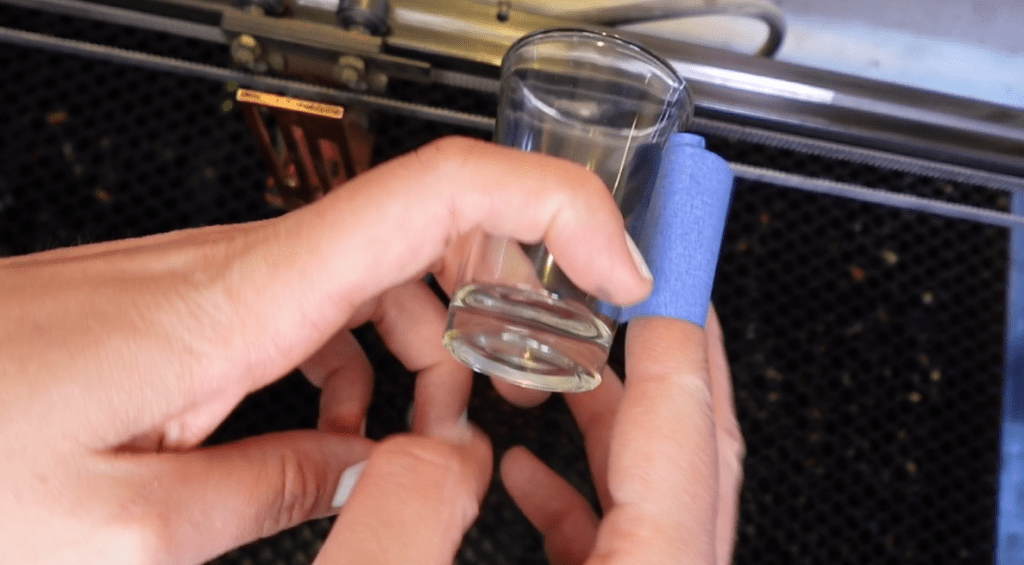
Project 2 – Engraved Shot Glasses (No Rotary Needed)
I really wish I could engrave a tumbler like this, but I don’t have a rotary attachment. No problemo! We’ll just engrave these shot glasses instead!
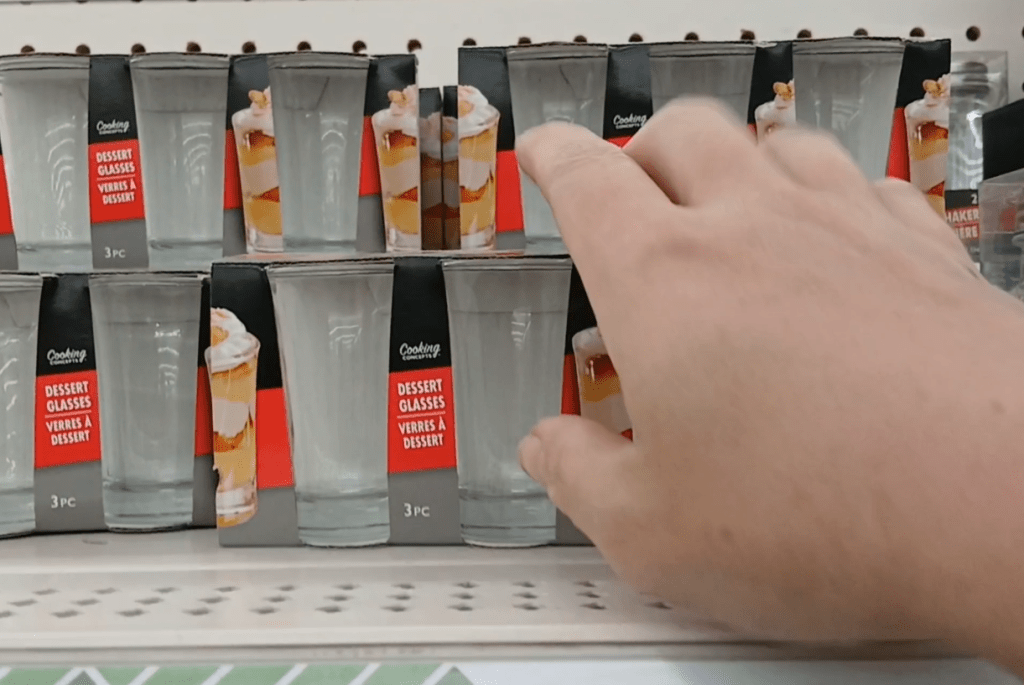
I don’t drink hard liquor, and I sure don’t make desserts this small, but I do have a super duper cute idea for these shot glasses!
Since they are so small, we should be able to engrave a little something on here without too much trouble! If you have a diode laser, you will need to cover the engraving are with tape, paint or marking liquid.
These are tapered, so I need to try to even it out a little bit. I used the magnets to make a little snuggly place for it to lay propped up. To keep it from wiggling, I used a bid of folded over masking tape.
I have 3 cute designs for these, which I will have as a free download for you, too!
I just engraved them one by one. Can you guess what these are for?
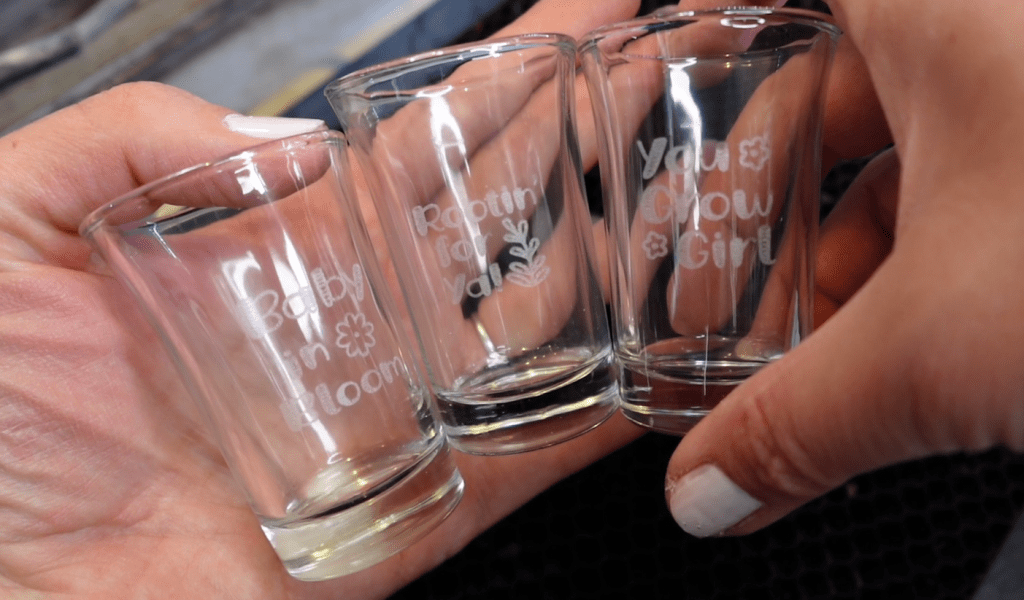
The number 1 thing I do with shot glasses are to root plant cuttings! Now they have a cute little home to root on!
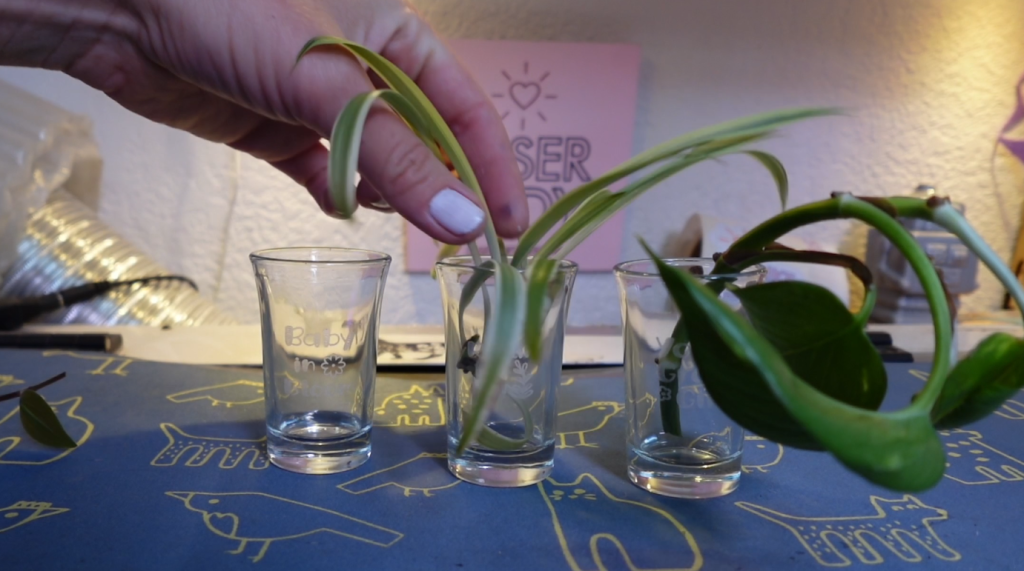
Maybe I’ll make a little stand for these one day! I feel a new product idea coming on!
Project 3 – Bamboo Cutting Board Wall Hang
These bamboo cutting boards are thick, sturdy and a great deal! I see them all the time engraved with silly little somethings, I’ve done it myself! BUT-
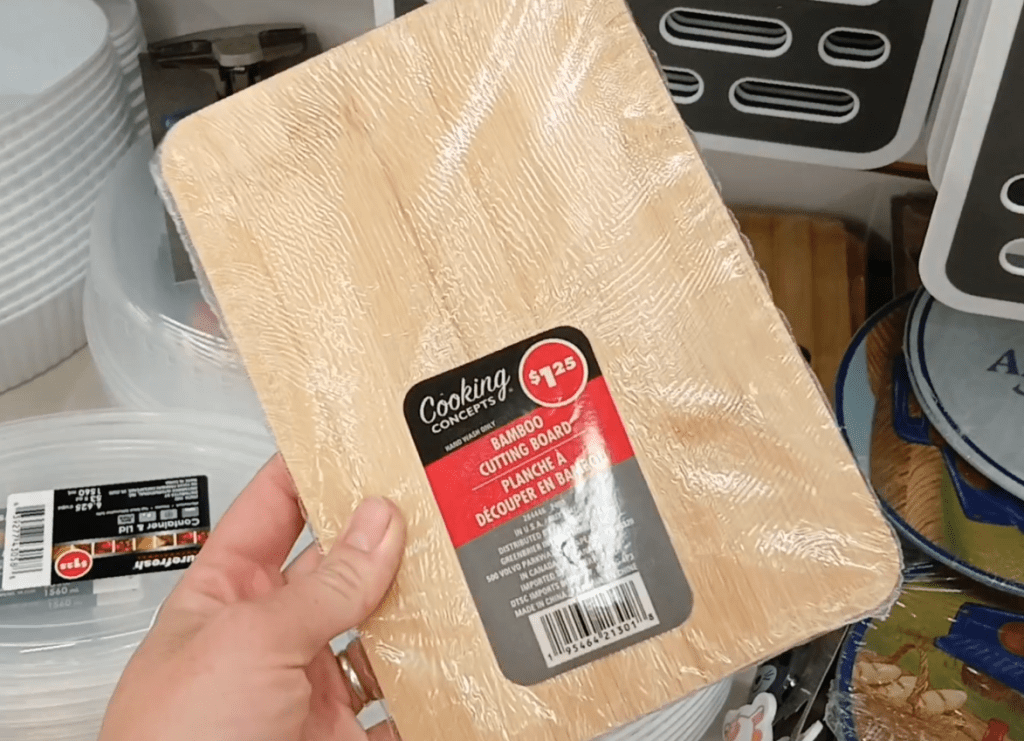
They are too small to actually cut food on and once engraved, you wouldn’t want to anyway. So, let’s make a fun sign with it instead!
I got this Cow Meat Cuts image on Creative Fabrica.
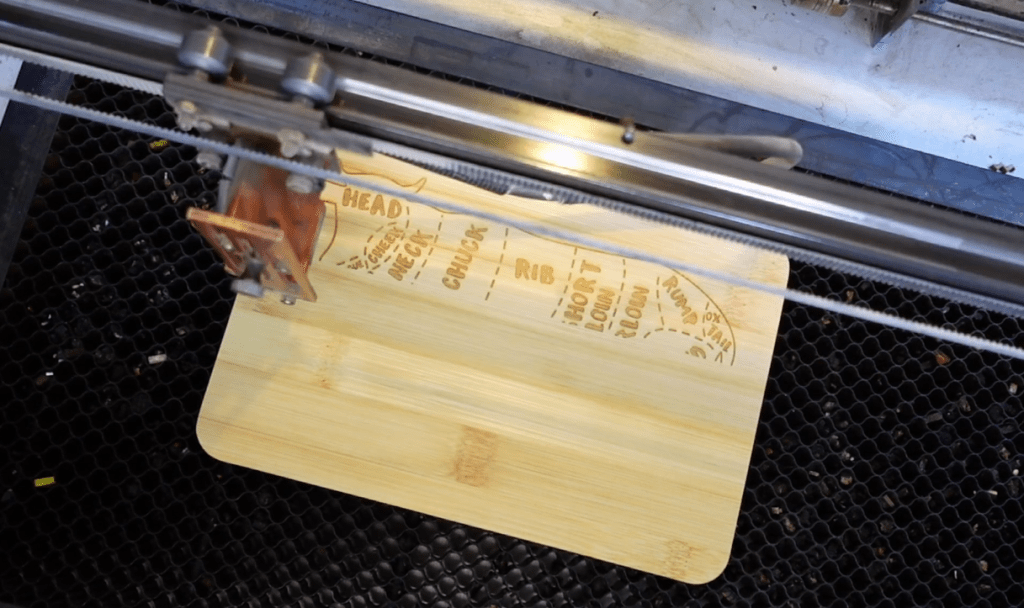
It’s my go-to place for laser downloads and svgs. I altered the image a bit to do a vector etch line around the engravings. I have many inkscape tutorials, if that is something you’d like to learn.
It’s really as simple as engraving it and you’re done! Just joking.
To really finish this up, I first sand it a little bit to remove any blowback residue and any finish the board has on it.
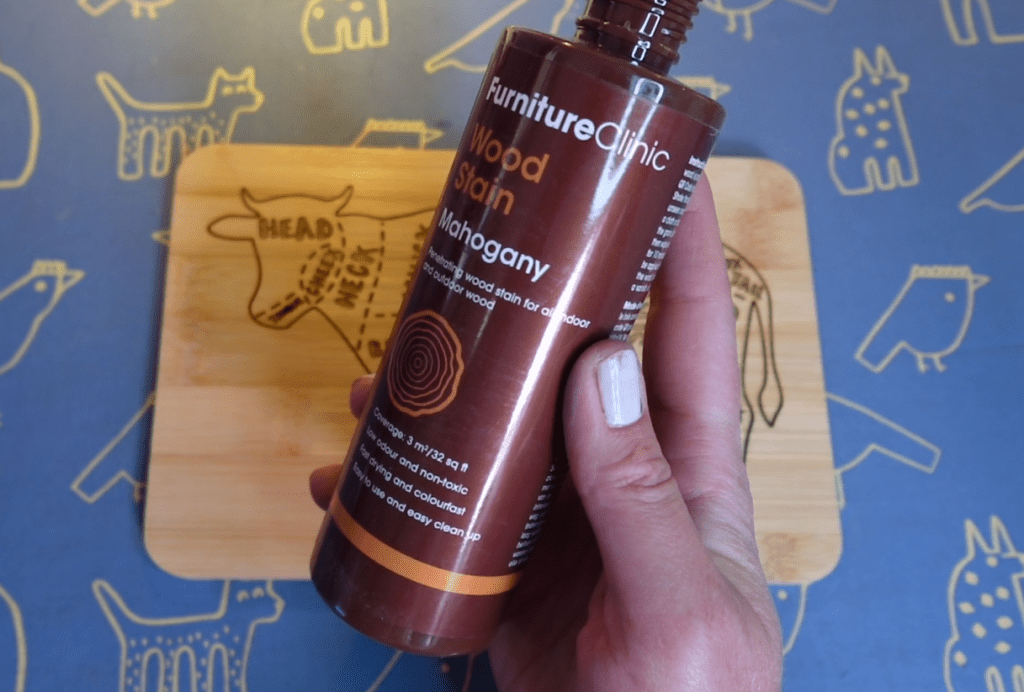
Now I am going to color in the cow with my favorite no odor super awesome wood stain. This color is Mahogany.
Once dry, I just go over it again a little bit with a medium fine sand paper to pop out the words. After sprayed it with a clear varnish, and slapped a hang hook on the backside, I finish it up with my brand sticker made from engraved wood veneer.
Beautiful! I am absolutely going to try to sell this at that event this weekend! How much would you sell it for? Let me know in the comments!
Failed Projects That Didn’t Work, but That’s Ok
Before the last project, I wanted to mention the 2 projects that failed! I’m just a real person, not everything I think up of works.
I wondered if I could laser cut this chalkboard because of it’s MDF core.
Nope. Don’t do it, it was on fire a little bit. Now we know. Plus, it’s a great time to say it is really important you have proper air flow and fans, or else this could have been worse!
Next, another cow! I spray painted it white, colored in some wild cow spots and got to engraving. A couple minutes into engraving I realized it should have said UDDERLY Insane! Whoops! Plus, the design would be better if the paint were darker.
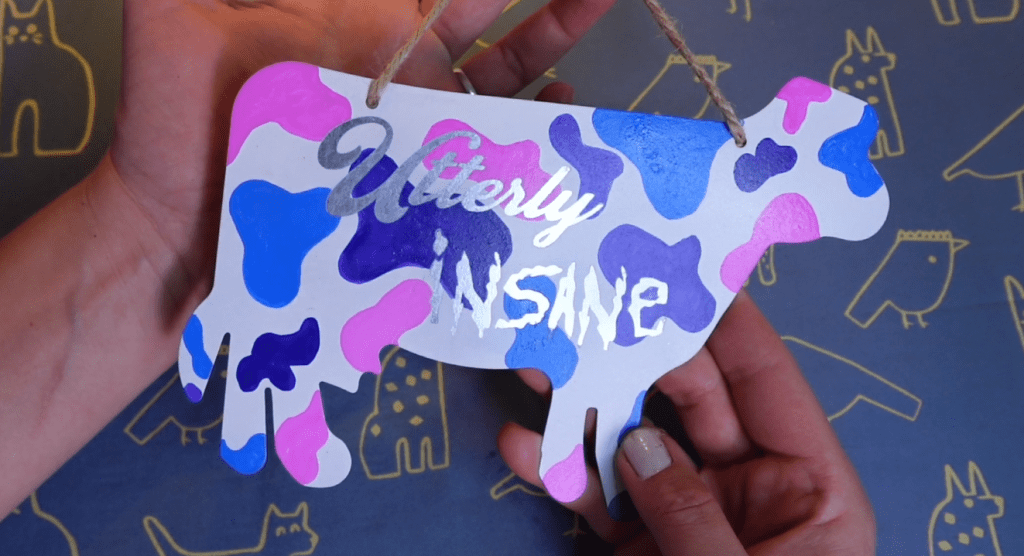
At least we tried! If we don’t try, we don’t get anywhere. I only lost out on $2.50 with these, not too bad, we’ll recover!
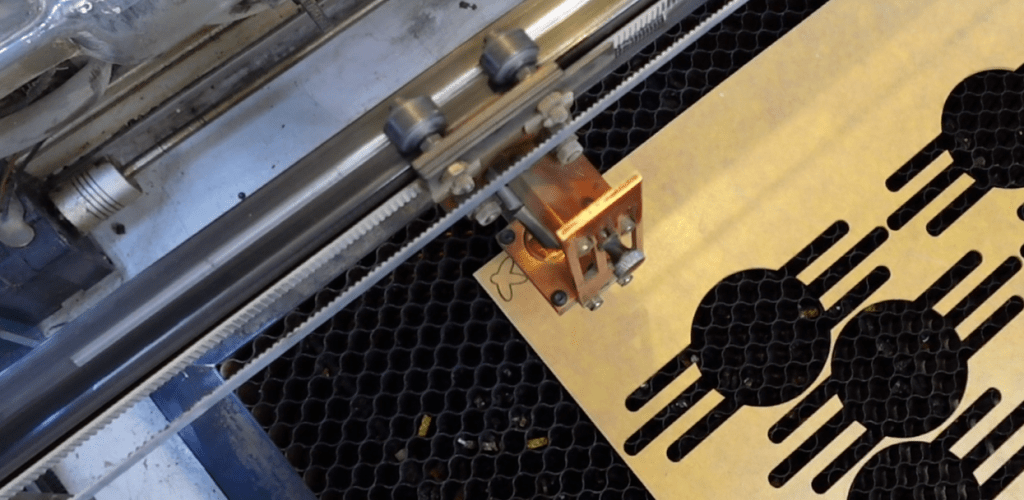
Project 4 – Embellishing Metal with Laser Cut Acrylic
When I saw this cute metal Mason Jar Stand, I struggled with what to do with it. Then I remembered, not everything from the Dollar Tree needs to be the object we engrave or cut!

We have these amazing machines and if you’re like me, a scary huge stack of acrylics to cut!
Long ago, my grandparents lived in Illinois by a pond. Here’s a picture of my mom, sister and me there! I’m the one having a midlife crisis at age 6. It was the only place I’ve ever seen lightning bugs!
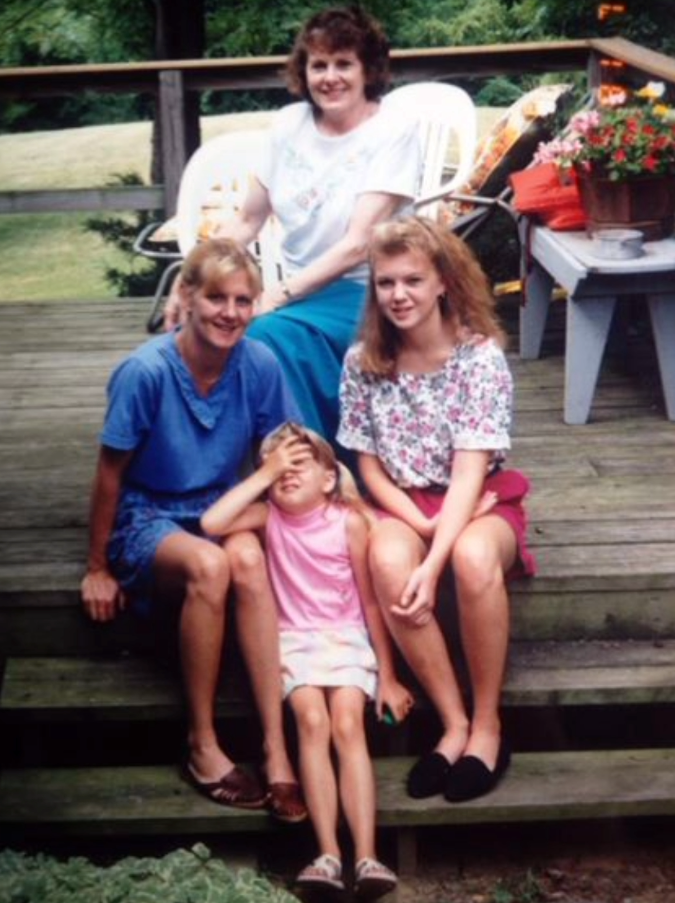
So, for this mason jar stand, let’s give it some lightning bug glam!
I used acrylics from my favorite laser materials website, Craft Closet.
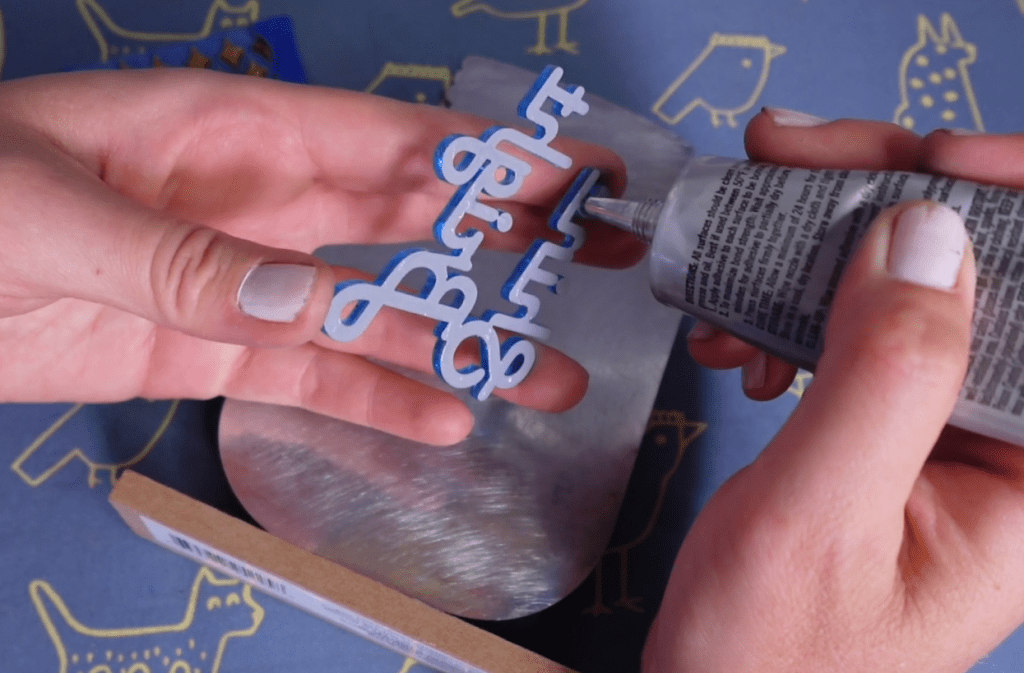
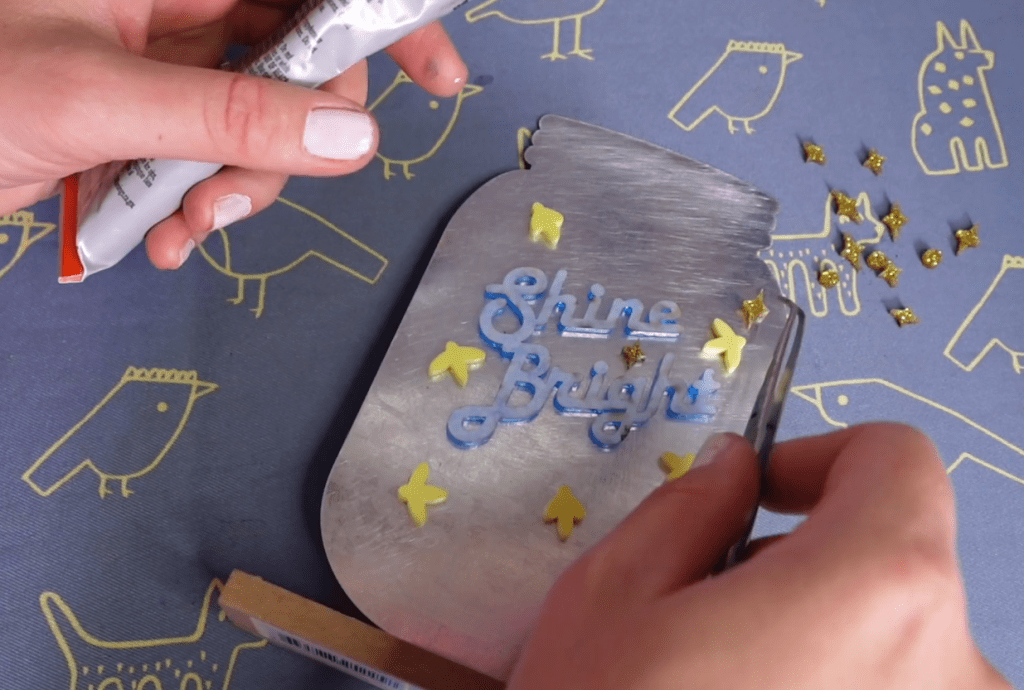
I cut out some lightning bugs from Dandelion Pastel (a diode compatible acrylic). Glittery stars from Gold Dust Glitter (also diode compatible.) And I cut the the words Shine Bright backwards on face down Blue Mirror Acrylic. (That one can’t be cut with a diode laser, but they have a bunch of other materials that can be!)
I have all this as another free download for you, as well!
Now to razzle dazzle this jar stand! I sanded it up so the pieces stick on there and dull it up a bit. Totally optional.
The glue I used was Gorilla Glue Contact Adhesive Clear Grip. A little dab will do ya!
I just randomly put on the little bits, thinking back to my first midlife crisis at my grandparents house.
Once dry, I picked out a ribbon for the top to really cutesy it up! All done! What do ya think? I’ve always like the look of mixing and matching materials like this. Super fun!

There’s always a lot to explore at the Dollar Tree! I think we got a few winners in this run!

Happy Crafting!
The dollar tree is a pretty great place to find cheap materials and supplies! If you would like some more inspiration on the cheap, check out this post next!

Leave a comment