
It’s Easier Than You Think! 👩🏫
Step by Step Guide on How to Make Your First Inkscape Laser Cut File
Is Inkscape a bit overwhelming? Making basic laser cut files can be easy, and I can prove it. How? Cuz – It’s my birthday! Which means, I need to make myself a birthday present.
(Scroll down to the bottom of the page to watch the detailed video. 📺)
PS: Some of these links are affiliate links, which means if you make a purchase on the site after clicking these links, I could earn a commission. thanks for your support!
Easy First Step
First, I am going to change the size of my workspace by going to:
File -> Document Properties
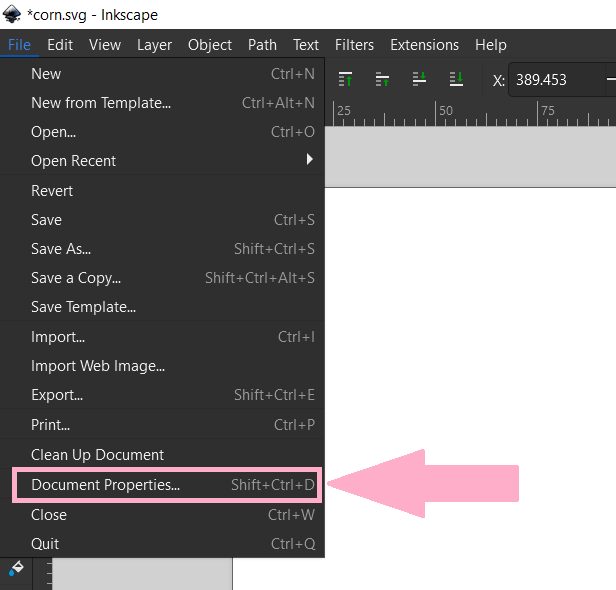
In this popup you can toggle between measurement types and input the workspace you need. I’m going with a 300 x 200 mm document. Depending on your laser requirements, you can skip this, but it’s good to know how!

Don’t worry about all the functions in here, let’s get to drawing some vector shapes!
Drawing Circles to Make Corn
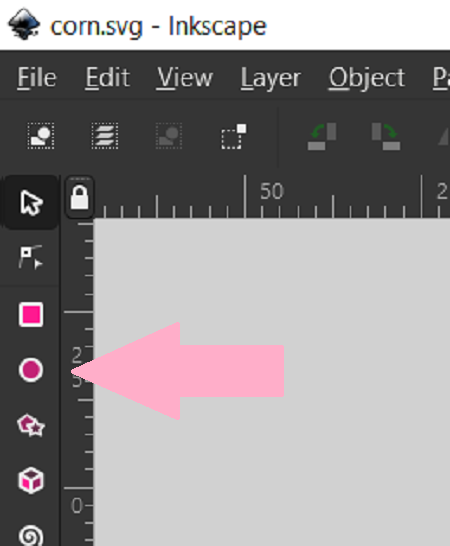
Using the simple circle drawing tool on the left side, we are going to start drawing some circles and using copy (Ctrl + C) and paste (Ctrl + V) to make a few of them quickly.

Next, we select Object -> Align and Distribute to get the right side bar up. I’m going to put the circles into a corn-like shape and use the horizontal alignment function. This makes all the circles equally spaced.

Selecting them all, I copy paste again and use this button that looks like 2 triangles and a line on the top bar. This flips them so I can make the other side of the corn.

A little more copy and pasting of circles makes the corn outline I am looking for.


Select all the circles and go to Path -> Union. This welds all the shapes together, but we don’t want the inside part.

To get rid of that go to Path -> Break Apart. Now you can select the inside shape and delete it.
Manipulate Shapes into Corn Husks
Since we have really gotten to know that circle shape tool, let’s draw a big circle.

To make the circle a shape we can manipulate we need to select it and go to Path -> Object to Path.

Now you can double click it or press the tiny square and mouse icon to edit the paths by its nodes. I’m just going to fiddle this into a leafy shape. Try out the 4 node function buttons at the top to alter the nodes functionality to get the shape you want.

Then, we do the same method of copying it and flipping it. Use the alignment tool to align the bottom and the Path -> Union to make it all one shape.
Make sure everything is where you want it and make 2 copies.

For the first one, select both shapes and go to Path -> Difference.

On the next copy, delete the corn. For the last copy, select Path -> Union. By now, you can see we use a lot of the same functions. Soon, you’ll be a pro!

Now we have some shapes for our design and a back layer to glue everything onto. I would like some more depth to this piece, so let’s make a copy of the husk and alter the nodes a bit.

I am going to pile these all on top of eachother and scale them down to the exact size I want. Everything will shrink at the same rate, so it will still fit together.

Adding Text for Engraving
Now to add a little bit of engraved flair, I am going to write a word on here. You’ll find the text tool in the left toolbar. Go up to Text -> Text and Font to bring up the toolbar on the right side.

I’m going to pick a fun font, click apply and now we need to turn it from text into a shape. To do this, we select the word, then up to Path -> Object to Path.

Next, we go to Object -> Ungroup. If you need to move any letters around, now is the time to do it.

To make it one shape, select the word and then we go back over to Path -> Union.
To change the color, you can select these on the bottom.

If you want a stroke line, like if you wanted to cut the word out, then hold the SHIFT key and select a color. I’m going to engrave mine, so I’ll keep it black.
HELPFUL TIP: To zoom in, hold the Control Button and push your mouse scroll wheel up or down. Otherwise, there is a toggle in the bottom right corner. To get rid of that red stroke line, hold Shift again and select the white x color for clear.
I ended up changing my word to Yum. If you need to alter the size of your line width you can go up to Object -> Fill and Stroke. This will pop up on the right side with a bunch of options.

You can alter the line size under the stroke style tab, as well as change colors here. Remember to save it and we can cut it out with our laser!
Time to Laser Cut!
I was able to fit an extra alien head pendant in with the bottom leaf cut file. There are a bunch of fun colors to choose from. The fun plaid color is from Craft Closet. I added a bit of a stake to the bottom of the back piece.

I bet you can guess how I was able to do that, now that you’ve learned so much about Inkscape!
While the last piece cuts out, let’s use this Sharpie paint pen to color in the engraving.

I used my handy gorilla duct tape to help me get off the backing paper. I am going to use this Weld-On #16 Fast Set Cement to glue it all together. A few clamps and a couple of minutes later and we are done!

Time to go outside and label my new garden bed!

I had a super awesome birthday and I hope I was able to teach you how to set up an easy, but super cute layered laser cut design!
✨ Links to Products Used
★ Alien Pendant File Download
★ Weld On 16
★ Gorilla Duct Tape
★ Sharpie Oil Paint Pens –
➕ Subscribe to my YouTube Channel HERE
🆓 FREE Download for Honeycomb Bed Pins

Leave a comment