

Everything You Need to Know to Laser Engrave Color on Metals

✨ Supplies
⇢ WeCreat Lumos Portable Laser
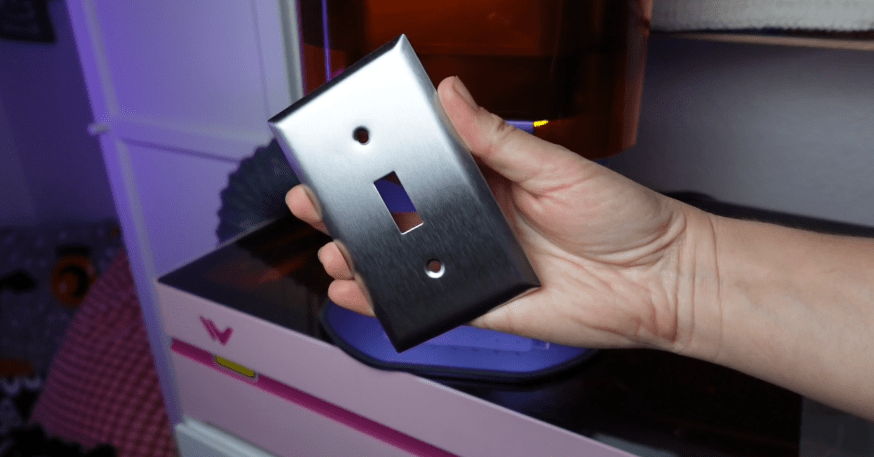
⇢ Stainless Steel Light Switch Covers
It’s true you can laser engrave color onto metals, such as stainless steel. But how easy is it? How long does it take and what kind of products can you even make?
Well, I’ve been doing some tests, and I have a lot of information you should know if you are looking into a color engraving capable laser, like this 10w diode slash 3w Infrared Laser – the Wecreat Lumos. Let’s get some examples made and find out all about it!
➕ Subscribe to my YouTube Channel HERE
What is MOPA?
The color engraving is achieved by manipulating the laser’s pulse duration and frequency with a MOPA, which stands for a Master Oscillator Power Amplifier (MOPA) laser system.

How MOPA works :
1. Master Oscillator: A master oscillator generates a low-power laser signal that controls the pulse duration and frequency.
2. Power Amplifier: A power amplifier then boosts the strength of this laser signal without altering its original pulse properties, resulting in a high-powered, precise laser beam.
And now you know, in case anyone asks!
How to Set Up Color Engraving with WeCreat Lumos
Let’s quickly go over how to setup a color engraving. I’ve divided the video into chapters if you’d like to skip to the results, but there is some added info sprinkled in here.
First step, make sure the material you have is Stainless Steel. This is the best material to do initial testing because it will produce the best colors, but other metals will have some range. More on that later.
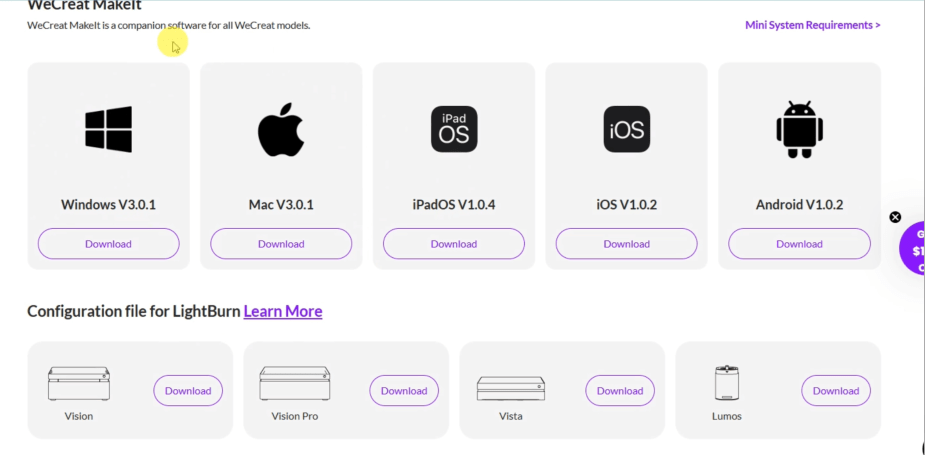
Next, ensure that you have Version 3.0.1 of the WeCreat Makeit! Program.
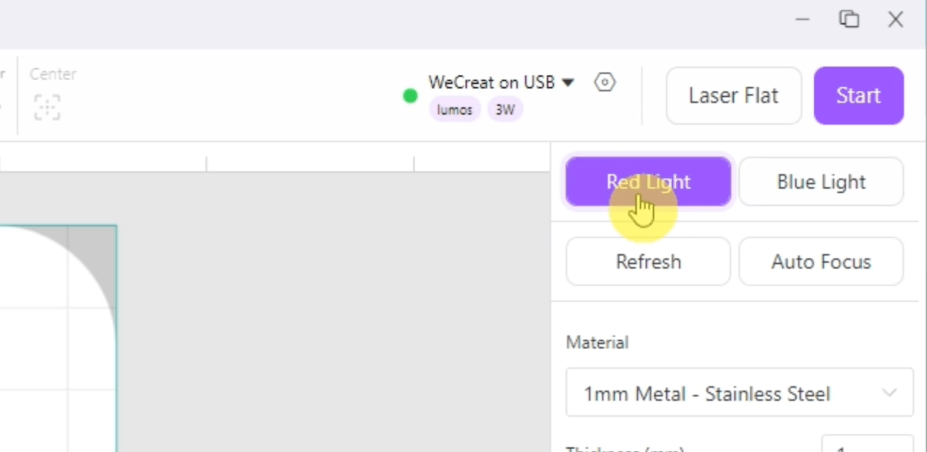
Turn on your machine and connect to the Makeit! Program and switch to the Red Light in the upper right corner.
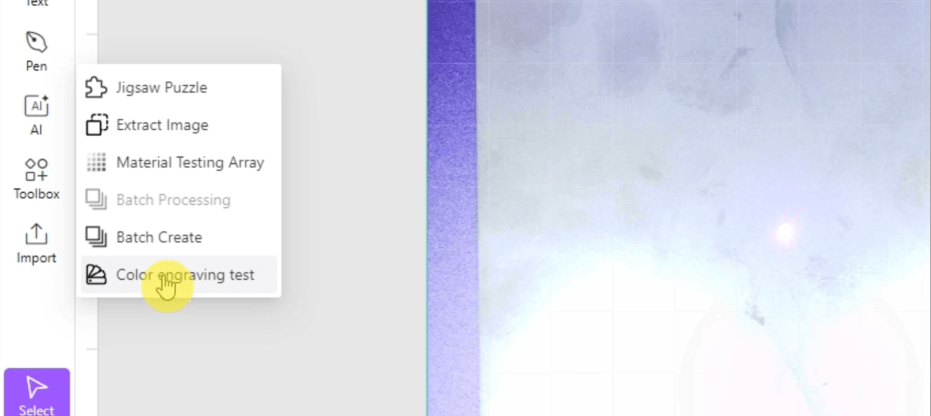
On the left-hand side there’s the Toolbox button, click that and find the Color Engraving Test Option.
A window will pop up. Choose whichever settings you’d like to try. I suggest leaving the settings alone for the first time.

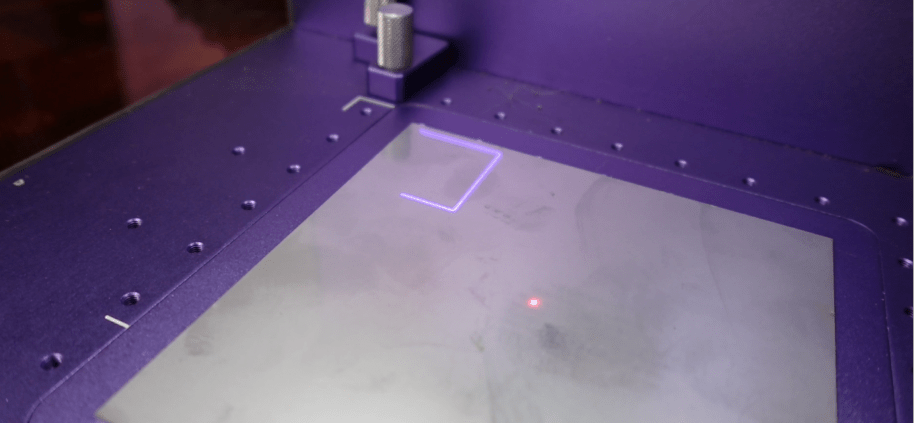
Scale it down and put it where you want. There will be a blue frame in the laser around where it is on the computer. Make sure it’s focused on your material. Flat things will work best.
Set it to go and once it’s done pick ANY color that you like. An array of colors will be made no matter which one of these that you choose. Once selected you’ll see that the machine moves itself up into that specific focal measurement. Don’t change it!
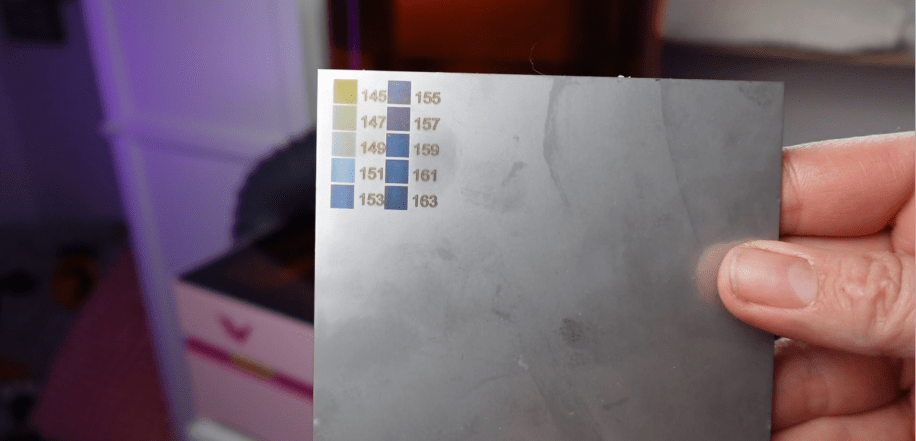
Here’s how it essentially works: it changes focus points and wavelengths to make the colors. But the settings are sensitive to the exact thickness of your material, so don’t try to refocus it after it goes into your chosen settings. The red and blue dots will not be on top of each other anymore.
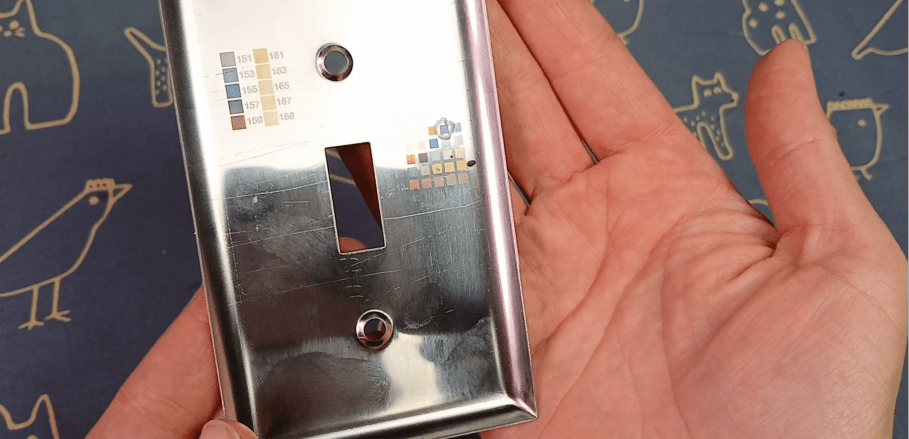
Now, set up the color array to the blue outline frame on your material and send it to the laser.
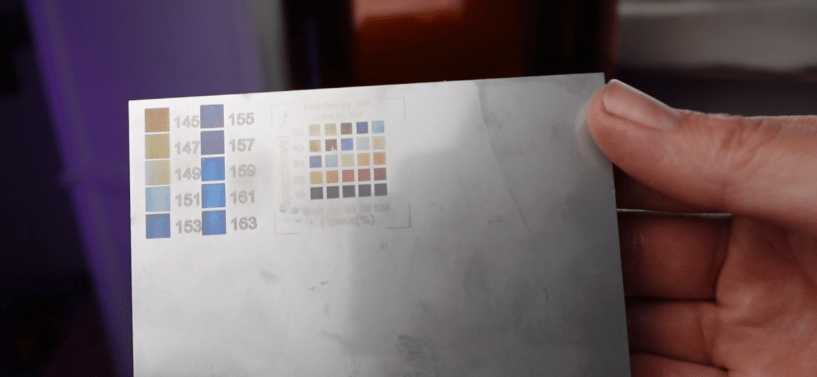
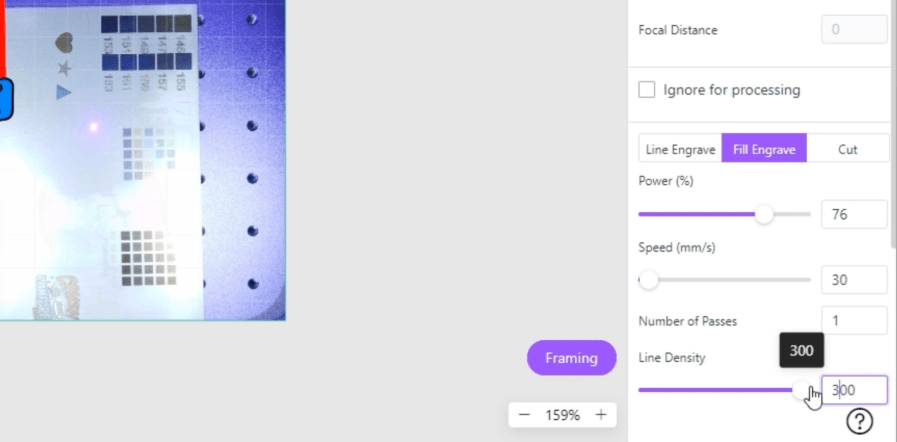
You can now assign colors in your laser project to whichever speed and power settings from this particular color array and double check that all your engraving settings are set to 300 Density.
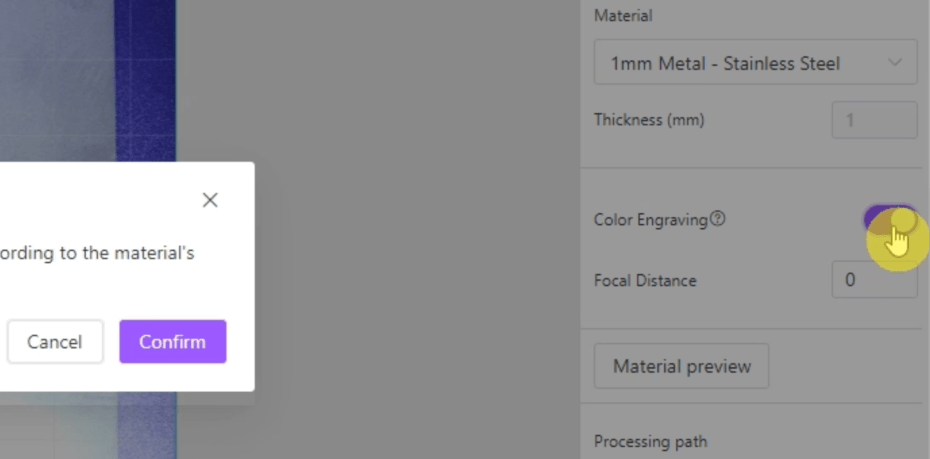
Make sure the color engraving toggle is switched on, set your focal Distance from your Color Array, line up your project with the frame function and start color engraving!
If you find color settings to your liking for a thin keychain, and you then tried used the same settings on, let’s say a thicker flask, the results would be vastly different because we are setting the colors to this exact focal point for this exact object.

So essentially, every time we want to color engrave something, we are going to need to at least start with this color array and focusing process before we make our projects.
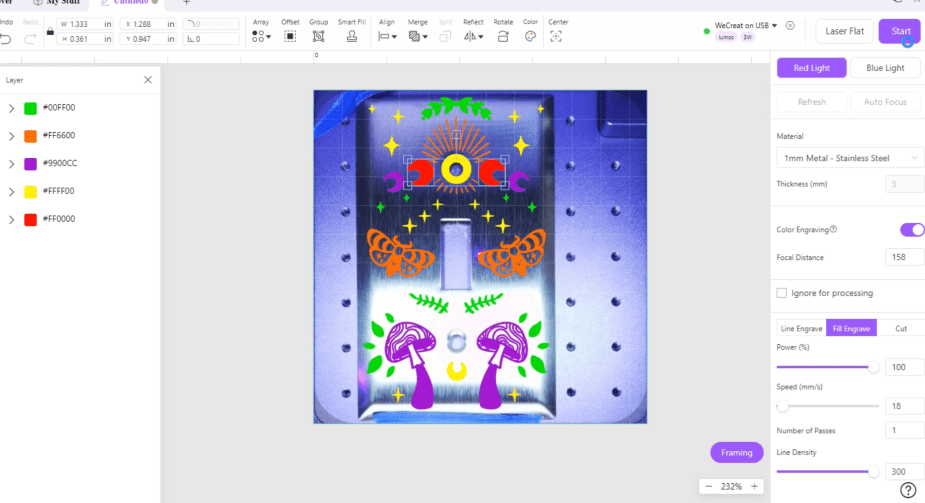
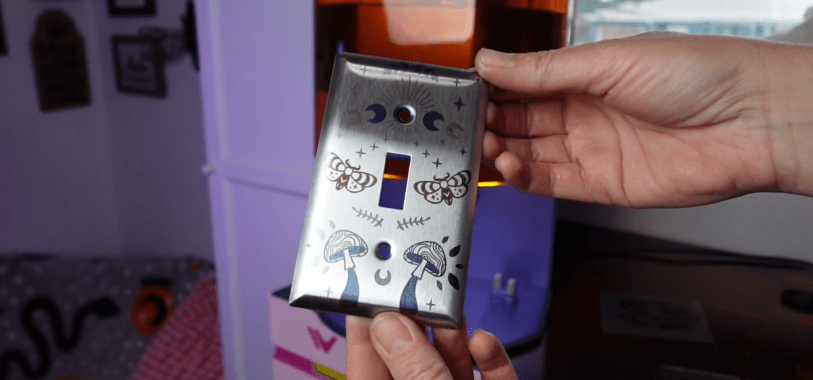
Color Engraving Stainless Steel Light Switch Covers
Let’s engrave some stainless-steel light switch covers. Now, these were $15 for a set of 10, so only $1.50 each. I have to sacrifice one to test the settings.
Here’s where I initially went wrong. At first, I engraved the array onto the backside of the cover and got this result.
Then I input all the color settings, flipped over the cover, refocused it, and started the engraving. This is why I just told you why you shouldn’t do that.
It turned into this.
The colors were barely there because I was way off in the material thickness, even though I refocused it, because it’s not supposed to be in focus.
The next one I forgot to make sure the color engraving toggle was on, so it engraved normally. It did get somewhat different shades on there though, but all in dark brown colors.
So, I figure all that out and did a color array test on the same surface as where I wanted to color engrave.
Which is nice, I think, but not what we’re going for!

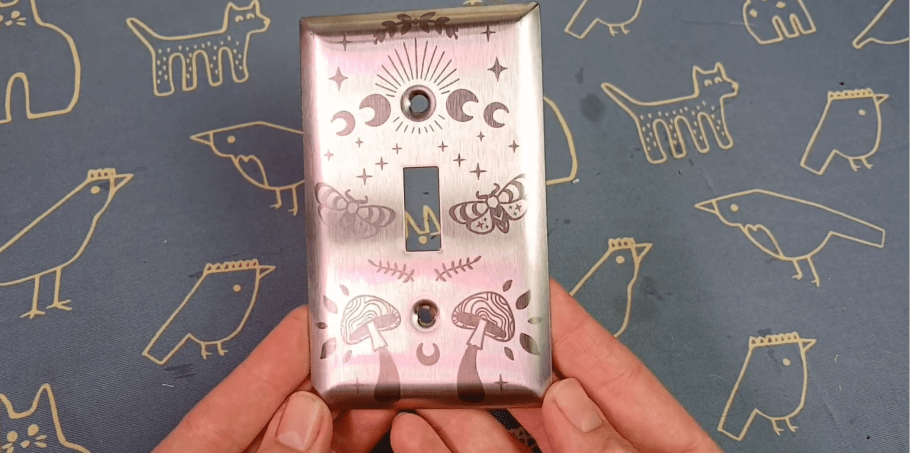
Once set up, for reals this time, it took about 50 minutes. Not bad, you could easily do something else while it’s going.
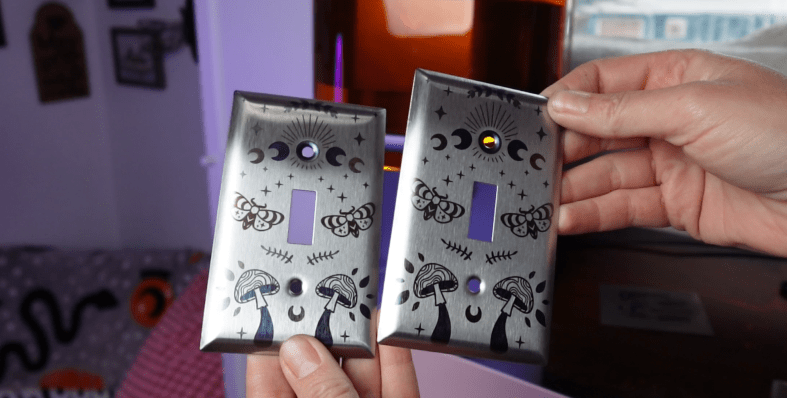
I went ahead and lasered another one out while the settings were still set for these light switch covers. You could alter the design, but don’t bother putting in any other materials.
You can’t take a picture of the laser bed while in this mode, so utilize the framing function to get your object in line.

You can also select one object to frame separately, which helped me align the screw hole engraving.

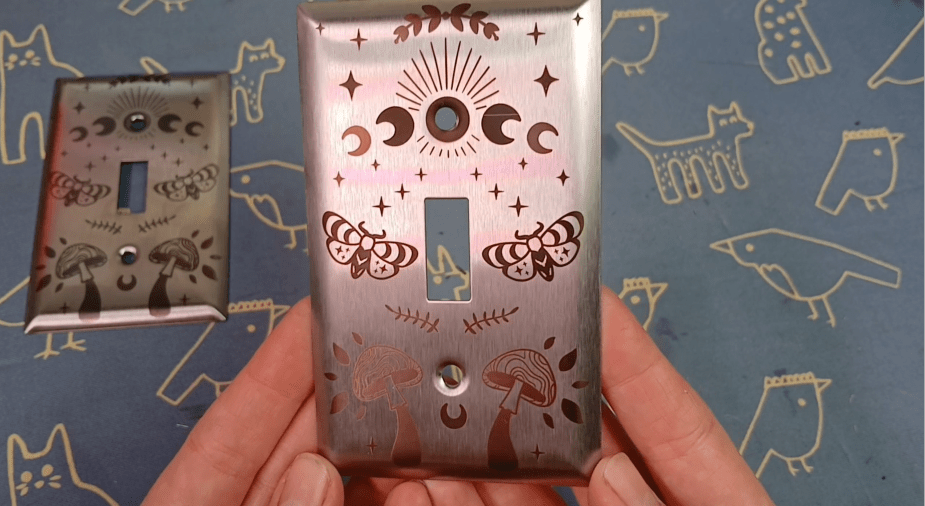
I whipped out a couple of these light switch covers easy enough!
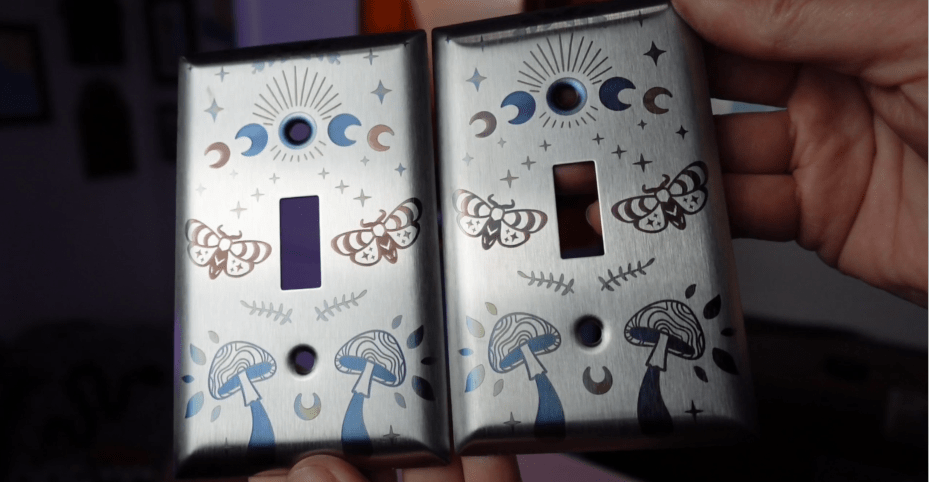
Because the settings are so fiddly, I recommend if you get into this for your cool laser business, you make as many of something as you can, while you have the settings where you want them.
How Long Does Color Engraving Take?
For some people, they say it takes forever to engrave. For anyone who has a 3D printer, waiting an hour for a relatively small 5 color design is nothing. Especially those 3D printed jobs that take like 5 sessions of 12 hours each to print.
This large engraving is coming in at around 3 hours. It goes through each color, one shape at a time, at 300 line density. So, it makes sense why it takes so long.

The smaller and simpler the design, the faster it’s going to go.
Why Should I Bother Color Engraving?

Here’s three key business advantages.
- Aesthetic Appeal: This is the big one. Color engraving transforms a standard stainless steel object from something functional into a piece of art. The results are visually stunning and immediately grab attention.
- Market Differentiation: How many people in your area are offering vibrant, multi-color engravings on metal? The answer is probably “not very many.” This immediately sets you apart from your competition and allows you to capture a unique corner of the market.
- High Perceived Value: Because this service is so unique and visually impressive, customers could be willing to pay a more for it. You’re not selling a commodity; you’re selling a specialty service. This allows you to charge more on custom items like jewelry, personalized tech gadgets, and high-end gifts.
Material Limitations:
The color-engraving effect is a result of a specific type of oxidation on the metal’s surface. This means it only works consistently on certain materials, primarily stainless steel, titanium and brass.
You can’t just slap a piece of aluminum or copper under the laser and expect a rainbow. Testing is key, and you’ll quickly learn what works and what doesn’t.
Plus, it’s encouraged to seal up your color projects, as sweat, humidity or products can alter the color over time.
The Bottom Line: Is It Worth It?
So, is adding this service worth it? That’s up to you. It depends on what you already specialize in. Would adding a color engraved light switch cover make sense to your crowd? Or jewelry pendants, or flasks?
Because of the time limitations, this is not for mass production, but it is a fun tool for offering unique, high-value custom work that there’s very little competition for.

I’d love to know your thoughts!
If you’d like to see what else the Lumos can do, check it out! They run specials all the time, give it a glance. If you’d like to see what it’s like taking this Portable laser TO a Cat Convention, then check out this post next.
Happy Crafting!
Sign up for Creative Fabrica’s All Access Free Trial and enjoy 10 free downloads to kickstart your creative projects. Plus they’re having a Subscription Sale, so check it out!

Leave a reply to mafunk5 Cancel reply