

Make Jewelry as Unique as You Are!
✨ Supplies for Project
⇢ FLUX beamo Laser CO2 Laser
⇢ Fancy Acrylic – Save 10% with Code LASERLADY
⇢ Novus Plastic Polish
⇢ Weld-On Acrylic Solvent
⇢ Gorilla Duct Tape
⇢ Metal File
✨ Jewelry & Supply List Download
I have been making a living off laser cut jewelry for the last 12 years and you can, too! We are going to go over the basics you need to know to make laser cut jewelry that sells!
We’re covering laser cutting and engraving techniques specifically for jewelry to make yours stand out from the rest so you can start making money!
Let’s dive in!
➕ Subscribe to my YouTube Channel HERE!
Starting a Laser Cut Jewelry Business
Whether you want to go all in and start a laser cut jewelry business or you want to perfect another line of products to sell, you’re in the right place!
First and foremost, the equipment you have will very much dictate what you are able to make. That’s why, I’ll be using the FLUX beamo.
One – because it is a CO2 laser which will allow us to cut and engrave all types of acrylics, even clear ones.
Two – because it is an entry level CO2 laser, so you can test your success with these products on a budget.
Three – because it’s perfectly sized, adorable and I love it.
If you are working with a diode laser, the upcoming tips will be helpful, you will just need to consider the materials you are limited to.
And bonus, I have a free download for you for these designs down below, along with a helpful supplies list. So grab that, and let’s begin!
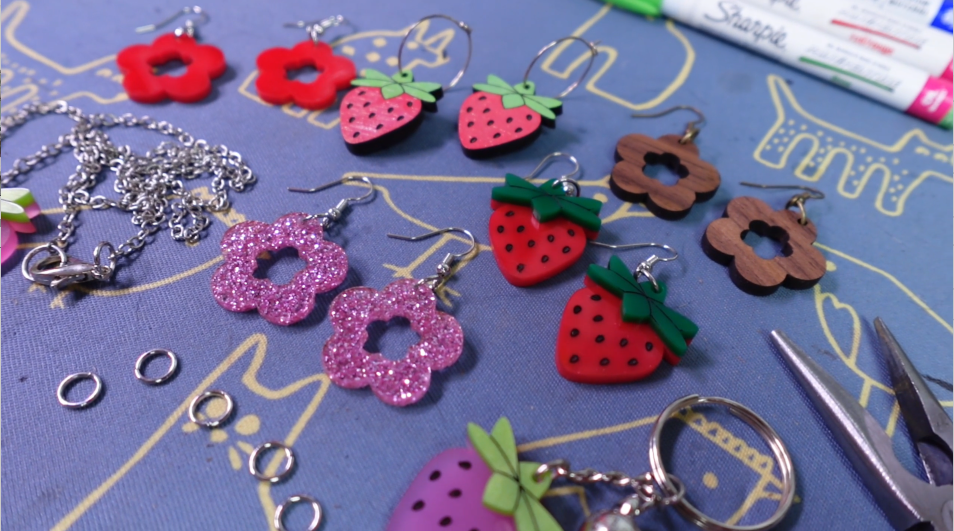
A Simple Flower 3 Ways – Covering the Basics of Laser Cut Jewelry
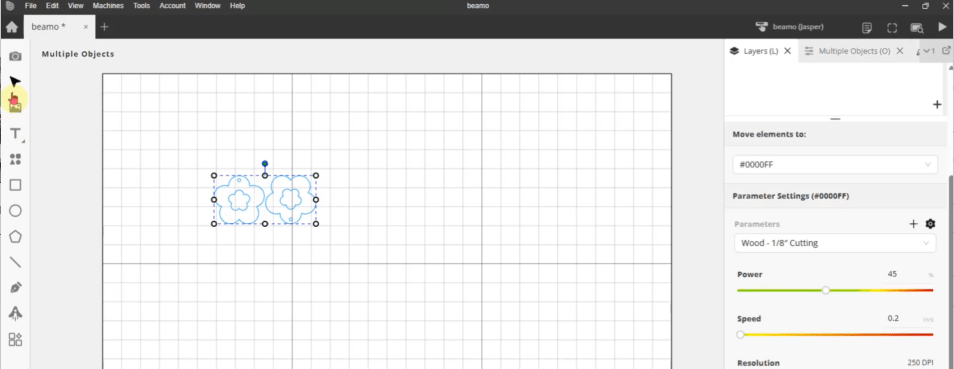
This is a simple little flower design uploaded in the FLUX Beam Studio. Pretty unassuming right?
Now let’s cut them out and make sure you keep those inside pieces! I will be doing something really special with these, so stick around to the end and I’ll tell you all about it!

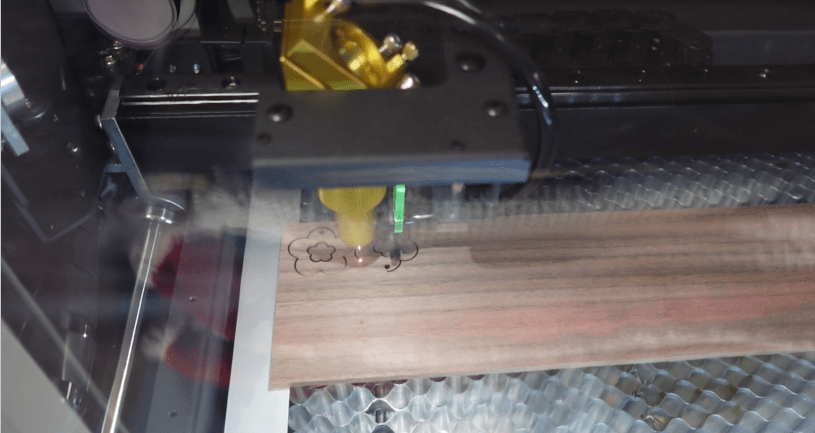
First, I’ll cut them out of wood.
Note on wood when it comes to jewelry: plywood or mdf core woods are ok for other projects, but solid wood is best for jewelry, in my opinion. Think of a precious metal ring, there is a big difference between a gold plated and solid gold, right?
Next, I am going to use this diode compatible red acrylic. You want to leave the masking on. If your material did not come with masking, or it has a clear masking on it, remove that and replace with some masking tape. This will protect the acrylic from all the blowback residue when cutting.
But, if you don’t want to use masking, let’s say because you are engraving something pretty detailed, that’s ok. I’ll show you what to do about that here soon.
Last one, I am going to use this fancy pants acrylic. This one is not diode compatible, which is where the beamo comes in handy with it’s 30w CO2 tube. That self-contained sucker slashes right through this stuff. And I left the masking off, to show you how to buff it up.
Ok. Now let’s compare these charms and talk about perceived value a little bit.
Here we have the solid walnut charms. I am going to sand these a little bit and give them a quick spray with some Rustoleum Clear Coat. Really brings out the wood, right?

You know what it also does? Protects from facial oils, makeup, hairspray and more. We need to consider these things when making jewelry.
Next, before we get these red flowers uncovered, we’ve got to sand it a little. These edges can be a little bit sharp. Especially if something came to a point.
To give the customer the best product ever and to make sure they come back for more, we don’t want things poking them.
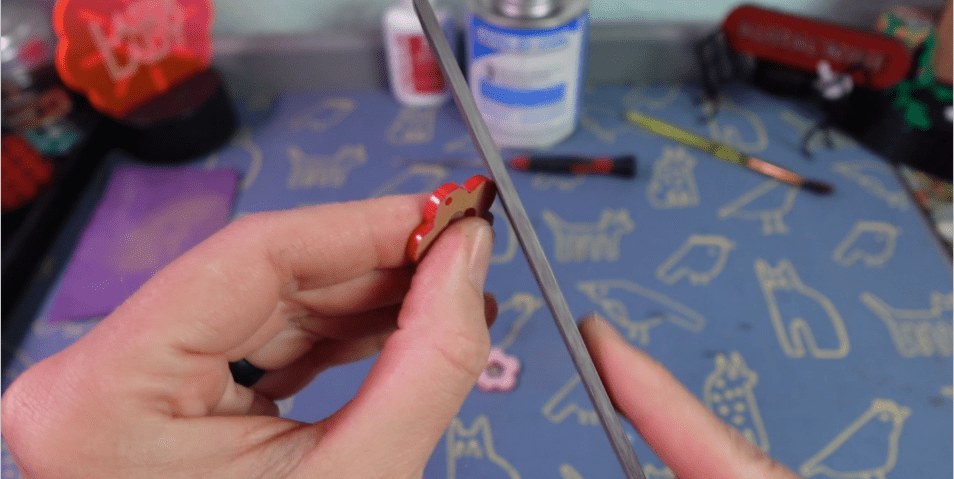
I am using a metal file, it lasts forever and you have more control over where you are sanding than sandpaper. Highly recommend one of these, they come in super handy!
To get the masking off easily, you can use some duct tape, I like the gorilla brand, it’s super strong.

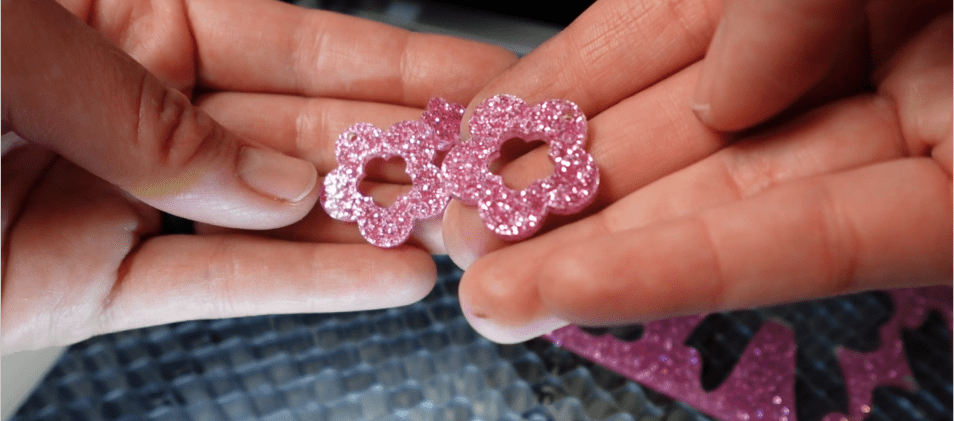
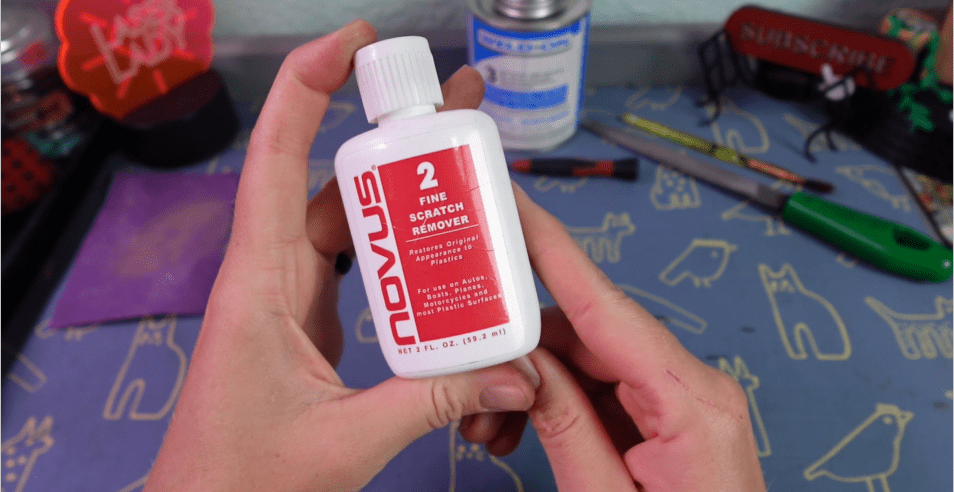
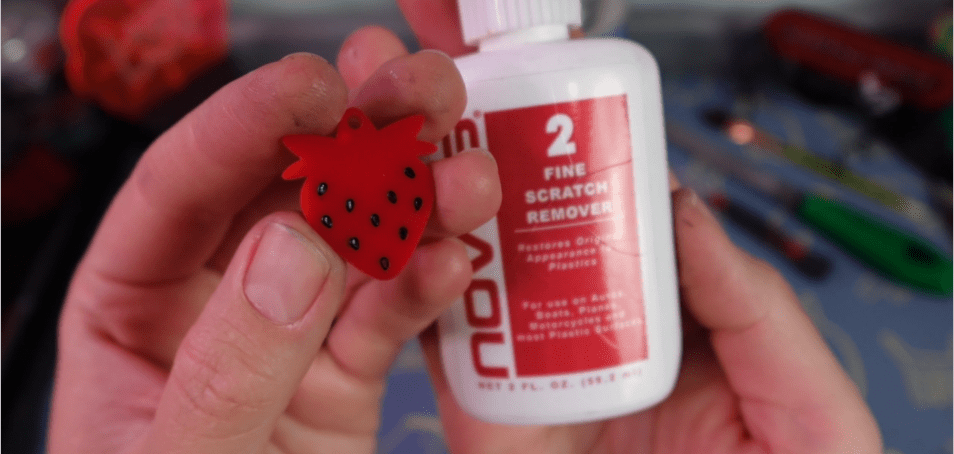
Here are the glitter flowers. It’s hard to see any residue leftover from the cutting process, but let’s give these extra shine with this Novus #2 Plastic Polish.
Now to file the edges, take off the clear masking on the back and we’re done!
Keep those little bits safe, we’ll be getting to those soon. Now take a look at what we’ve got so far.
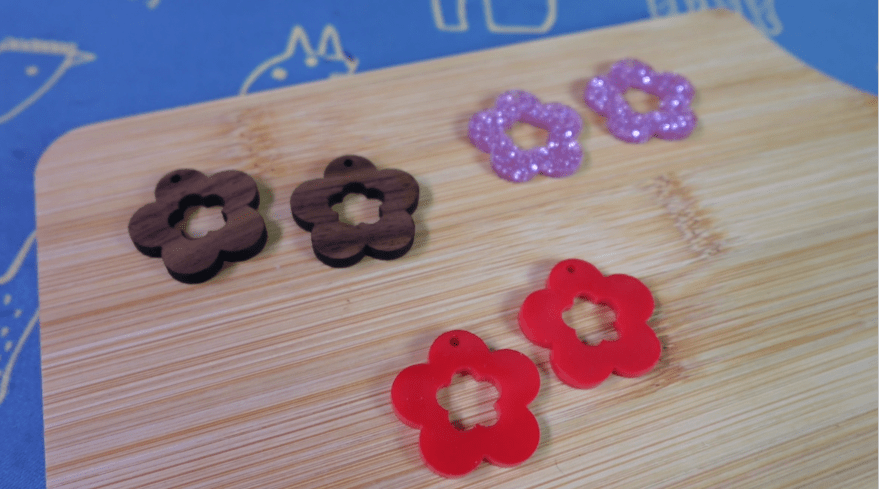
Which style do you like best? Which looks like it is more valuable? What might match with more outfits? Is this a good style for this time of year?
Believe it or not, your customer unconsciously thinks these same questions before they hand over their hard-earned money. So, keep them in mind.
Color, Engraving & Layer Techniques
Those flower charms are great, but let’s get fancy. We’ve got lasers to engrave things, so let’s engrave things!
First, let’s start with that same walnut wood again.
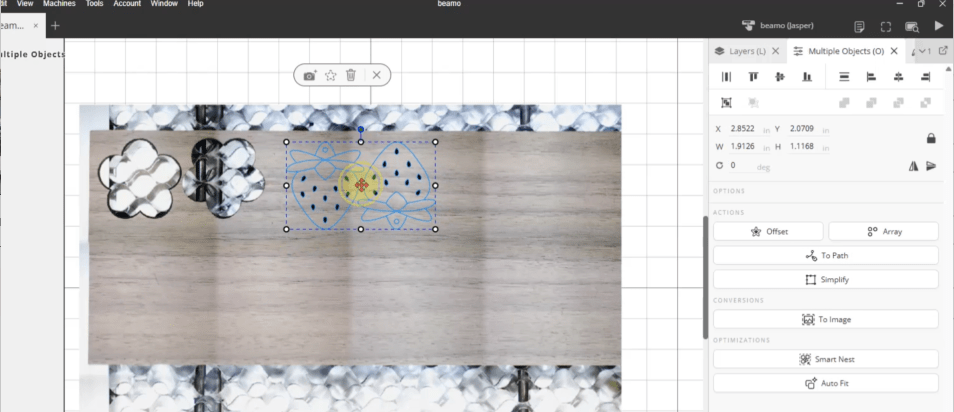
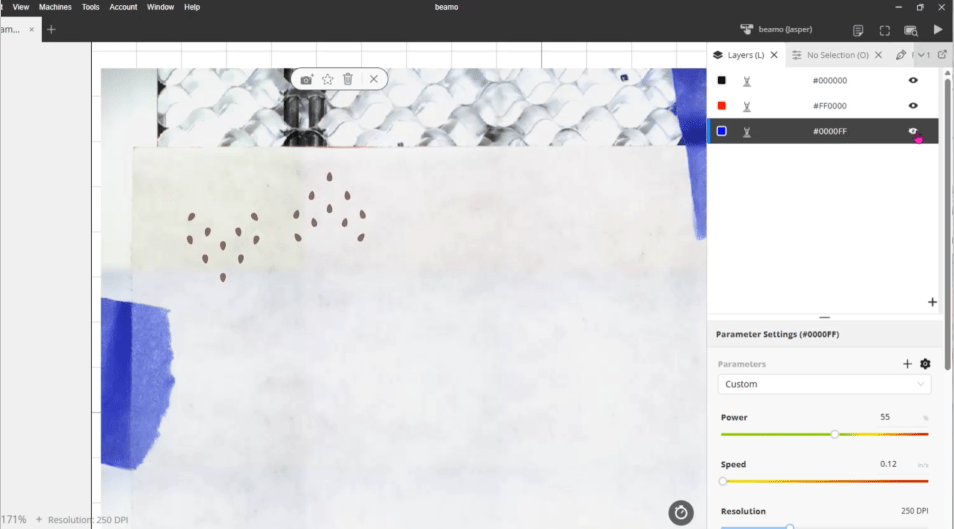
Make sure you assign the engravings the perfect settings. We don’t want these strawberry seeds to be too deep.
The red lines will need to be set to line engrave. This is essentially a low-level cut line, meant to just “draw” onto the wood. It will go around the engravings, so we need to make sure the settings are quite low, indeed.
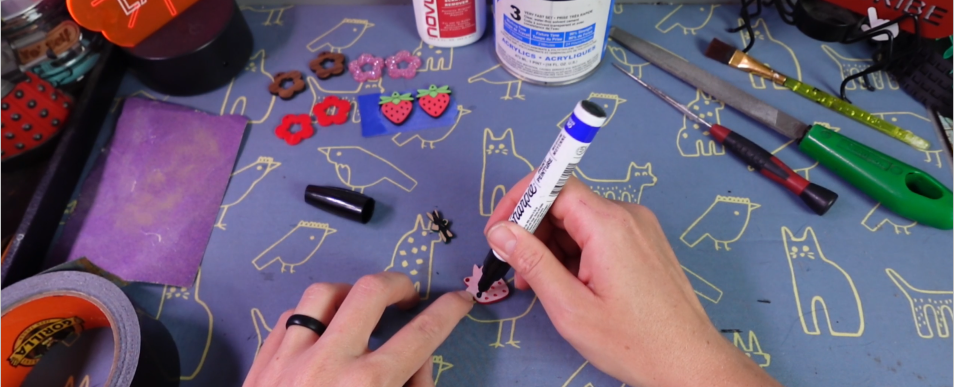
Let’s get these over to our workstation and sand them a little bit. Brush away the dust and let’s get some color on this thing!
I like to use oil paint markers. If you have acrylic paint pens, use those! These paint markers are quick to use and makes “drawing” on your paint a lot easier than whipping out a whole paint brush situation.
With a steady hand, I am going to just color this in! Just like when we used to do our very best with coloring books back in the day.
While that dries, let’s get that red out again and some green!
Engrave and cut. Diode lasers can have a hard time engraving deep into acrylics. You may need a few passes. Since the beamo is a CO2, we can engrave a good depth just one quick pass.
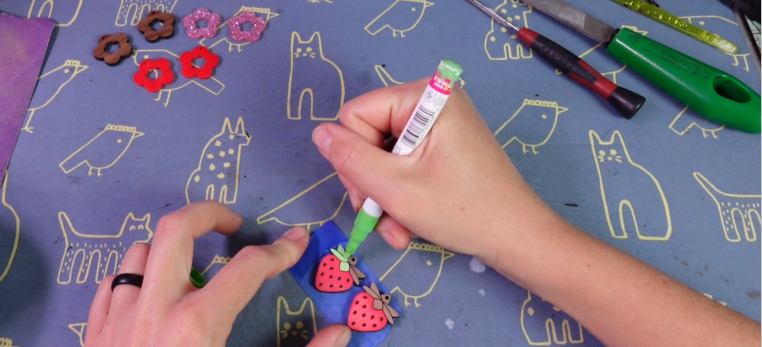
Back over to paint! With the masking still on, we can be a little reckless with our paint! If you don’t have a steady hand, this method will be best for you.
We’re going to color in the seeds, and the strawberry leaf lines.
While that is drying, let’s go back into the laser with some fancy acrylics! If you can’t tell yet, glitter, glitz, shimmery and textured acrylics are my favorite.
Here’s an expert tip for you when it comes to coloring, especially acrylic engraved pieces.
Get your material on your laser bed and secure it. I’ll be using some tape in the corners. Easy. Then, set you laser to just engrave.
When it is done, you can color in the engravings while it is still in the laser. Just make sure you don’t move it around, or your cut lines will be off. This is especially useful when you have a lot to paint.
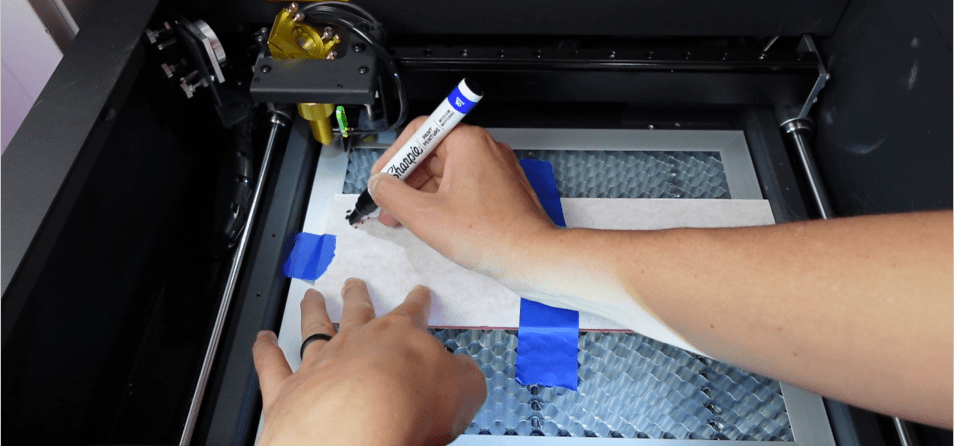
Now go back into your program and turn off engraving and turn on just the cut lines.
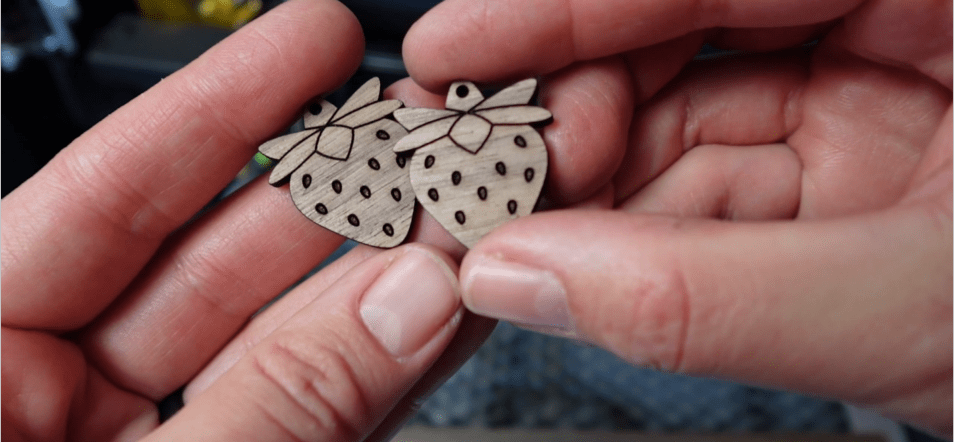
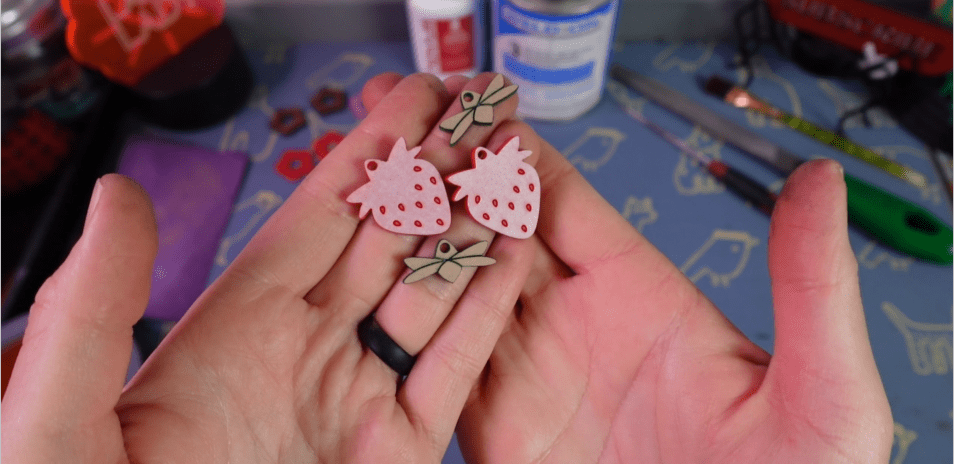
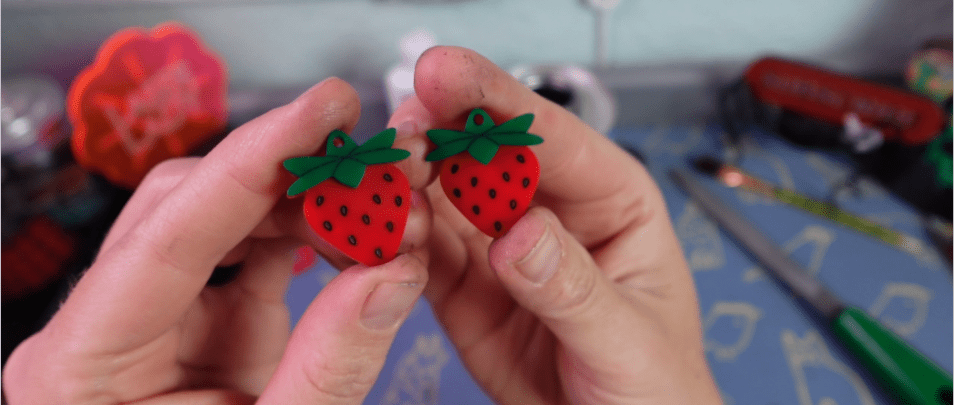
Now we have our pieces!
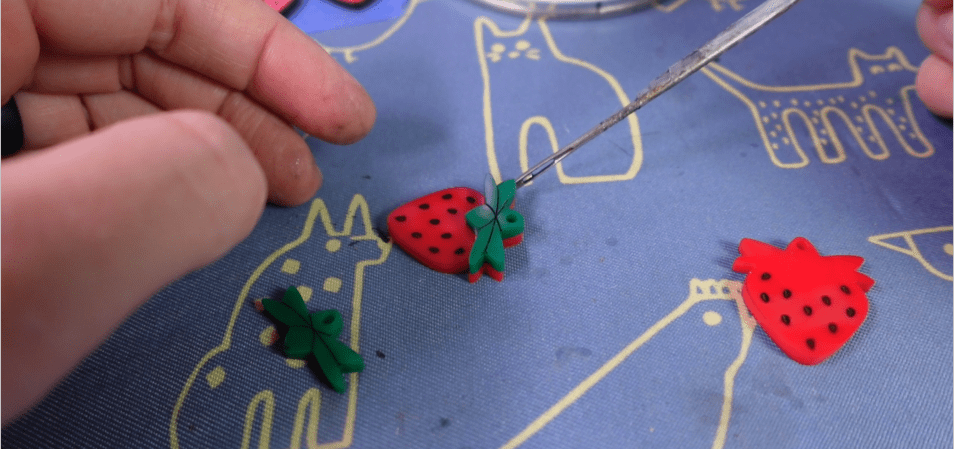
Time to assemble these 2 layered acrylic strawberries!
After a little sanding, peel off the masking just like last time. If you find any paint has seeped through or smudged, you can use a little Novus #2 Plastic Polish to take that off.
Now to make a permanent bond between these 2 acrylics. I am going to use Weld-On #3 or #4 solvent. This will permanently bond the 2 layers together.
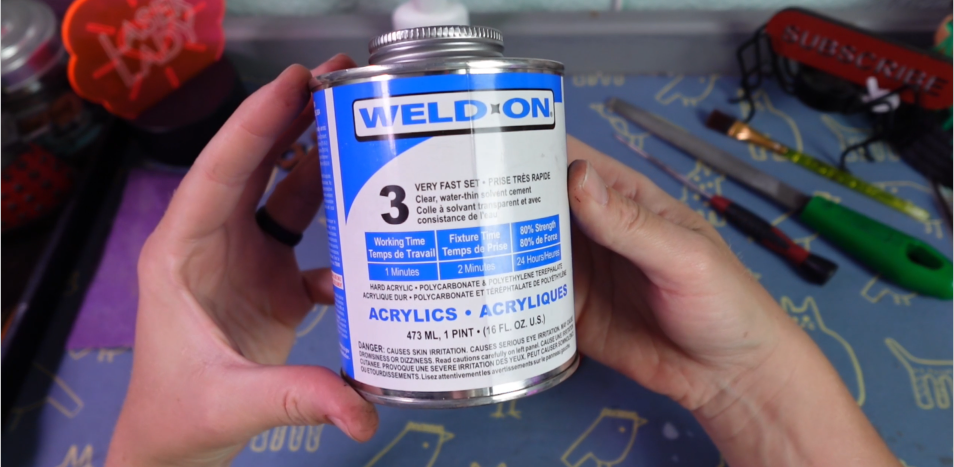
There are a few ways to get this icky chemical where we need it. One of these bottles, which are a bit unpredictable when it comes to fine detailed, small things like this.
Or, what I like to use is this – I call it “an upholstery needle taped to a screwdriver”. The name is a work in progress.
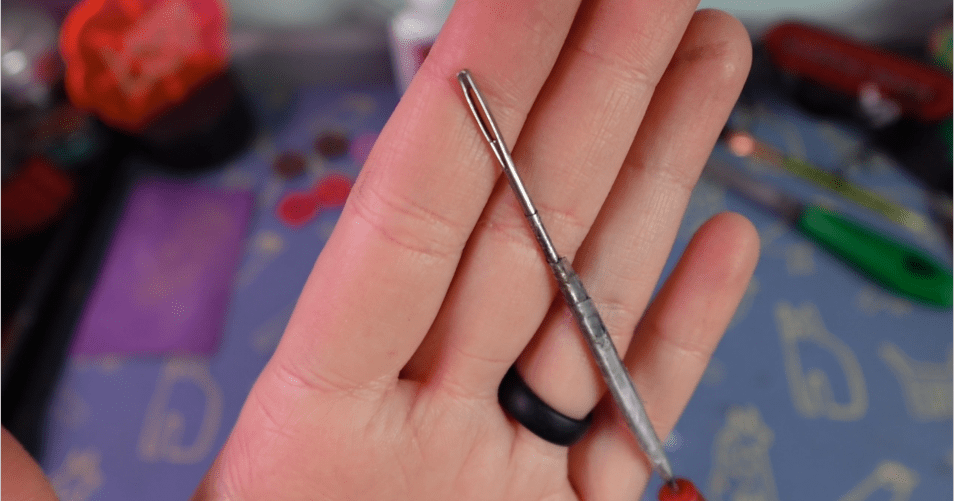
What this does is we can now dip the needle eye end into the solvent, grabbing just a little bit and dab it on a corner where the 2 acrylics are touching.
If you don’t have a big needle like this hanging around, try an old paintbrush. It might melt the paint brush hairs, so test that out first.
It sucks in between the layers, and in just moments, it is dry and ready to go!
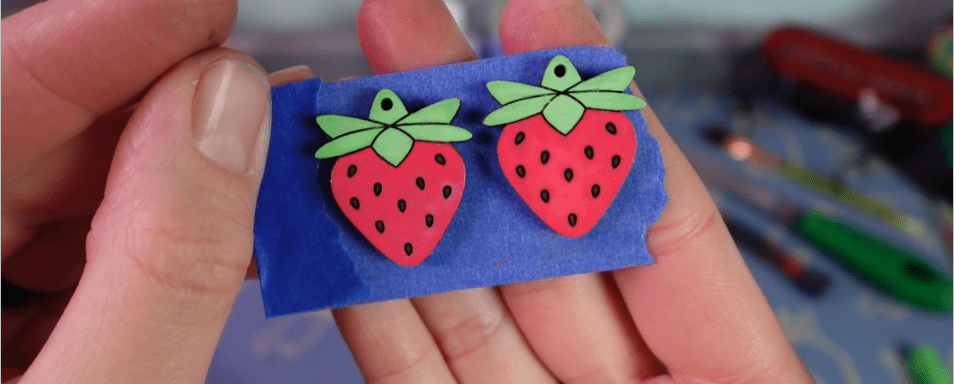
Let’s do that with the other acrylic pieces and they are all done!
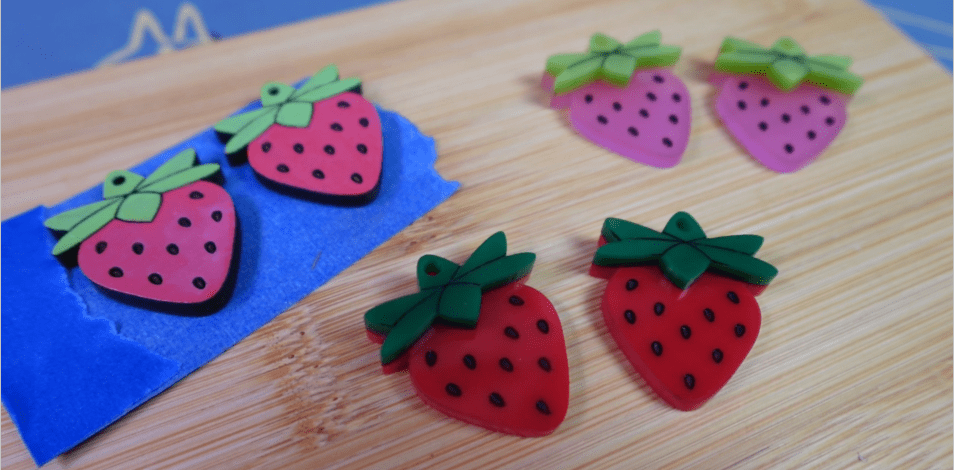
Now we have some multi-color, multi-layer charms to make all sorts of stuff with!
Laser Cut Jewelry WARNING

We’ve gone over a lot so far! So much value is in the techniques.
BUT.
I can talk all day long about what works, but what is just as important is what doesn’t.
First – Designs that won’t make it in the real world.
There are a lot, and I mean A LOT of laser cut jewelry files out there. I sell some, myself even! But there is a big difference between jewelry designs that were made to be worn and jewelry designs that were made in 5 minutes to make a few bucks selling the file on Etsy.
Small holes, break. Overy complex, thin lines – break. It doesn’t matter if you scale it up, make it with wood or acrylic. If the design is too intricate and the customer picks it up too hard or drops it once on a hard surface, and it breaks… we’ll that’s going to show up in your reviews.
There’s no “bad publicity is good publicity” in small business. That’s a make or break for us small business owners.
Next, just like with any niche when starting out, try to pick a design lane. Jewelry is a niche, but when you start out, think in cohesive collections. Start with 5 flower designs, or 5 cat designs, geometric designs, thigns like that.
And last warning, before I overwhelm you –
Your equipment matters. You have already seen that the materials you use make a big difference in the perceived value of your jewelry pieces.
But there is no way to open yourself up to all the possibilities of materials out there, when you are working with a low level diode laser. I love them, don’t get me wrong!
It’s just the jewelry niche is giant, and the more you can differentiate yourself – the more you will stand out.
That’s why I recommend the beamo. It won’t take up an entire garage. I won’t eat into your electricity bill. The machine is compact and self-sufficient. The cooling system AND the air assist blower are all inside the machine.
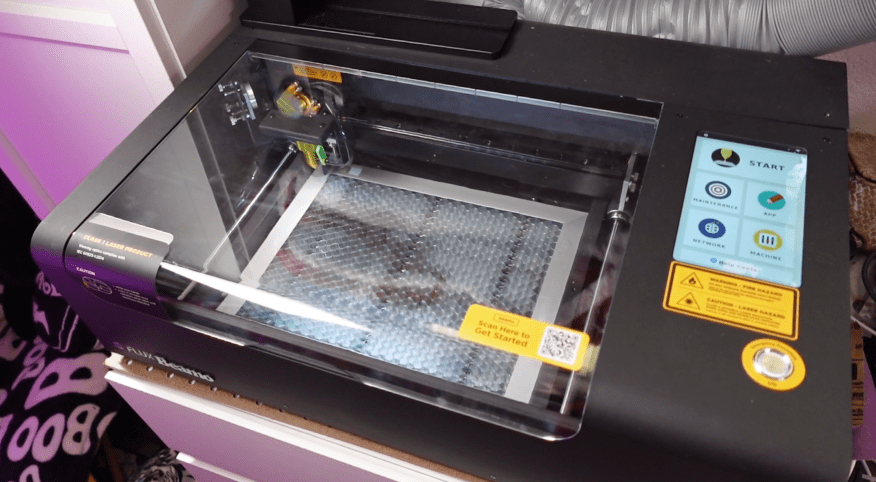
You can easily find space for this in any small workspace you might have, and it’s not a $10,000 investment. Save up for that later.
If you want to try out jewelry or expand your crafty wares to include every type of acrylic and laser-able material out there – check out the FLUX beamo!
Plus! I will have more mini tutorials like this in the Laser Lair! It’s a new community I have started where you can ask questions, get social and see what I ended up doing with those extra bits I told you not to get rid of!

Did you think I forgot!? No way. Come on over to the Laser Lair and check it out. It’s free to join!
I would love for you to see how easy the FLUX beamo is to set up and what else it can do, so check this video out next!
Thank you so much for watching and Happy Crafting!

Leave a comment