
Tool Leather with a Laser Mold?
Of course you can laser cut and engrave leather with your laser. But, have you made tools with your laser to take you leather craft to the next level?
In this tutorial, we will experiment with laser engraved and cut leather molds to make cute Cat Paw and #1 Dad leather Key FOBs.
✨ Supplies for Leather FOBs
⇢ Leather Scraps
⇢ Acrylic or Wood
⇢ 3″ C-Clamps
⇢ Leather Dye
⇢ Standard Key Rings
⇢ Leather Snaps
⇢ “Chicago” Screws
✨ File Download for this Project
How to Make a Laser Engraved Leather Mold
After you download, or make your own, files for the mold, you will need to pick a material to engrave and cut. I used 5mm clear blue acrylic. The clear color does help with aligning the leather blanks later, but wood would also work.
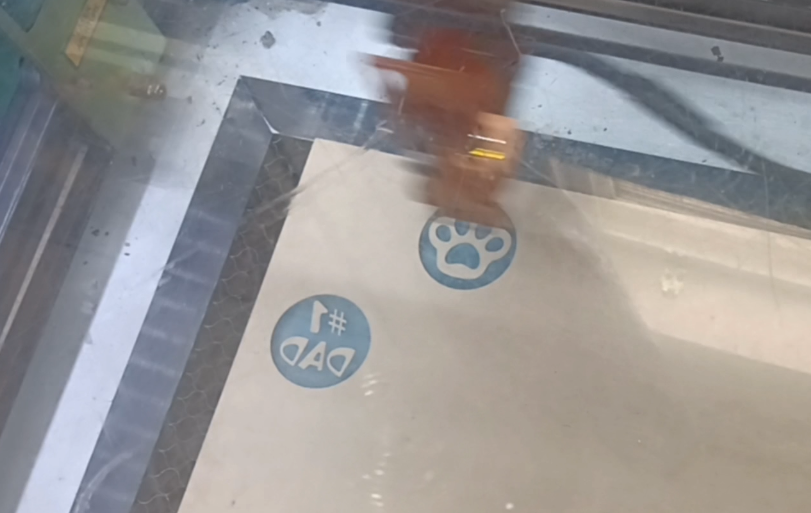
To make the engraving super deep, I engraved over it with the same settings 3 times before it was cut out.
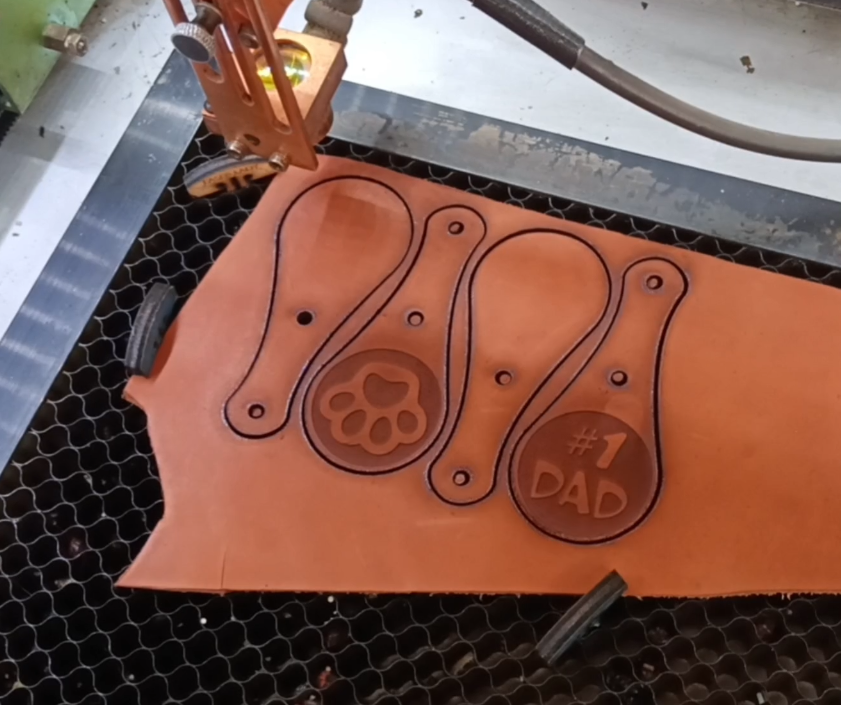
Engraving & Cutting Leather
Before the leather goes in the laser, I soaked it in some water for about 20 minutes. This will help even out the engraving and cutting, with a bonus of making the burning leather smell not as bad.

For my particular laser, the engrave and cut settings for leather are similar to acrylic settings. Your laser may have it’s own requirements for leather. Always try a small test area to get your settings right before you try to laser large and expensive pieces of leather.
Putting the Leather in the Molds
Here are the blanks we’ll use in the molds.

The mold has been made with alignment lines and are easily centered in this clear acrylic. I’m sure you’ve noticed the dad themed design, and that is because Father’s Day is coming up!
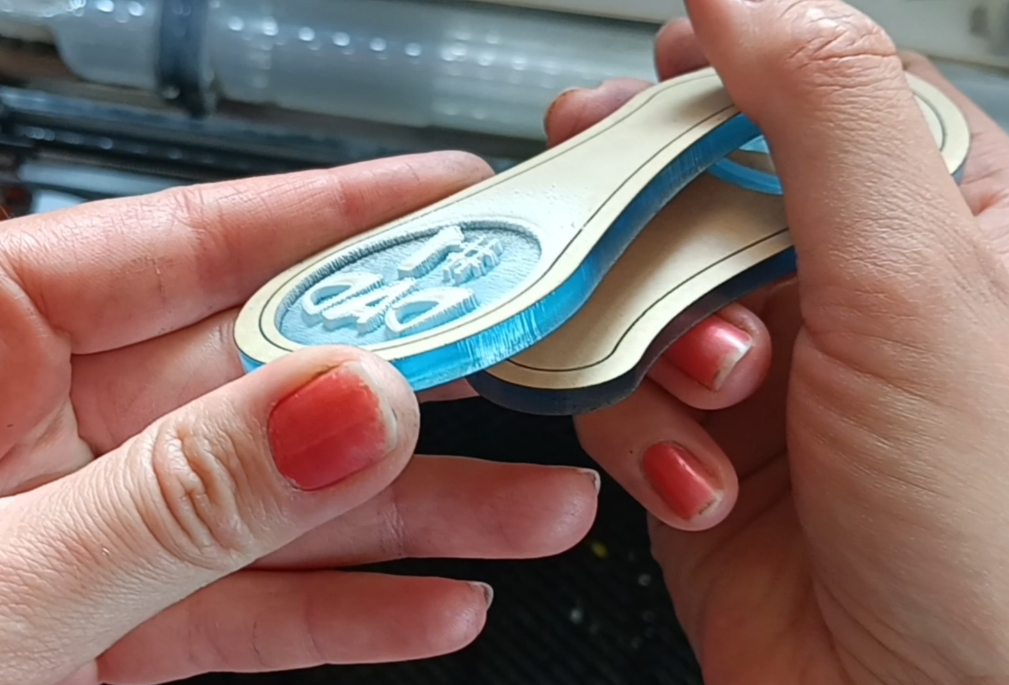
Using some cheap C-clamps I sandwich it all together. Everything just needs a little time in the sun and should be ready for the next steps!

I waited overnight for everything to dry. You don’t need to wait this long. I have tested it and gotten similar results with the mold clamped for between 1-2 hours. If you want a light design, these can be pressed and released immediately.
Dying the Leather FOBs & Putting on Clasps
Do protect your area with parchment paper or some sort of a barrier when using Leather Dye.

My results were a bit splotchy, but that is just part of the handmade charm! Your results will probably come out even better.
Next up, we need to attach the hardware. You can choose between a Rivet styled Snap Clasps or a Chicago Screw. Each have their benefits. I designed these to go around standard keyrings, but they can be modified for anything!

The Final Result?
Which do you prefer? The pillowy, professional result of the leather mold, or the traditional leaser engraved leather? Either way, you can customize your own with this $1 download!
Watch the full tutorial in the video below for more tips on this fun laser project!
➕ Subscribe to my YouTube Channel HERE
🆓 FREE Download for Honeycomb Bed Pins

Leave a comment