
Ready to WOW! Your Customers?
Try this on some free downloads! Sign up for Creative Fabrica’s All Access Free Trial and enjoy 10 free downloads to kickstart your creative projects.
✨ Supplies for Project
⇢ Wood Shadow Box Frames – Various Sizes
⇢ Shadow Boxes from Michaels – Square
⇢ Shadow Boxes from Michaels – Hexagon
⇢ Wood and/or Fun Acrylic
⇢ Non-Toxic Wood Stain
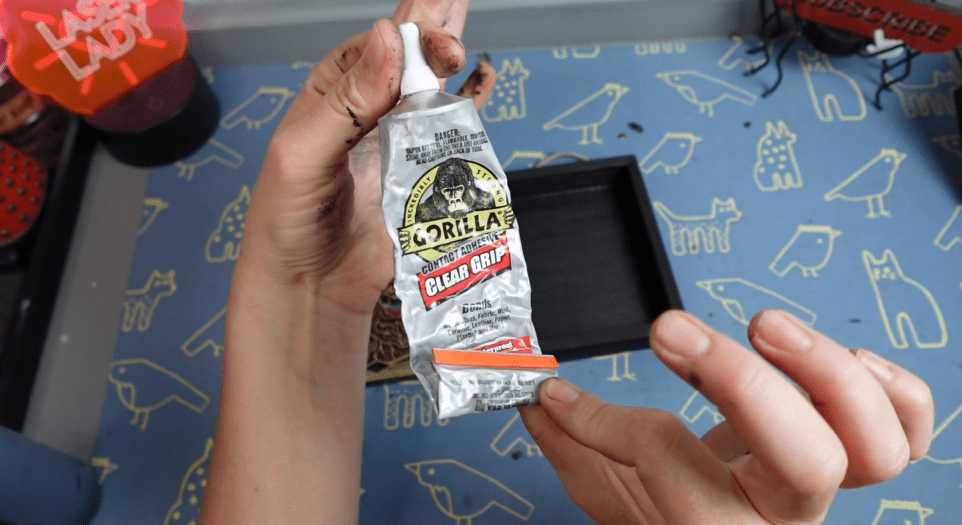
⇢ Gorilla Contact Adhesive Glue
⇢ Gorilla Wood Glue
⇢ Rust-Oleum Clear Coat
⇢ Sticker Backed Wood Veneer
✨ File Download
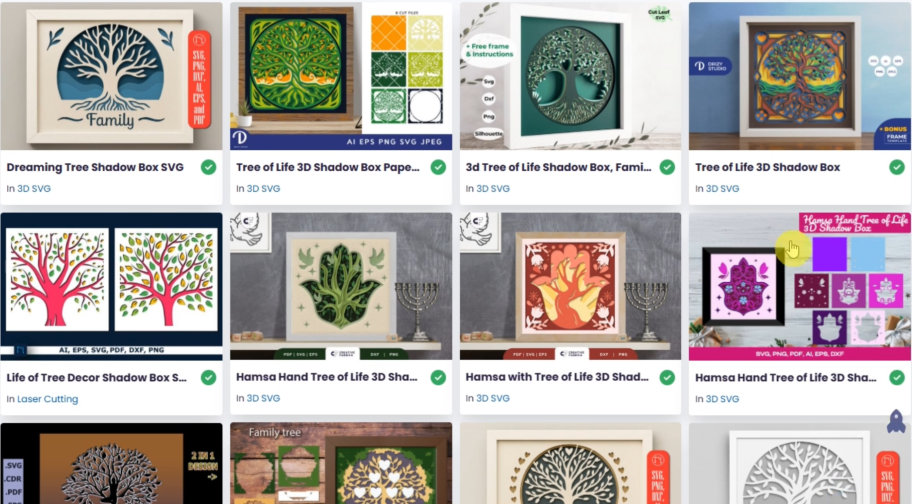
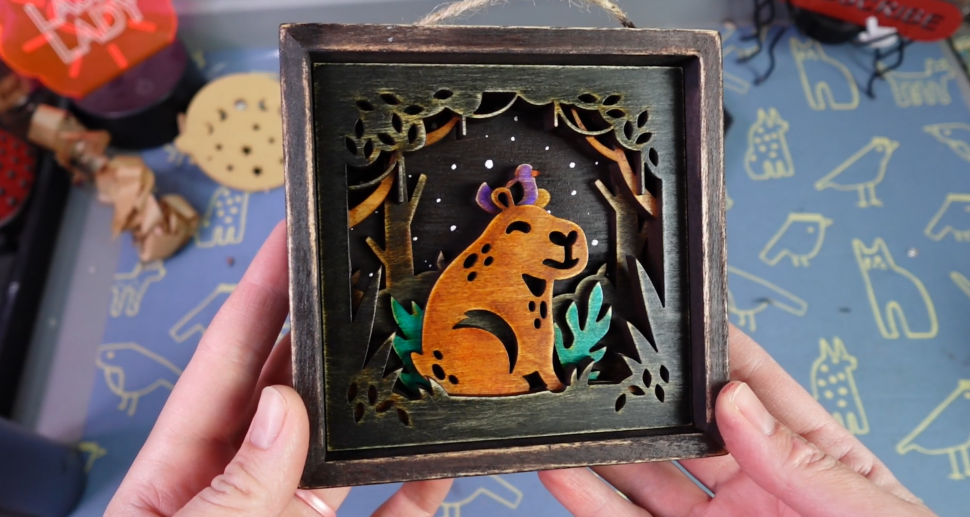
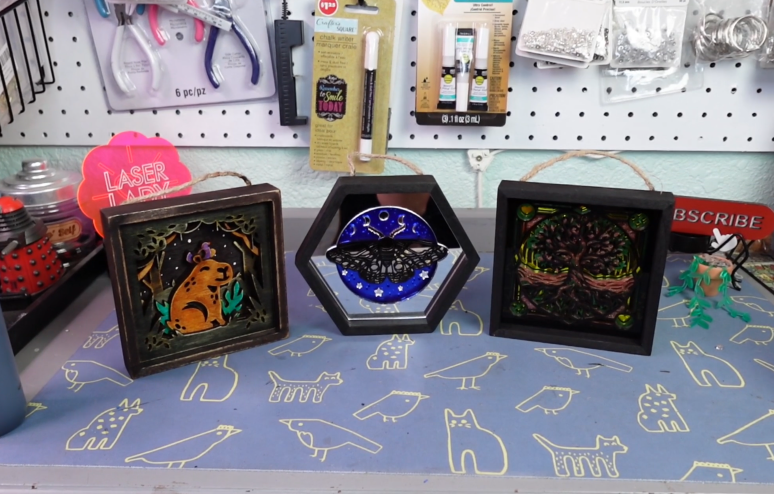
⇢ Capybara Shadow Box
⇢ Tree of Life Shadow Box
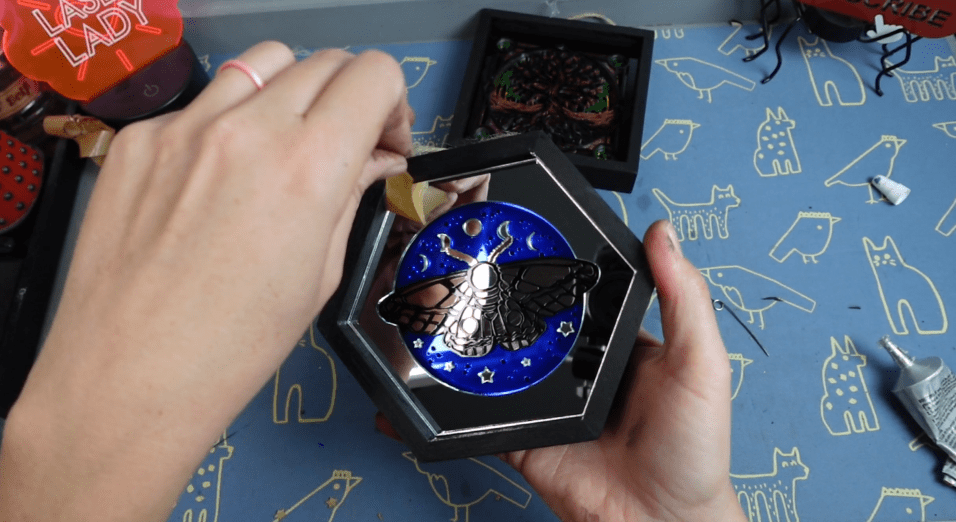
⇢ Space Moth Shadow Box
Everyone has been asking me how I make one of my Top 5 Products – Laser Cut Shadow Boxes! This is the tutorial on how you can create your own multi-dimensional shadow box layers in Inkscape and how to alter ready-made files to suite your project! It’s easier than you think to impress your current and future customers with Shadow Boxes!
Subscribe to my YouTube Channel HERE
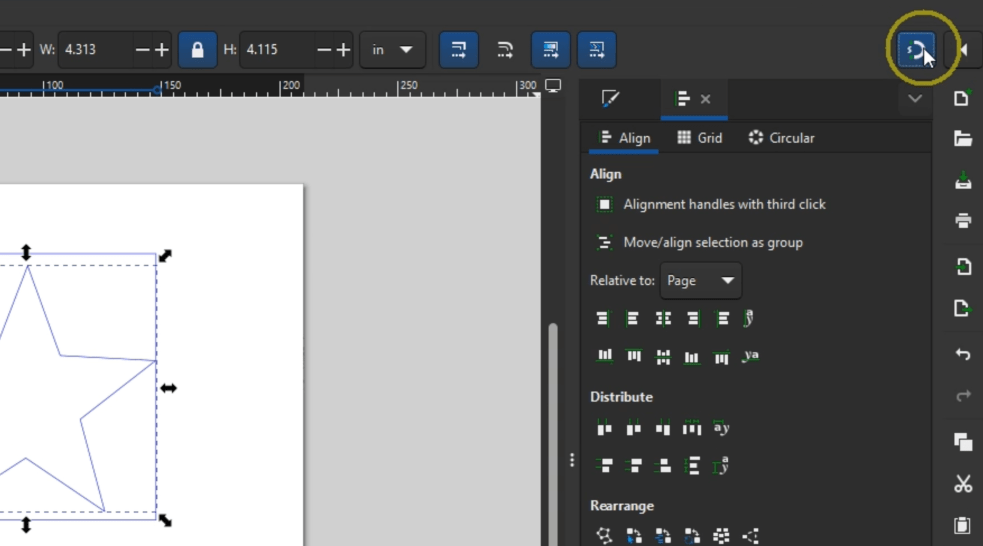
After we open up Inkscape, let’s get some toolbars ready. Go up to OBJECT -> FILL & STROKE.
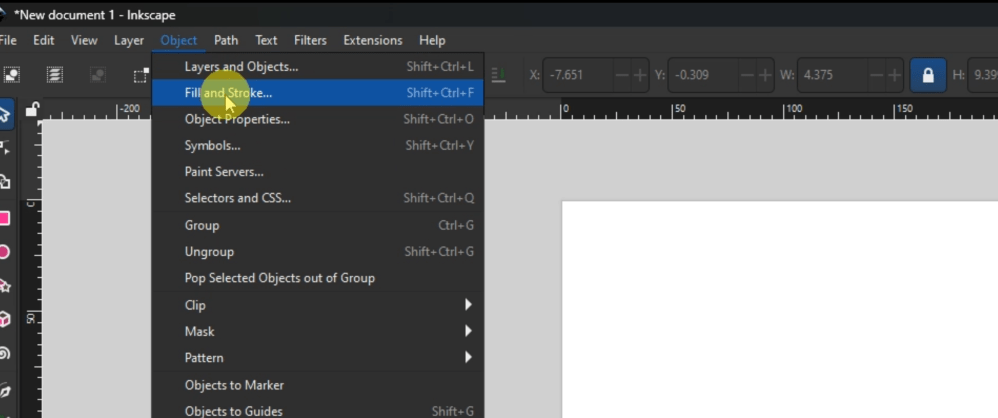
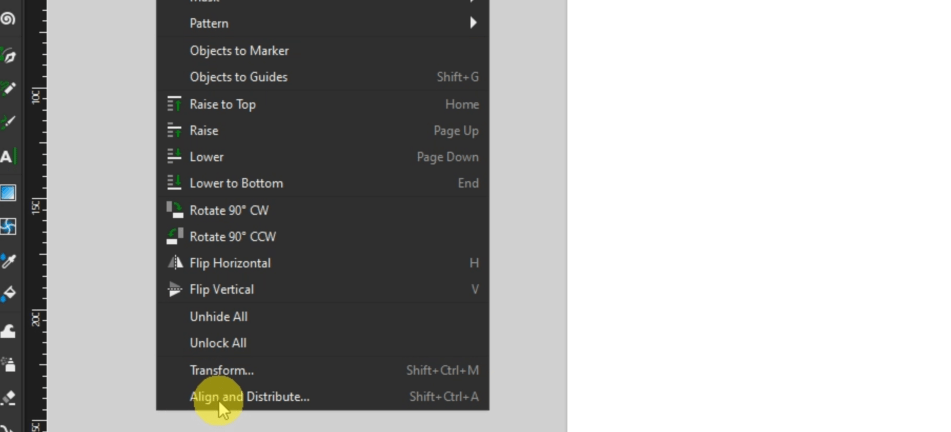
That will pop up on the right-hand side. Next go to OBJECT -> ALIGN & DISTRIBUTE. We’ll be using those a lot later.
Let’s start with a basic square. If you hold the CTRL key while you’re dragging it out, it should remain a perfect square.
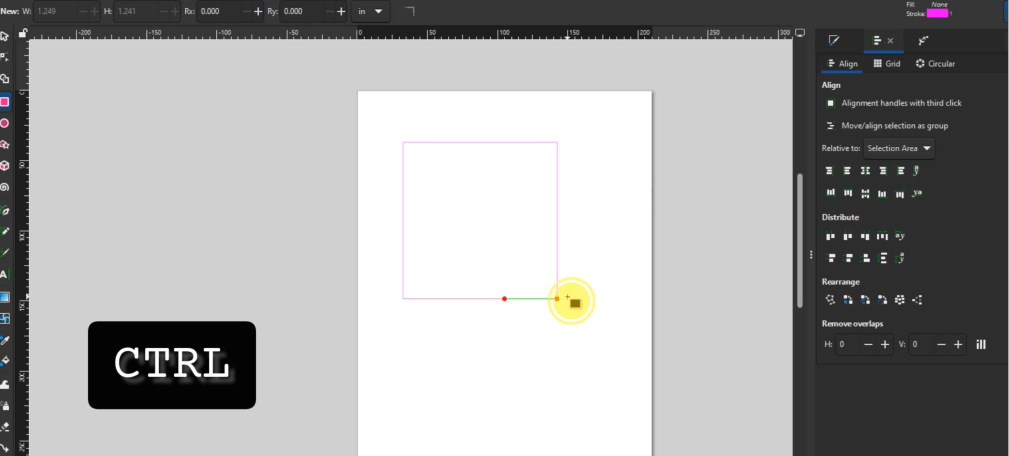
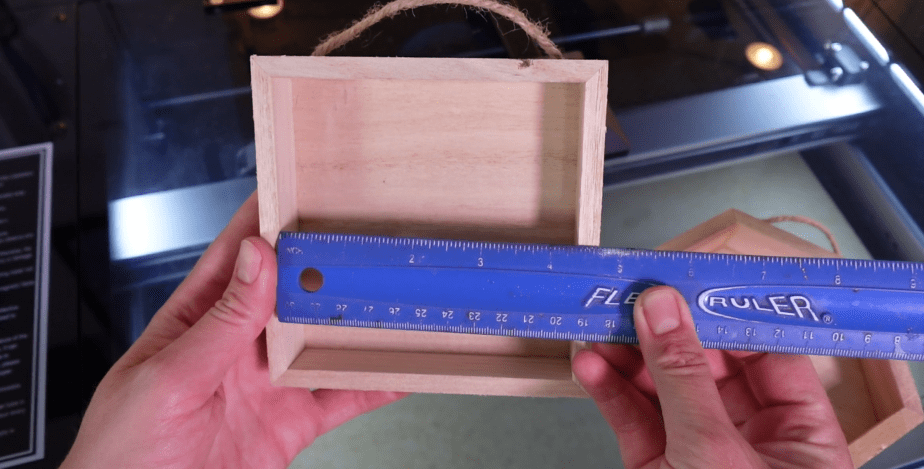
Now, let’s measure the shadow box. It looks like we need this to be about. 4.375 inches across.
We can alter the square to these dimensions now in the boxes in the upper right hand. There is a lock icon that when locked will alter all dimentions together, or if you unlock it, you can alter the different numbers.

To change the colors of anything we make going forward, we can either do that in the FILL & STROKE window on the right-hand side or the color bars on the bottom. If you use the color bar on the bottom, hold down the SHIFT button and click a color to just change the outline color.

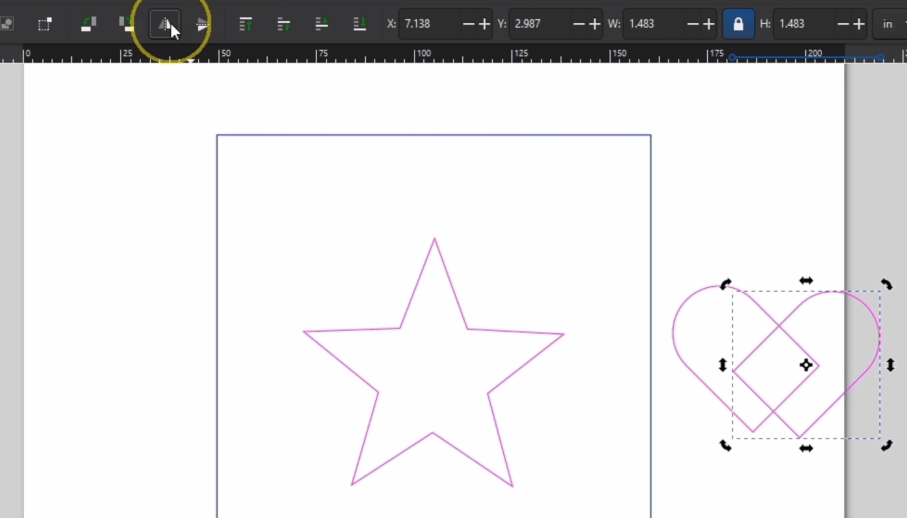
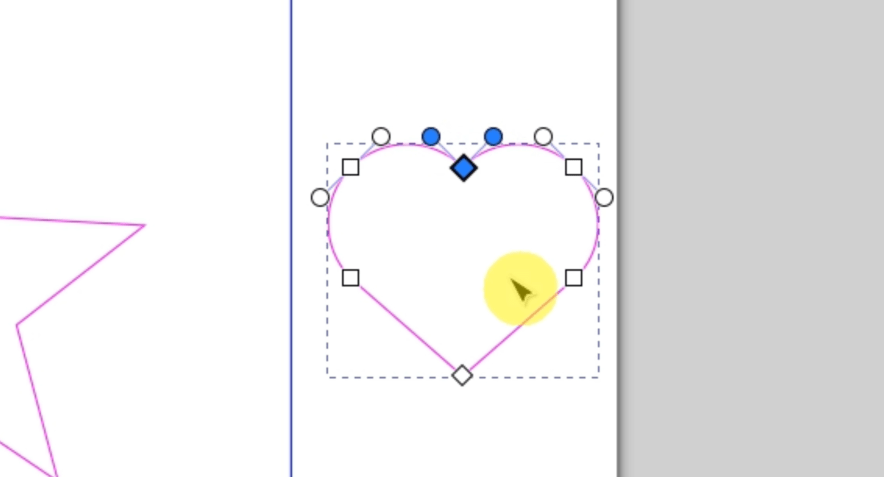
Now, let’s use the star tool to draw out a star. There are options in the upper left corner to alter the look of the star, or if you double click it, there will be some nodes you can play around with, also.
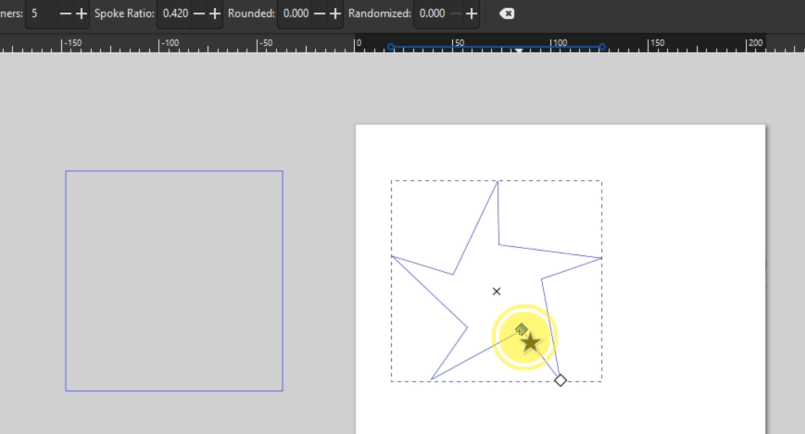
I’m going to scale this down slightly inside of my square. If you’re having a problem with it snapping to other objects, find the magnet in the upper right-hand corner. You can toggle that off or on and might help later on our designing.
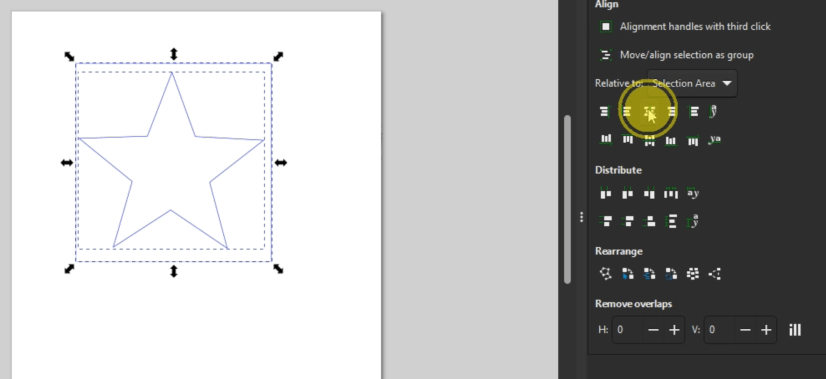
Using the align tool in the right-hand bar, we can select both the square and the star and align the star perfectly within the square.
I then CTRL D to duplicate it, which is a lot like copy and paste except it will copy it right on top of itself. Move that aside.
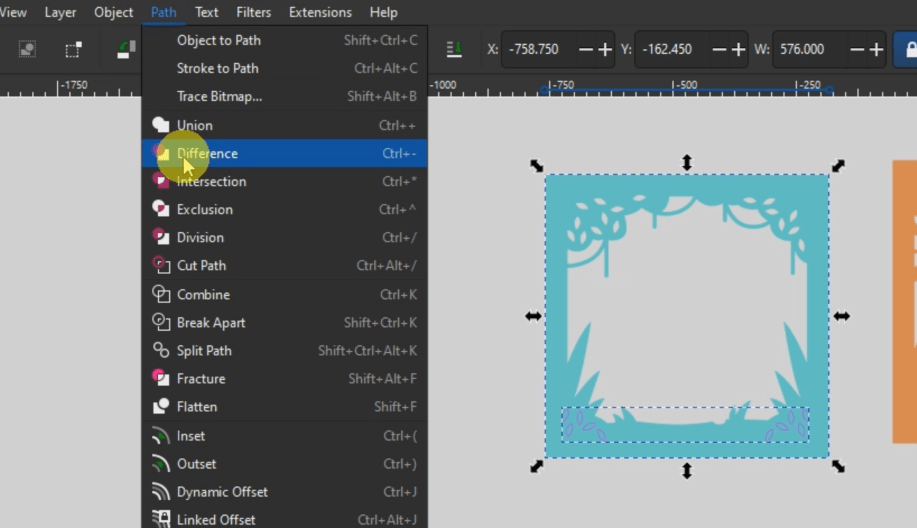
Select the original star and square and go up to PATH -> DIFFERENCE and that will essentially cut the star out of the square shape, making that a whole object.
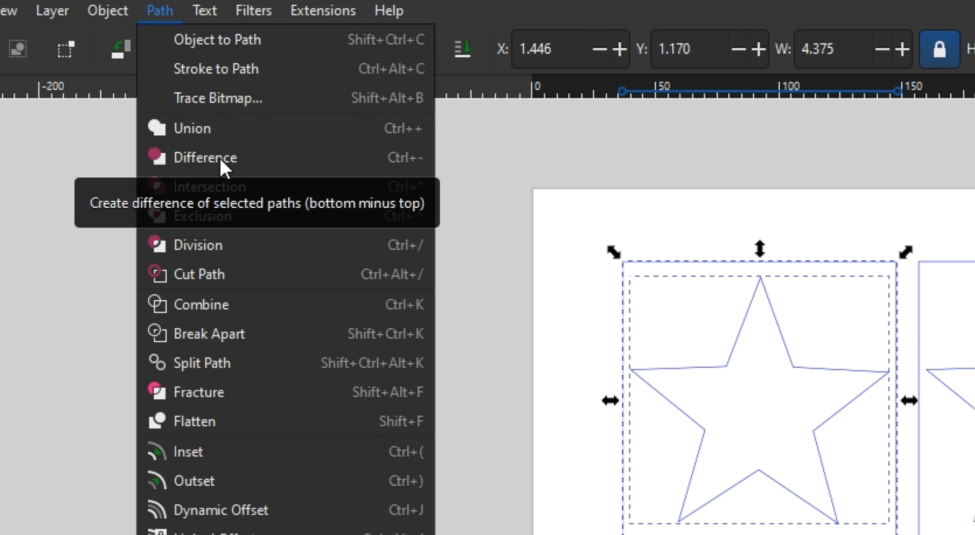
You’ll see what I mean when you fill it with color by selecting one of the colors on that bottom color bar. Set that aside for now.
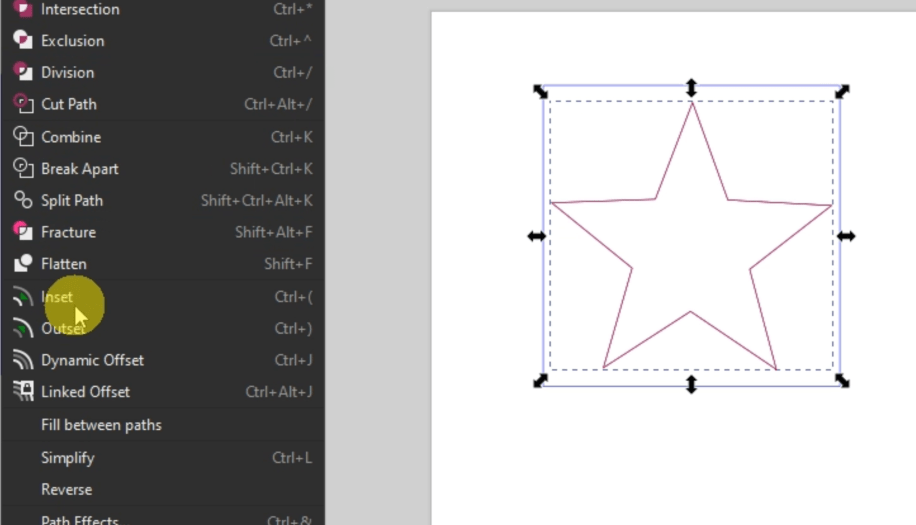
Working with the duplicate now, I want to scale down the star, but I want it to be perfect. One way we can do it is by selecting the star, duplicating it with CTRL+ D and changing the color of the new star so we can tell them apart. Go up to PATH -> INSET, which you could also do with CTRL+ ( .
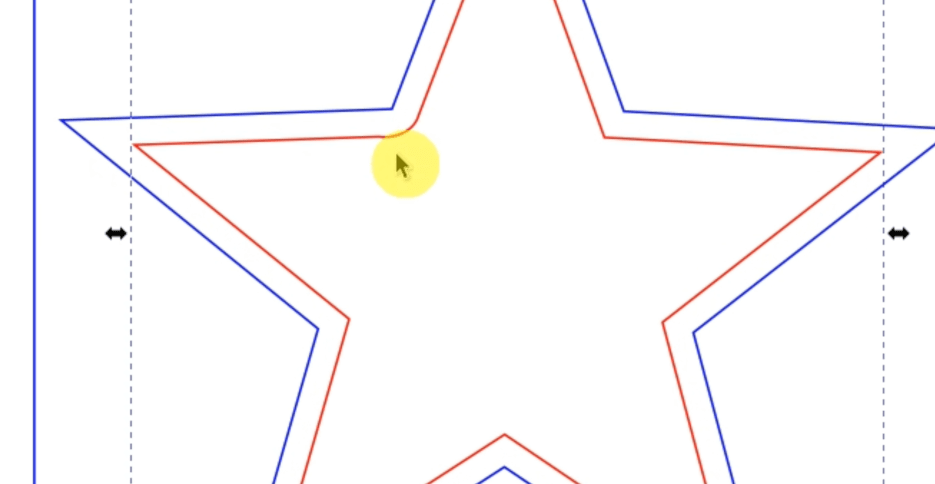
Let’s give that a try. It looks like one of the corners is rounded, and we don’t want that.
So, let’s delete this and then go up to PATH -> PATH EFFECTS and that’s going to pull up a new bar on the right-hand side.
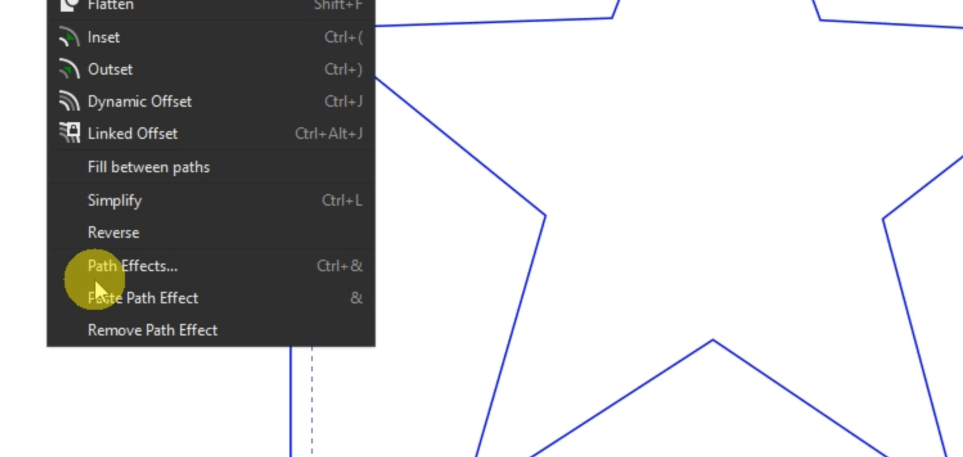
Click the down arrow and we can see now an option for OFFSET.
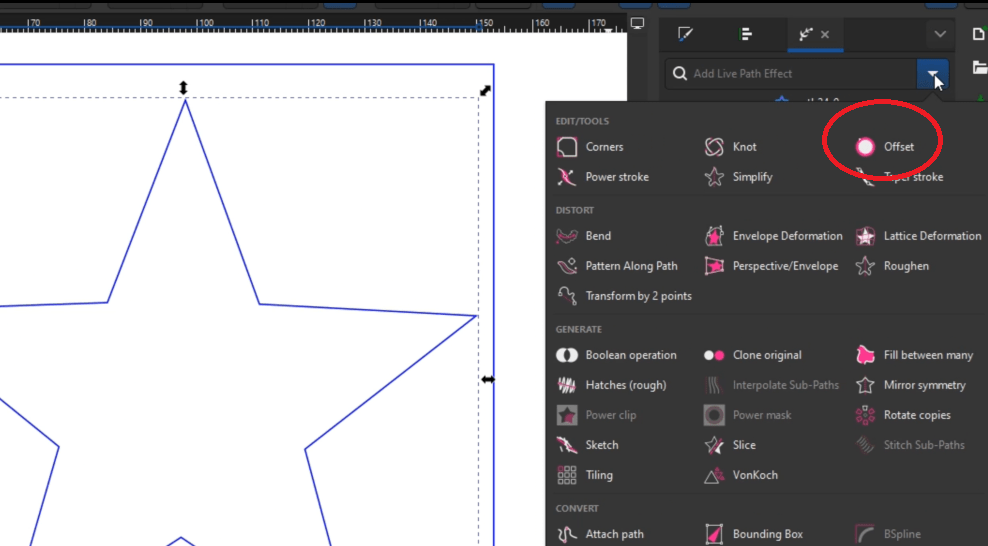
Let’s make a perfect offset! There are different join functions, and we want miter. You can change the units if you need to. I’m just going to click the (-) to make the offset on the inside of the object of the star. Now all the corners are exactly what we want!
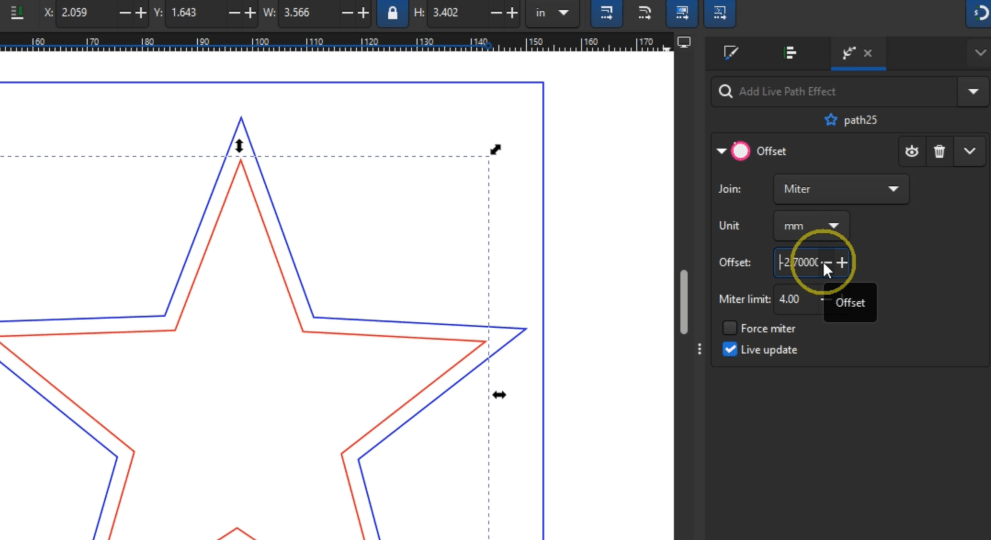
Delete the outside star and now we’re going to do the same as before by selecting the square and the star going up to PATH -> DIFFERENCE and now we can fill that with a different color. This will come in handy later.
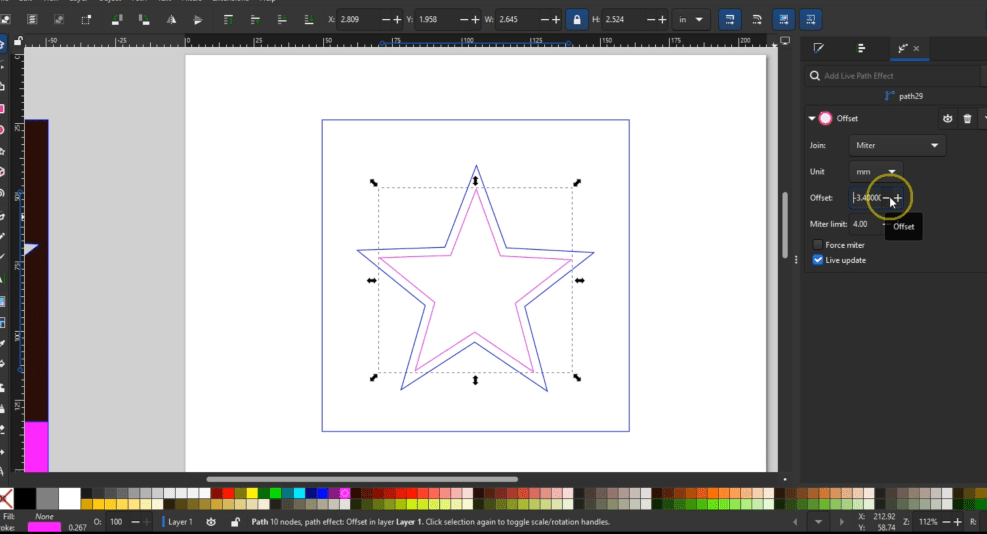
Essentially, we’re going to do that entire process one more time. It’s convenient now that we can make it exactly the same offset percentage.
Now let’s work on the 4th layer. For this last duplicated layer, let’s do something a little different. First, draw out a square. It doesn’t matter the size so long as it’s a perfect square and make a duplicate with CTRL+ D and with the duplicate double click it and there will be a circled node in 1 of the corners. Select that and drag it down to make it a circle.

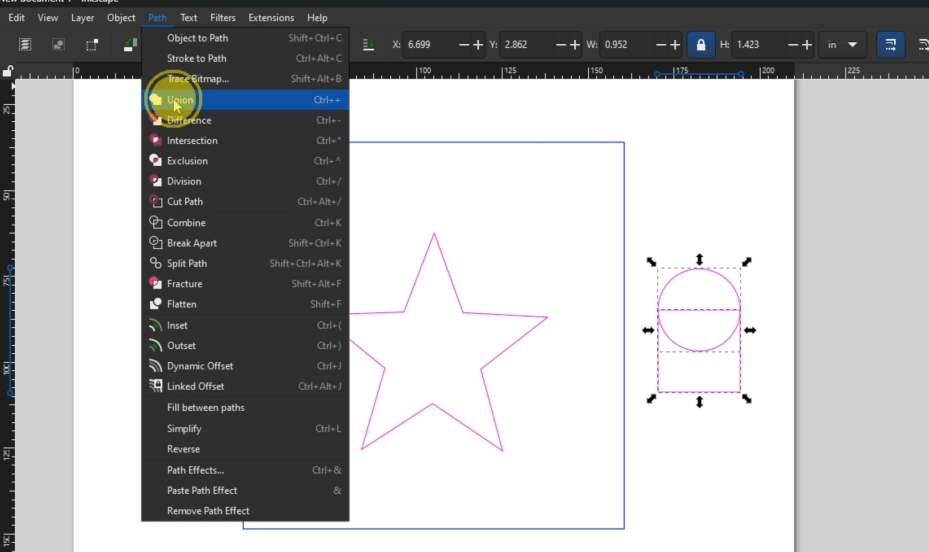
Making sure the magnet tool is clicked on, align the top corner of the square with a middle node of the circle. Have both the circle and square selected the go up to PATH -> UNION.
Then click it until the corner arrows are curved. Holding the CTRL key pivot that to the side until it looks like this.

Make a duplicate, select the duplicate and using this button up here will mirror it over to the other side.
Align the two most points to make a heart shape. Now up to PATH -> UNION and we’ve got ourselves a heart! Double click it the heart to alter the nodes if you want it to be more curvy or swervy.
I’m going to shrink this down and align it to the middle of that star. Once it’s in a good spot, I delete the star, and of course, again we select all of that, go up to PATH -> DIFFERENCE.
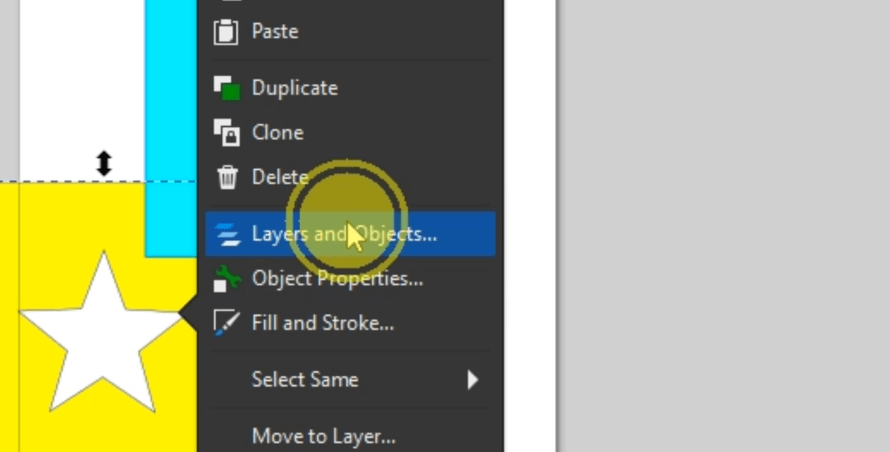
I’m going to stack them on top of each other but first, to get them in the right order, right click on any of them and go to Layers and Objects in the pop up window and that’ll pull up yet another display on the right sidebar. You can rearrange those to be in the right order.
We can then align them in on top of each other. It’s pretty simple, but adorable, and depending on the materials you use, you can make it pretty magical even though it’s just a star.

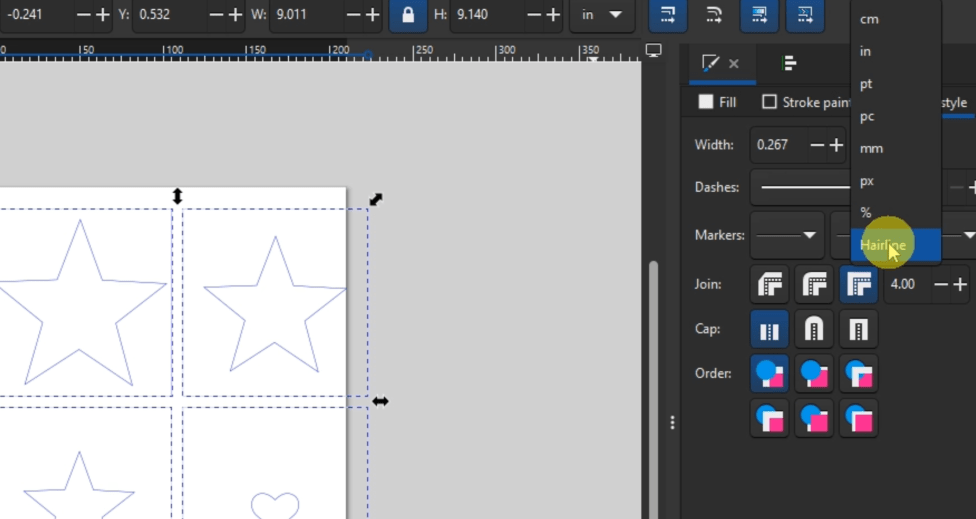
To finish them up for the laser, go to the FILL & STROKE Bar and make sure everything is the color in line width you need for your laser.
Next, let’s download a file and alter it to be perfect for our shadow boxes.
Creative Fabrica is a great resource that you can pay a subscription for to get oodles of laser downloads and is where I like to get my shadow box files. I’m not sponsored by them, I do have an affiliate link for you though, if you want to check it out. These shadow box files are typically made for paper, but we can alter them to be a laser cut shadow box.
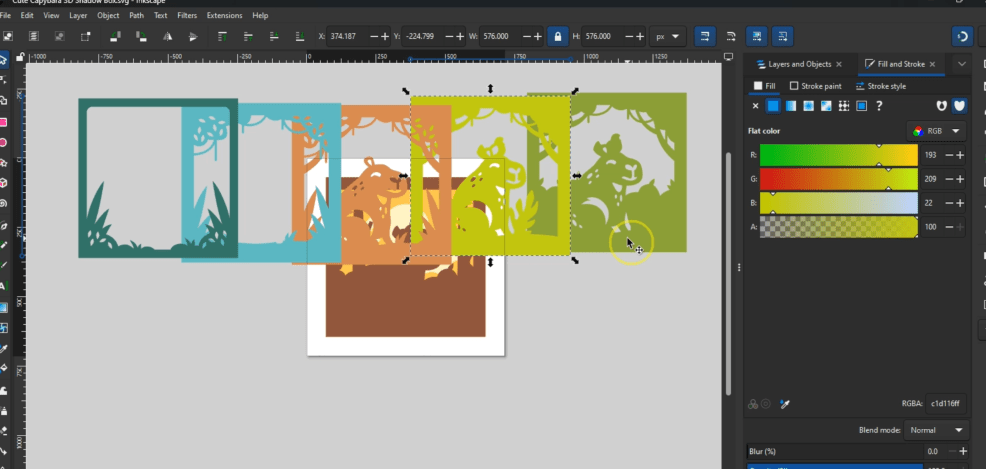
Let’s take this very adorable capybara shadow box design as an example. I download that and upload the SVG into Inkscape. Then, separate the layers and decide which ones I’m going to keep and which ones I’m going to get rid of. I like to keep it around 4 or 5 layers Max. Otherwise they start getting really heavy and more expensive to produce. These two layers I think could be one layer. I just want those little leaf shapes in the bottom corners to be on this other panel.
To do that, I select the panel and go up to PATH -> BREAK APART. Don’t worry that it got all colored in.
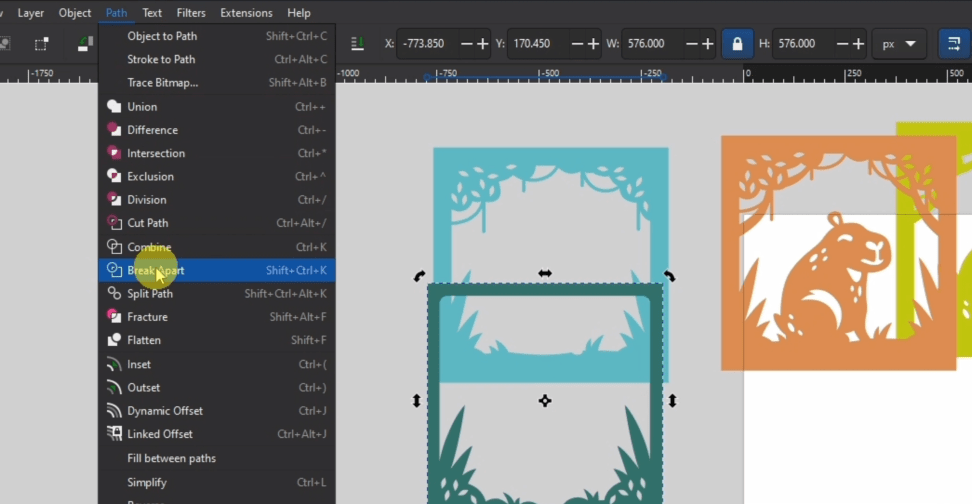
The red X in the bottom corner will make the color go away and then hold the SELECT button and click a different color so you can see the lines we’re working with.

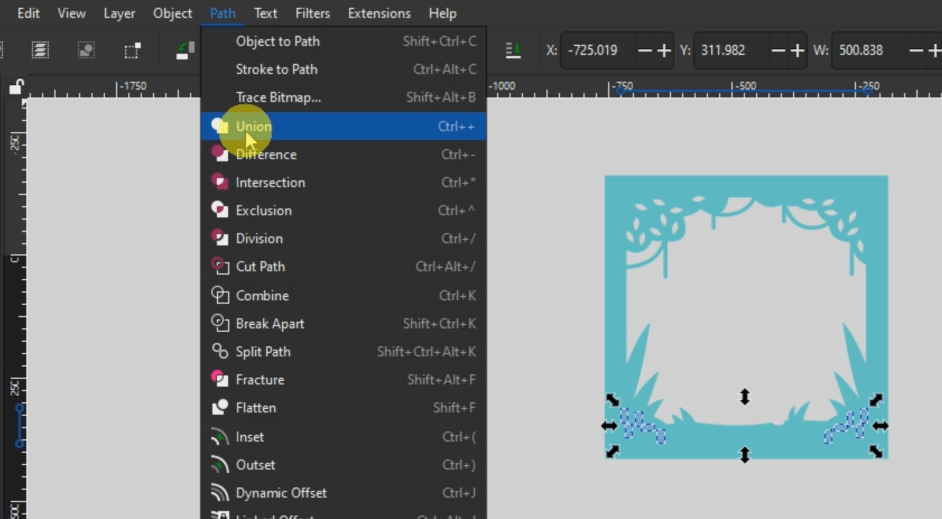
I delete the innermost shape; we’re not going to need that. Use the outside square to perfectly align these leaf shapes on top of the other one and then delete that. So this works out right, I’m going to select all of those little Leafs. Go up to PATH – > UNION and that’s going to make them one layer.
Then, selecting both the little leaves and the panel go back up to PATH -> DIFFERENCE and that will cut them out.
Now I can get this ready for the laser and laser it out!
For the capybaras, I’m going to be using wood and staining those. For the other designs, I’m going to be using a mix of exotic acrylics as well as mirrored acrylic.

The first thing we’re going to do is sand them down a little bit. It’ll help the paint go on better and give it a very professional look. It’s an easy step that adds a lot.
Then using any regular old paint of any color you like, paint up the boxes! I’m going to stain this last one for the capybaras since it’s got the wood panels.
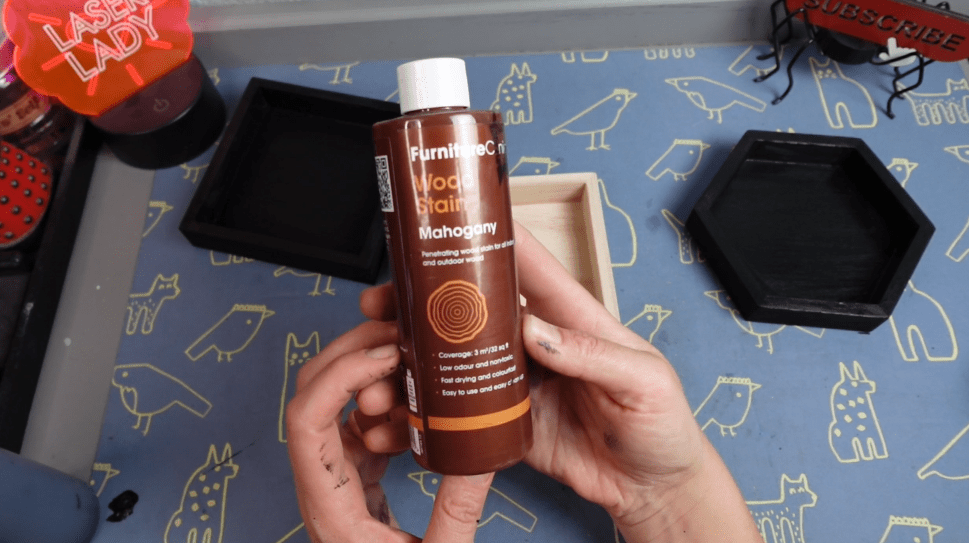
While that’s all drying, let’s stain up the capybara panels. One fun little cheat that I do is I use markers to color them in instead of investing in a bunch of different dyes.

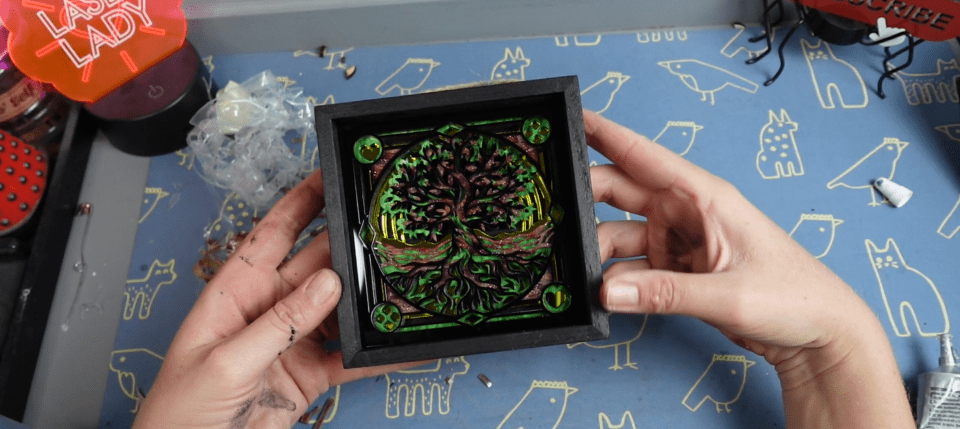
Once all that’s colored in and stained and dried, it’s time to start gluing things in. For the Tree of Life design, I’m going to be using this Gorilla Contact Adhesive Glue.
For the mirror acrylics especially, I’ll just pull up a corner and then glue it in. And then I’ll lift up the contact paper, so I don’t get fingerprints all over everything. It’s just a matter of gluing in the rest of the layers and then watch the magic unfold before your eyes.
The hexagon moth design is exactly the same. All these mirror acrylics are very impressive to customers. Most people think it’s glass, and I think it really adds to the value. But that’s not just saying that wood isn’t exquisite as well.
Should you only have a diode laser, you can still make some pretty amazing shadow boxes. For this capybara guy, I’m going to the. weather the panels a little bit. It’s just a look that I like. I glue all these in with some Gorilla Wood Glue. Works great, dries fast.

Once I get just one panel in, however, I’m going to paint some stars in the background. I think it just adds a little nighttime mystery to it.

Once that is all glued in, I do give my wood pieces a quick clear coat with just some Rust-Oleum Clear Coat.
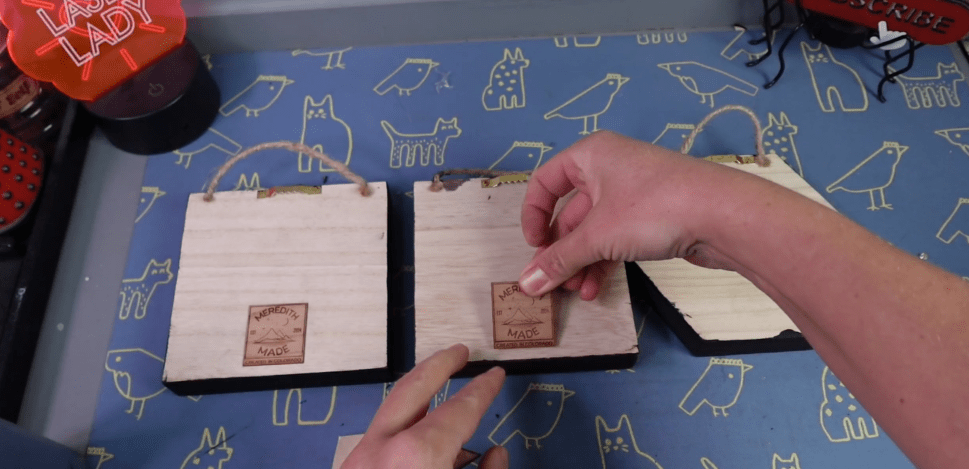
Now that these are all dry and ready to go, there’s only one more step and that is putting on my little brand name wood veneer stickers. It’s just a fun little touch and really comes off professional.
There you have it! It’s literally that easy to make shadow boxes. I sell these between $35-40 a piece and people love them! I hope you can find some success with these shadow boxes, as well!
If you’d like to learn even more about making laser files with Inkscape, I’ve got bunches of tutorials HERE.
Happy Crafting!

Leave a comment